
Art et Perles perles d'art - AU FIL DE L'EAU - perles de verre à la flamme, lampwork, bijoux UNIKAL - Anita et Elias SCHWEGLER-JUEN Ils vivent en Suisse, partagent leur vie et leur passion du verre. Anita crée de merveilleuses perles aux motifs incroyablement riches et précis. Elias travaille le verre borosilicate et crée à l'intérieur de ses boules de verre des univers infinis et hallucinants. Claudia TRIMBUR-PAGEL Claudia Trimbur-Pagel est née en Allemagne et vit en France. Elle découvre alors la magie du verre, qui pour elle est "un défi et un émerveillement" permanent. Michi SUZUKI Michi Suzuki vit et travaille à Paris depuis bientôt dix ans. Son œuvre se situe à la croisée des chemins du Japon, son pays natal, et de l'Occident, deux univers artistiques et créatifs riches et exigeants. Kristina LOGAN Kristina Logan vit et travaille aux Etats-Unis.
Loisirs créatifs vente en ligne QMJ Simple Ear Cuff Tutorial What you've all be waiting for... an ear cuff tutorial! I've been making ear cuffs for over a year, but unfortunately haven't had the time to make some of the insanely complicated designs I've dreamed up. This, however, is a very simple ear cuff that takes only a few minutes to master! Ear cuffs (also known as ear clips, cartiliage cuffs, ear vines, and more) are fabulous for people who don't have pierced ears-- or pair them with other earrings for a "double piercing" look. All you need is pliers and some wire (the pictured wires are 20ga blue silver plated copper and 20ga enameled copper in various colors). Begin with 3 inches of wire. Fold at one inch. Fold again, creating a little zigzag. Twist the ends into swirls and pinch the swirls until they touch the center wire. You will need a mandel to form the ear cuff correctly. Push the ends down... The tips of the ends will still be straight. Tada! This brown ear cuff fits both ears. This ear cuff is for the left ear.
UO Wire Heart Necklace/Bracelet Tutorial This is yet another super easy, super quick tutorial. This dainty wire heart bracelet from Urban Outfitters is great for summer; the gold and silver tones look great against tans! Plus, it's lightweight and you can layer them with other necklaces. The original is a bracelet, but in the tutorial I make both a bracelet and necklace. The copper heart is my bracelet, while the silver heart is the necklace. You can also vary the shape of the heart by using different forms to bend the wire around. I am not a "heart" person; I was thinking of making these to wear myself in lightning bolts, diamonds, half moons or any other cool symbol! Let's get started! Step 1: Gather materials. Step 2: Cut a length of wire, 1 foot is plenty. Step 3: Right next to the point in the "V", on the outside of the "V", place your pen/pencil. Step 4: Cut the ends of the heart to meet at a point, (make sure the wire pieces are touching) and glue these ends together. Finished! Like I said, different shapes can be made.
Tassel Earring DIY I have a lot of earrings, but always seem to forget to wear them. But lately I have been in the 'earring wearing mood', and that called for a new crafty tutorial featuring earrings! I found these tassels on sale in a store that sells about anything (xenos for the Dutch people among us). And I am sure that they are not supposed to be worn in someones ear, but I just saw so much earring potential in them that I decided to buy them :) Here's how I made the tassel earrings: Easy right?!
Tangerine Chandelier Earrings It hardly seems fair to call this one a “tutorial”, because it’s SO easy, and fairly self-explanatory. But now that spring is (nearly) here, I have been itching to add some color to my wardrobe. And because shopping isn’t easy when you feel gigantic, I settle for adding some color to my accessories instead. I spotted some tangerine disc beads not too long ago, and I knew they would make gorgeous chandelier earrings. And speaking of feeling gigantic – this is what I’m talking about. In all my tired glory at 24 weeks pregnant as I write this post up. Okay, back to jewelry, though. You only need a few things to make up chandelier earrings: Beads you love – and disc beads like these work beautifully. Your chandelier bases will dictate how many beads you need – I only used 16 (leaving me a lovely stash for future projects). All you have to do is open your jump rings, add a bead, and attach them to the loops on your bases. When you’re done, just attach an earring wire to each base.
Hogwarts Double-Knitted Bookscarves © Ann Kingstone SuppliesSmall amount of 4ply/sock yarn in the two colours of the relevant house as follows:• Gryffindor - Red and Gold• Hufflepuff - Yellow and Black• Ravenclaw – Blue and Bronze• Slytherin – Green and SilverUS/0 (2.00 mm) needlesYarn needle ChartsClick on the thumbnail for a full-sized picture. InstructionsCast onMake 18 sts in each of the two colours for the bookscarf (36 sts total), alternating the colours with every stitch. Any two-colour cast-on will do. First rowSlip the first stitch knit-wise, then alternate knit then purl stitches as when working a (k1,p1) rib, but work all the knit stitches with one colour and all the purl stitches with the other until the last stitch. Always take both yarns back before working a knit stitch, and bring both yarns forward before working a purl stitch. Purl the last stitch with both colours held together. Second and subsequent rowsSlip the first, double-stranded, stitch knit-wise. Purl the last stitch with both strands held together.
DIY | DIY Steel & Ombre Ring Hey everyone! I have a quick tutorial up over at For the Makers today on how to make a ring from dark annealed steel wire from the hardware store (3!) and embroidery thread. The thread I used was leftover ombre floss from the January box, but you can use any color that you have lying around. Cute and simple. DIY Wood Jewelry Holder I love junk wood. Months ago when I was having some fun with dimensional paint for the Martha Stewart craft article, I experimented with a dot stippling method that could make some interesting designs. So all you need for this project is a an old piece of wood, 3-dimensional paint, and some hooks to screw into your wood, and a little elbow grease to screw them in. It’s a Great Day For… It’s a cool rainy day here, one that calls for some indoor cozy activities – like embroidery. (Pattern from the September For the Makers box. Also, with the weather change, it seems to have brought out some big spiders around our house. Consider the Birds
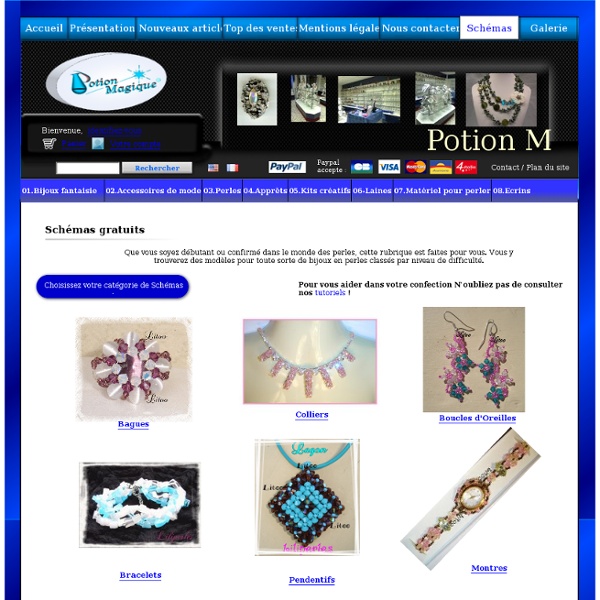
{Tutoriel} Fabriquer ses Bracelets Shamballa Exprimez votre personnalité en fabriquant l’accessoire incontournable du moment: Les Bracelets Shamballa Les Fournitures qu’il vous faut: - 30 cm de fil de nylon noir - 150 cm de fil de nylon rose - 1 Perle à strass Fuchsia 12 mm - 2 Perles nacrées Gris Anthracite 12 mm - 2 Perles en verre Noires 8 mm - 2 Perles en verres à Facettes Noires 8 mm - 2 Perles en verre Givrées Roses 6 mm Première étape: Préparer le fil du milieu - Enfiler toutes les perles sur le fil de 30 cm (noir) dans l’ordre final souhaité. Les 2 petites perles de 6mm doivent être aux extrémités. - Nouer un petit nœud à chaque bout (on peut rajouter un point de colle ou bruler l’extrémité pour être sûr que ça tienne bien). - Ce fil sera notre fil du milieu. Deuxième étape: Apprendre à faire les nœuds Astuce: Vous ne savez plus si vous venez de commencer par le fil de gauche ou de droite ? Variante: Vous pouvez faire un bracelet torsadé en commençant toujours par le même fil pour le tressage.
Bricolage | décoration | travaux d'aiguilles | couture | buttinette France - loisirs créatifs Notre savoir-faire s´est affirmé au cours des 30 ans d´existence. Plus de 17000 articles sont disponibles dans notre boutique en ligne pour satisfaire vos envies de création. Lire la suite Profitez de notre grand choix d´articles de loisirs créatifs pour vos activités manuelles : vous trouverez des produits de qualité dans toutes nos rubriques, p.ex. « Papier et créations », « Techniques de loisirs créatifs », ou alors « Bijoux et créations ». Dans notre boutique en ligne vous trouverez un grand choix de tissus au mètre de différentes compositions et marques à des prix avantageux. A part de différents articles de loisirs créatifs et de couture, nous pouvons vous proposer tout autour du thème des « travaux d´aiguilles ». Vous êtes à la recherche de nouveaux matériaux de bricolage ou il vous manque encore une idée ?