
Système canadien de référence spatiale - Calcul inverse géodésique Démonstration en ligne News: CGVD2013 is now available! Natural Resources Canada has released the Canadian Geodetic Vertical Datum of 2013 (CGVD2013), which is now the new reference standard for heights across Canada. This new height reference system is replacing the Canadian Geodetic Vertical Datum of 1928 (CGVD28), which was adopted officially by an Order in Council in 1935. Geodetic reference systems stem from the need to provide a consistent and integrated reference surface for data analysis. This site provides end-users with the geodetic data and tools they need for a range of commercial and private uses. Date modified:
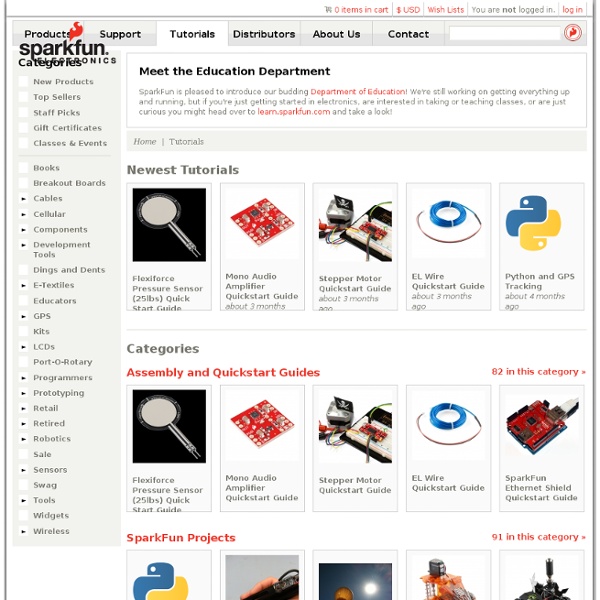
Tutorials New! Getting Started with LTspice LTspice is a high performance SPICE simulator, schematic capture and waveform viewer with an impressive library of passive devices. RFID Basics An overview of Radio Frequency Identification (RFID) technology. LIS3DH Hookup Guide A guide to connecting the LIS3DH to a microcontroller and using the Arduino library. Lessons in Algorithms Learn techniques on how to use Finite Impulse Response (FIR) filters and other data-processing tools to turn data into information. Illuminated Mask Use LilyPad LEDs, a switched battery holder, and coin cell battery to make a fun light up mask for your next costume party. Glowing Pin Create a quick and easy piece of e-textile art using a LilyPad LED, battery holder, conductive thread, and coin cell battery. Light-Up Plush Craft a light-up plush with LilyPad LEDs controlled by pressing a button and sliding a switch in the creature's hands. Looking for the old, archived tutorials?
About We are a community of makers, artists, designers, and builders focused on simplifying the world of electronics DIY by modularizing information. Instead of showcasing users’ projects, we offer bite-size, easy-to-follow articles that help you hit the ground running. We understand that, for many, the idea is more important than the method of accomplishing it. Our hope is that by offering working code and wiring examples for almost anything you would want to make, we can create building blocks that will enable people to stop searching for help, and start getting their idea made. What’s all this talk about Modularized Information? It’s pretty simple. Imagine buying an entire car just because you needed a single part. More about the site bildr is not a company, has no funding, and does not make a profit. How can I help? The thing we need above all is content, in the wiki and blog. The simple goal of bildr At the end of the day, this is what we hope to accomplish.
Connect an iPhone, iPad, or iPod touch to Arduino with the Redpark Serial Cable Step #1: Wire up the RS232 adapter to the Arduino PrevNext Connect the RS232 adapter's power and ground to the Arduino's 5V and GND pins, respectively.Connect the RS232 adapter's TX to the Arduino's RX, and the RS232 adapter's RX to the Arduino's TX. Step #2: Make sure you're set up for iOS development To develop apps for the iPhone, iPad, or iPod touch, you'll need to register as an iOS developer. Although you can register for free, all that gets you is the development tools. Step #3: Make sure you can run an app on your iOS device If you've never programmed for the iPhone before, you can't count on this guide to help you. Step #5: Add a switch to your app On the left pane of the screen, expand your project, and open the folder HelloArduino.Next, locate the HelloArduinoViewController.xib and click on it. Step #8: Import the iOS Accessory Framework Next, you need to import Apple\'s Accessory Framework. Step #9: Add some declarations to the view controller Step #13: Test the Arduino
Weller Magnastat Autopsy and Repair » Code and Life Immediately after soldering together my USB password thingy, my solder iron, the family heirloom Weller Magnastat stopped working. Some investigation showed that the base station was providing 24V AC voltage just fine, so I decided to unassemble the handpiece to see if something could be done. Here’s what I found: It turned out my iron was salvageable; read on to learn a bit about the Magnastat and how I was able to repair mine. Magnastat basics The construction of the device is surprisingly simple (see this image): The first (blue) wire from A/C power unit goes straight to the heating element (first red wire with black tube around it). A long tube goes “out” the handle part into the iron tip, and the tip is placed at the head. Note that in my model the tip and the magnastat are one solid piece (magnastat is in the base of the tip), newer models have a separate magnastat and tip, and you can change the target temperature just by changing the magnastat part. Reviving the old Weller
Learn About Electronics - Home Creative DIY Stuff (69 pics) Pics | 14 Jun, 2012 | Views: 36110 | 20 creative things. Pop Tabs Bag DIY Windshield Rainbow DIY Spoon Lamp DIY Missioni Shoes Turn a Glove into a Chipmunk Dried Pineapple Flowers Rosy Stationery Maple Leaf Roses Easter Eggs Toilet Paper Roll Wall Art Lace Lamp Cherry Blossom Art from a Recycled Soda Bottle Recycled Bottle Broom Solar Bottle Bulb Plastic Spoon Rose Cutting Board Bird Feeder DIY TetraBox Lamp Lightbulb Bud Vase DIY Planter & Candle Holder DIY Clouds Night Light Do you like it? It is just one of the thousands of posts that we have on the Acidcow.com.
Serial Cable - Redpack These Redpark serial cables connect 30-pin iOS devices to RS-232 serial devices. Two version of the cable are available. See the FAQ for details on the differences between the two versions. The cables are used in conjunction with the Redpark Serial Cable SDK. Part #: C2-DB9V Price: $59 UPC #: 013964221015 Warranty: 1 year Length: 1 meter Part #: C2-DB9 Price: $59 UPC #: 013964221008 Warranty: 1 year Length: 1 meter Q: What are the differences between the two 30-pin Serial Cables? Q: What kinds of devices have serial ports these days? Q: Which iOS devices are these cables designed for? Q: Is there a way to connect to devices using TTL (logc level)? Q: Can I power the iOS device using this cable? Q: Can I power the serial device using this cable? Q: What apps does this cable work with? Q: Does the cable work with apps available at the App Store? Q: How can I tell if my iOS device recognizes the cable? Q: How do I know what version of firmware the cable is using?
List of single-board computers One of the first 10 MMD-1s, a prototype unit, produced by E&L Instruments in 1976. The "dyna-micro"/"MMD-1" was the world's first true single board computer.[citation needed] The MMD-1 had all components on a single printed circuit board, including memory, I/O, user input device, and a display. Nothing external to the single board except power was required to both program and run the MMD-1. The original design of the MMD-1 was called the "dyna-micro", but it was soon re-branded as the "MMD-1" List of single-board computers – computers built on a single circuit board, with microprocessor(s), memory, input/output (I/O) and other features required of a functional computer. ARM based[edit] Other board[edit] ARM9, ARM11[edit] Cortex-M3[edit] Cortex-M4[edit] MYD-LPC435X EVM for NXP LPC4350/4357 ARM Cortex-M3 microcontrollers designed by MYIR Freescale i.MX[edit] OMAP[edit] Rabbit/Z80[edit] Rabbit SBC Signetics 2650[edit] ST-Ericsson NovaThor[edit] Snowball – ST-Ericsson Nova A9500 Xilinx Zynq[edit] P-Cubed
Learn Electronics Online | Easily master the basics of electronics theory and practice CD drive scavenging for parts Old CD drives are a decent source for parts to make things from. Since the computer industry has encouraged manufacturing churn for so many decades, it is pretty easy to find at least a few surplus drives to dissect. Inside these dusty relics, you will be lucky to find DC motors, switches, gears, springs and more. The tools you will need are pretty easy to come by as well. You can get drives from old computers, which always seem to be at the dump, on the sidewalk of some neighborhoods, out on the loading dock of the school, in basements and garages, etc. Teach your family to solder! Supplies: Old computer CD drives (older ones often have better parts) Plastic bags for storing parts (zippered half size sandwich bags are great) Small cardboard boxes for storing the larger metal and plastic partsBattery holder Tape Paper and pen Digital camera Paper clip Concepts: How does it work? Time frame: An hour or more is ideal Process:What do you have? Case disassembly: Put on your safety glasses.
MaKey MaKey: An Invention Kit for Everyone (Official Site)