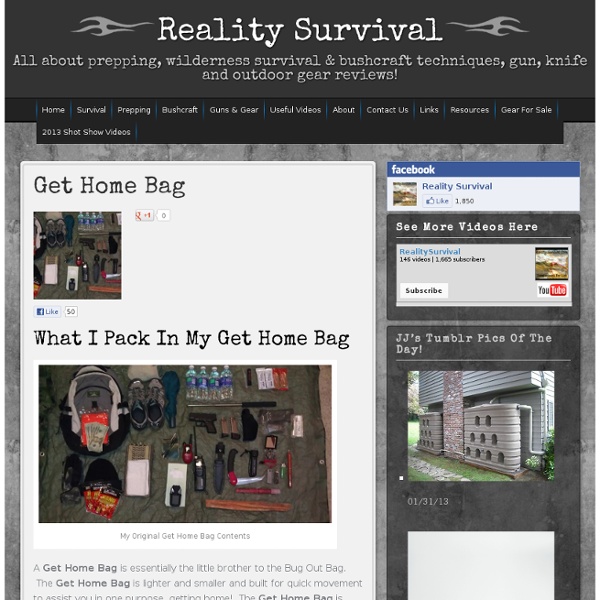
Get Home Bag Contents
34 Essential Items For Your Bug Out Bag
Imagine the following scenario. You are awakened in the middle of the night by the jolt of a powerful earthquake. Your house is leveled, but thankfully you and your family are uninjured. However, the roads are impassable, your utilities have been cut off, and many of your neighbors were injured or killed in the earthquake. Unfortunately, this was a very real scenario for the people of Haiti. What exactly is a bug out bag? A bug out bag is a collection of basic survival gear that might be required in a disaster scenario, natural or otherwise. The actual bag could be as simple as an extra frameless backpack or duffel bag, or as elaborate as a framed ALICE pack or similar framed backpack. What About Bugging In? In some cases, it might make sense to “bug in.” What goes in a bug out bag? Anticipating worst-case scenarios is never fun, but to properly pack your bug out bag with only the essential items, you must start here. A couple rations of food (I buy from MountainHouse.com).
How To Turn An Old Pair Of Jeans Into The Perfect Home Concealed Handgun Location
If you've ever thought about how to properly hide a home defense handgun in your bedroom, this DIY guide from one of our customers here at LuckyGunner.com is pretty ingenious. He has taken a pair of old blue jeans and sewn them in such a way as to create a closet holster that allows a loaded handgun to be hidden in the middle of the blue jeans while ensuring the blue jeans remain hanging on a hanger. We call it a "Closet Jeans Holster". Items Needed To Create Your Own Closet Jeans Holster: Needle & thread1 old pair of jeans1 sturdy clothes hanger1 handgun2 magazines (optional) Steps To Follow To Create Your Own Closet Jeans Holster: Step 1: Sew the jeans together immediately beneath the clothes hanger. Once you've created this Closet Jeans Holster, you'll be able to easily conceal a handgun in your closet along with two spare magazines. Editor's Note: Follow this guide strictly at your own discretion.
Notes From The Bunker
Do-it-yourself Survival Kit
The Do-it-yourself Coffee Can Survival Kit This is a compact kit that can be carried in the car, on the boat, or in a pack for hunting, hiking, exploring, etc. Most of the contents will fit in a one-pound coffee can which doubles as a pot for melting snow and device with which to dig an emergency snow shelter. (However, if you can carry it, include a small shovel. It is far, far better than trying to use a coffee can.) Keep three points in mind when putting together a survival kit. Thirdly, bring enough to enable you to spend at least one night out. Thanks to Allan Priddy who helps teach the Wilderness Survival class for putting this list together. General Items Repair Kit Sewing kit Dental floss (It's strong and useful as thread for sewing, or a fishing line or for lashing branches for improvised shelters.) First Aid Kit (Also see Lightweight First Aid Kit) Moleskin Sterile pads (2 x 2 and 4 x 4) Sterile Gauze Neosporin Bandaids Aspirin First Aid Tape Nourishment Optional
Related:
Related:
