
Paper Flowers – Anyone Can Do That | FindInspirations.com Japanese Kusudama, this tutorial is featured on Craftuts Anyone can do that, I assure you. The proof: I can, just take a quick look at my result below. And, believe me, I am neither meticulous nor particularly patient. Below you can see my very first attempt to create paper flowers. What you will need to make your own Kusudama paper ball? 1. 3. 4. (optionally) I prefer torn paper instead of cut. You have to start with a single petal. Now you have to glue your 5 petals into a flower. Apply the glue to only one side of each petal, except for the last one, in this case cover both sides with glue. Your first flower is done. Don’t glue every petal right after you make it. When all 12 flowers are finished you have to glue them together. When two halves of Kusudama Flower Ball are ready you have to glue them together.
untitled How to Fold Origami Paper Cubes - Frugal Fun For Boys and Girls Here’s another fun paper folding project! Make some simple origami cubes. These cubes are built from six different pieces of paper that fit together perfectly. They hold together without any tape or glue! After learning how to make paper ninja stars, my 8 year old was excited to try this project. I found this project on Origami Mommy. Instructions To make the cubes, you’ll need 6 pieces of square paper. Step 1: Start by folding a piece of paper in half, and then open it back up. Step 2: Fold each side over to the center line and crease it well. Step 3: Flip the paper over. Step 4: Fold the bottom left corner up and over to the right and crease it well. Step 5: Then fold the top right corner over to the left and crease it well. Step 6: Now turn the paper so that the points face directly up and down. Step 7: Then fold the bottom corner up and crease. Step 8: The corners will pop back up, but that’s fine. Then make five more of these paper sections! Then add a third paper section.
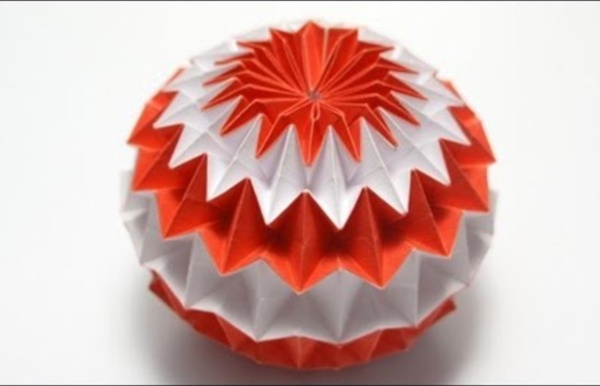
Diagram: Finger Prisoners Fingerfanger - tør du stikke fingeren ned i den? En overraskende fingerfanger. Det ligner en uskyldig blomst, men stik en finger ned i bunden og se hvad der sker! Papiret må ikke være blødt, men gerne på kanten til karton. 15 cm papir giver en 6 x 8 cm model. Se også ugens fold 2010-02. 8-kantethed Kvadratisk papir... ...men start med bagsiden op. Diagonalfolderne. Tværfolderne. Nu til 16-delsfolderne. Sådan. Gentag med de 3 andre. Hjørnerne skal foldes ind så folden rammer 16-delsfolderne. Nemmere: Læg papiret i en af 16-delsfolderne. Fold så de to hjørner ind over kanten. Vend og gentag på den anden side. Og fold ud. Reduktion til 4-kantethed, men 3D Fold over i halv. Fold den ene af trekantenderne over (i eksisterende fold). Vend. Fold den anden trekantende over. Åben op og fold sammen på den anden led. Fold den nye trekantende over. Og fold den sidste trekantende over. Alle trekantenderne skal ligge til samme side (her set som med solen). Her ses det tydeligt. Kronbladspidserne Fortsæt med den næste flap.
How to: 3D Origami Angry Bird Tutorial [Part 4] Starstruck at Christmas « Kate's Creative Space Regular followers will know of my obsession with all things paper, and with projects which take very little time or specialist skill. As Christmas draws ever closer, I’ve been experimenting with different types of festive stars and bring you some simple projects to try today. My usual reassuring criteria apply; these had to be things I could a) get right the first time – or very occasionally the second; b) could do in front of the TV, merlot in hand, and c) look far more elegant and skilled than the actual labour would suggest. I hope you’ll agree! Below you’ll find my instructions on how to make each of these stars; the classic 5-point Amish barn stars, 6-point folding stars and concertina or snowflake stars, which look beautiful hung in windows. Five-point stars are in some ways the most striking and simple stars; reminiscent of Amish barn stars and New England folk decorations, they are the kind of stars that children draw in their first pictures. Finally, fold! Like this:
50 nouvelles idées créatives pour Noël Découvrez 50 nouvelles idées créatives pour Noël. 50 idées Deco pour décorer votre sapin, préparer vos table de fête, fabriquer des petits cadeaux à déposer sur les tables de fêtes, plein d'astuces pour un Noël réussi. Folding 5 Pointed Origami Star Christmas Ornaments These 5 pointed origami stars are easy to fold and make beautiful Christmas decorations. You can make them from magazines, scrapbook papers or sheet music, whatever you happen to have lying around. We don't have our tree up just yet so for now I've put these Christmas star decorations on our mantelpiece. One of the 5 pointed origami stars is folded from scan of a dictionary page and the others are made from vintage style scrapbook papers. I went for vintage patterns but you could equally well use bright Christmas colors. I also tried hanging them on the mirror in our living room and I think they look quite nice there: Perhaps we'll move them to our Christmas tree once it's up :-) Here's a photo shared by reader Vicki, who made both the origami star from this page and also the modular money origami star. Reader Mel Hurst made these gorgeous tiny stars to decorate Christmas cards and presents. Materials for 5 Pointed Origami Star All you need is: a square sheet of paper. You've got two options: