Eva Dress - Patterns Archive
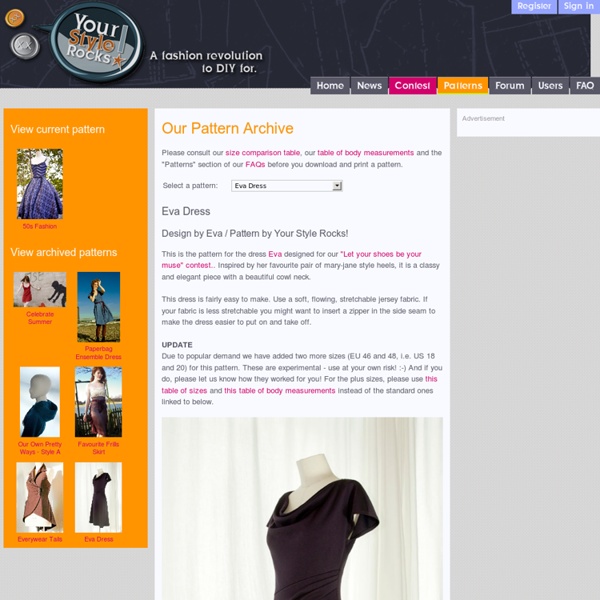
Please consult our size comparison table, our table of body measurements and the "Patterns" section of our FAQs before you download and print a pattern. Eva Dress Design by Eva / Pattern by Your Style Rocks! This is the pattern for the dress Eva designed for our "Let your shoes be your muse" contest.. This dress is fairly easy to make. UPDATE Due to popular demand we have added two more sizes (EU 46 and 48, i.e. Detailed sewing instructions for this pattern are available here. Download the pattern:
Flashing a cocktail dress with a spectacular bow. Comments: LiveInternet - Russian Service Online Diaries
Автор: Эльвира Киреева Выкройка праздничного платья получилась довольно легко, чего даже я не ожидала. Думала придется повозится над деталями. но все детали при детальном осмотре «под лупой» оказались простыми прямоугольниками (не все, конечно, но большинство!). Как мне кажется, такое платье не сможет оставить Вас равнодушными … А теперь поговорим об отличительных чертах этого платья: платье короткое (для смелых стройных девчушек);лиф с эффектом запаха;на бретельках;с дополнительной кокеткой по передней половинке;эффектный бант на передней половинке. Вообщем то в этом платье собралось огромное количество новых для нас, с точки зрения моделирования, элементов. но поверьте мне на слово, сложно не будет! Сейчас покажу Вам вид сзади, и мы приступим к этапу «пошаговая выкройка платья»: Пошаговая выкройка платья: алгоритм действий Начнем моделировать спинку, так как это самый легкий этап, и чтобы сразу было интересно и удобно По модели длина платья около 90 см.
Making a picnic dress
Several people have asked me how to make my Picnic Dress. It’s a bit too complicated for the step by step instruction on how to draft a pattern I gave for the draped t-shirt, but I hope this will be enough detail for anyone who is familiar with how dresses are made. You will need 4 yards of 45″ fabric and an 18″ zipper. These are the pieces of the pattern. Mark out the measurements listed and the distances between them. For example, on the waistband measure out the distance between your underbust/ribcage and your waist, then measure half your ribcage measurement at one side and half your waist measurement at the other. If you’re not used to making your own sleeves, trace both the arm hole and the top of the sleeve off a pattern you’ve used before and like. To make the curve of the skirt even, use your tape measure like an enormous protractor. To gather the top, mark out a distance ¾ of the difference between bust and underbust measurement on one side.
Welcome to Fashion freaks! Home
XOX SKIRT
Featured: Victoria Secret Peasant Skirt You’ll ♥ this easy-to-sew skirt…XOX. You will need: Approx. 1 ½ to 3 yds. of fashion fabric (depends on fabric weight and width)Coordinating threadHeavy-duty topstitching/upholstery thread Waist – measure around narrowest part of torso (just above navel level) Hips – measure around the fullest part of the seat, about 8” [20cm] below the waistline. Finished Skirt Length – measure vertically from waist to desired hemline. This is a simple block draft. (This also will help you determine how much fabric to purchase.) Designer Tip: If you wish to use a printed fabric, look for a print that has been “railroaded”, that is the print runs along the fabric’s length. XOX Block Draft Measure the hip. O = (hip measurement + 2” [5cm] ) divided by 2. Next, determine the desired length of each tier; divide the finished skirt length by the number of tiers you desire. X = (finished skirt length + 2 ½ ” [6.5 cm] ) divided by 3. O = 20” [51cm] X = 8” [24 cm] Top Panel = 1 block
Dress
I made this thing. It’s pretty cool. It’s a convertible dress that’s basically a circle and two straps, so it’s really easy, inexpensive, and crazy versatile. It’s been around forever and everyone seems to love it (in fact, part of the reason I’m posting this is to answer some questions for people I’ve run into), and I can hardly believe how close I came to not making it at all. I first found the instructions at a blog called rostitchery, and then I came across a second set at Cut Out + Keep. It sounded so easy. So I bought some material, spread it out in the living room, cut out my pieces, and… …stopped. I didn’t understand the next step. Turn the skirt inside out? And what’s this about making them overlap each other? There’s, like, a band of fabric involved? What? I figured I was just being thick. So I folded up my circle and my straps and I put it all back in the bag it came in. And I went upstairs to watch TV. I was wearing my new dress after about half an hour. Even me. Good luck!
Related:
Related: