
DIY: Cute handmade kids shoes! Hey everyone, It's Janae! I wanted to share a DIY for soft soled baby gladiator sandals. I made these for my baby Hazel, and I love them so much! What you'll need: Leather or faux leather(make sure it's not too thick for the needle to go through). 1. 2.Wax coated string. 3.A strong needle! 4.Scissors or an exacto knife. 5.Leather string If you live in Springfield, go to Springfield Leather! +++I measured everything on my baby, she is a size 5 infant. Start by grabbing a pair of your child's shoes. After you cut the soles,measure the length of your child's upper foot (right under toes). Cut 3/4 inch wide strip of leather. Next I cut out 2 squares that were 1 1/2 inches X 1 1/2 inches (will be bigger if you have a bigger child). You can use one continuous 3 inch strip too. Turn it under and sew it on the edge of the heel. Next, take your leather string and tie it around your child's ankle. Mark where you would like it, and cut it. There you go!
Encouraging Words for 2012 Back in the summer of 2009, Portland, Oregon-based designer and creative director Ian Coyle decided that he would print a daily thought for 73 days straight. Using his 1950's letterpress, he printed and inked by hand these messages that seem to take on new meaning as we begin this new year. "Some were random, some pertinent, it was a great way to end each day," he says of the project he calls 73 Letterpress. Out of all of them, here were some of our favorites. May they encourage you today and always. Update: We got in touch with Ian to ask him a few questions about this project. Q: What made you want to start this project? Q: Was it hard coming up with ideas each day? Q: What is it about letterpress that intrigues you? Q: Which message seemed to resonate most with viewers? When I was printing them, I displayed them all on a 25 foot tall wall behind the press and people would stop in as one or two caught their eye. Q: What can we expect next from you?
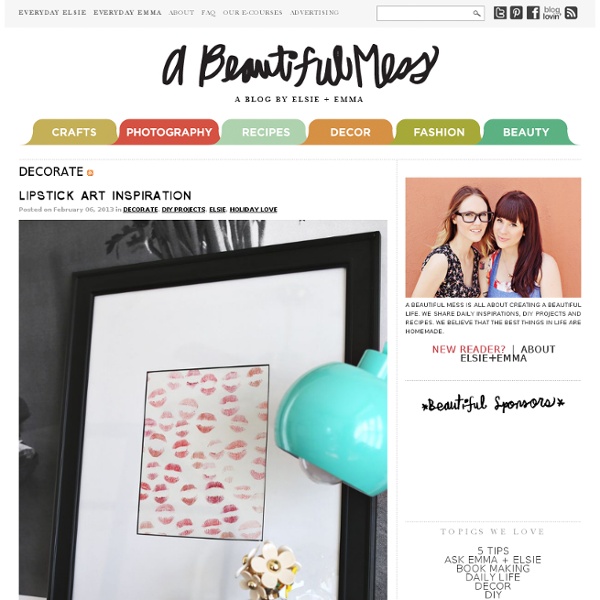
A Beautiful Mess I love using cloth napkins to dress up our dinner table, and through the years I've grown even more fond of their sustainability and cost effectiveness. Though, I'm not sure how cost effective it is if you keep buying more and more cloth napkins each year! This holiday season I thought it would be fun to look at how I could dress up the napkins I already own to give them an extra festive vibe. Check out three simple ways you can give new life to your table linens. Ribbon Trimmed Napkin This look is so (no sew) simple! Supplies:-ribbon-heat bond in width of ribbon-cloth napkin (buy mine here)-iron-fabric scissors (not shown above) Step One: Trim pieces of your ribbon to be about 1.5 inches longer than the width of your napkins. Step Two: Fold down the edges of each ribbon segment about 1/4" and iron flat. Step Three: Iron the heat bond to the ribbon (pressing with hot iron for two seconds), then peel off the paper backing. Pom-Pom Trimmed Napkin This is my favorite napkin style by far!
25 HQ Inspiring Daft Punk Wallpapers One thing I love about Daft Punk is their style. Not only is their music heart pumping, and energetic, but their very own appearance has sparked creativity throughout the art industry. Their masked appearance, and their looks are something people really wish to draw out. Combined with their music and a feeling to draw them, gives out a result that only inspires you more and more. OI tried to credit as many artists as I could find for these given wallpapers. A tribute to one of the best bands out there – Daft Punk!
Owl iPhone Cozy: DIY project hello there. i hope your gift giving list is shrinking by the day! but just in case you still have a few people on your list (wink!) i've put together 10 adorable handmade gifts for under $10 each. i'll be posting them all in the next two days! most are made with easy to find supplies that you may already have at home. Owl iPod/iPhone cozy: isn't she a cutie?! 1. first you need to crochet or knit a rectangle the size of your phone. it will be stretchy and you want your phone to have a snug fit in the cozy, so don't make it too large. use your phone/iPod as a template. if you don't know how to crochet/knit you can also use a piece of thick wool felt as your 'face'. 2. cut white and dark brown or black felt into circles for the eyes. stitch them on with matching colors of embroidery floss. center the dot in the middle of the eye. 4. add embroidery with white (or a contrasting color) yarn to give the owl a forehead and nose. 8. you can add a little bow, wings, a hat or glasses.
The 5 Best Online Marketplaces for Selling Handmade Goods Once upon a time, it was considered insane to compete against eBay. If you sold custom-made goods like clothes or jewelry, you sold at flea markets on weekends, and eBay the rest of the time. The idea that anyone would shop anywhere else for your handmade merchandise was silly. But anyone who’s shopped on eBay knows how tough it can be to find certain goods. A search for “vintage t-shirt” may turn up more than 300,000 results, very few of which are either vintage or t-shirts. Sensing an opportunity, Etsy launched quietly in 2005 and has carved out its own little empire in the form of an alternative marketplace devoted to the sale of handmade (and vintage) items only. While it’s quite large, Etsy’s 12.3 million listings are dwarfed by eBay’s 300 million. We looked at five marketplaces--both big and small--for sellers of homemade, handcrafted, and vintage items. Etsy If you’re a crafter, Etsy should need no introduction. DaWanda Bonanza Heavily focused on higher-end clothing and fashion, U.S.
Guest DIY: Katie from Skunkboy Creatures Hello friends! It's Katie from Skunkboy Creatures. The DIY I have to share today is a pretty collar in honor of the blog party! Supplies needed: pretty fabric, measuring tape, scissors, sewing machine or patient hands, needle and thread, pretty trim, button, and iron 1. 2. 3. 4. 5. 6. 7. 8. Loves*Katie Lotus Flower Tattoo Ideas Lotus flowers have been influential in cultures across the world from ancient times until today, from ancient Egypt and India to all across Asia. They have been associated with the human soul, gods and goddesses and featured in stories and legends.of a lotus flower ranges from divine purity and enlightenment, as in Buddhism, wealth, as in Hinduism, to rebirth, as in the ancient Egyptian religion.Read more (eHow) Pottery Barn Knock-Off Tutorial - Ribbon and Bird Chandelier - StumbleUpon It seems I’ve teased you long enough about the flock of 250 birds on my coffee table. I’ve received a number of emails this week asking what I did with all of those little birds. If you guessed that I put together a Pottery Barn knock-off with those little guys, using a glue gun, then you would be correct! DIY Ribbon and Bird Chandelier For some time, I have been inspired by this Paper Flower Chandelier from Pottery Barn. However, once I decided on a color scheme for my baby’s nursery, I knew that this particular chandelier wouldn’t work in the room. Supplies Three Macrame rings (available at craft stores) – Mine were 19″, 12″, and 6″.Two wire coat hangersLower gauge craft wire (available at craft stores or home improvement stores)Wire cutter and/or DremelInvisible thread or fishing lineSpray paintRibbon (mine was 5/8″ satin)Glue gunCardstockPaper punch or template in a shape you like 1. You can see that I just wrapped the edges of the hangers around the macrame loops. 2. 3. 4. 5. 6. 7. 8.
MALOWANIE FARBAMI NA TKANINIE | KREACJA DNIA Tak jak obiecałam, w dzisiejszym poście postaram się przekazać wszystkie swoje wskazówki i przemyślenia na temat malowania farbami na tkaninach. Zacznijmy od wyboru farby . Próbowałam rożnych dostępnych na rynku , ale jednak najlepsze efekty dają farby Marthy Stewart. Bardzo szybka schną, są prawie bezwonne, duża gama kolorystyczna , także kolory perłowe, matowe, maja bardzo dużo pigmentu. Cena za jedna farbkę o pojemności 59 ml to koszt około 14 zł. Teraz omówmy wybór materiału. Malując pamiętajmy o tym by nakładać na pędzel małą ilość farby, i nie zapomnieć włożyć pomiędzy ubranie grubszej gazety aby farba nie przeszła na drugą stronę. Przy pierwszych swoich pracach używałam ołówka , nie robiłam szablonu. Przy malowaniu tej bluzeczki użyłam szablonu wykrzyknik był celowo robiony odręcznie i niedokończony . Na koniec pomalowałam szerokim pędzlem farbą perłową, co dało naprawdę świetny efekt końcowy . Tu natomiast wykorzystałam liście jako stempla więcej TUTAJ Dodaj do ulubionych:
» The first lime «: Homemade pore strips! Steps 1-2: First take one spoon of milk and one of Unflavored Gelatin (it works with flavored too!). Mix it very well, and then microwave for about 15 seconds. Step 3: Place the mixture over your nose and wait for about 30 minutes, peel it of and you are done! Hope you have a lovely weekend! hugs, Monica.
Jak przerobić stare trampki na istne arcydzieło? Zapytaj.onet.pl - Masz Pytanie? My mamy Odpowiedź! Siedzisz samotnie w domu i rozmyślasz jakie buty założyć na urodziny przyjaciółki? Nie trać czasu! Przerób swoje stare trampki na istne arcydzieło ;)Nasze ubrania wyrażają naszą osobowość,wyobraźnię i styl. W tym poradniku pokażę pomysły z których możecie skorzystać ;) 1.Pierwszy motyw który mi się spodobał jest bardzo prosty do wykonania ;dPotrzebujemy tylko parę pisaków,linijkę,kartkę,nożyczki i ołówek ;)- Na kartcę rysujemy długą linię,a na niej trójkąty o bokach 1cm x1cm x1cm- wycinamy pozostały obszar tak,aby między trójkątami były wcięcia (szablon posłuży się do narysowania motywu na naszych trampkach) Zdjęcia: 2.Drugi motyw jest wam pewnie znany,są to trampki Galaxy ;dUzyskujemy efekt kosmosu nakładając farby na nasze trampki;) To bardzo proste! Poradnik z Youtube: 3.Trzeci sposób to przyszycie do trampek ćwieków,jest on znany,modny oraz wypróbowany przez gwiazdy;)Ćwieki można zamówić na stronie allegro.pl ;)Przykłady: Źródła:Google Grafikapinger.plYoutube.plloveit.pl