
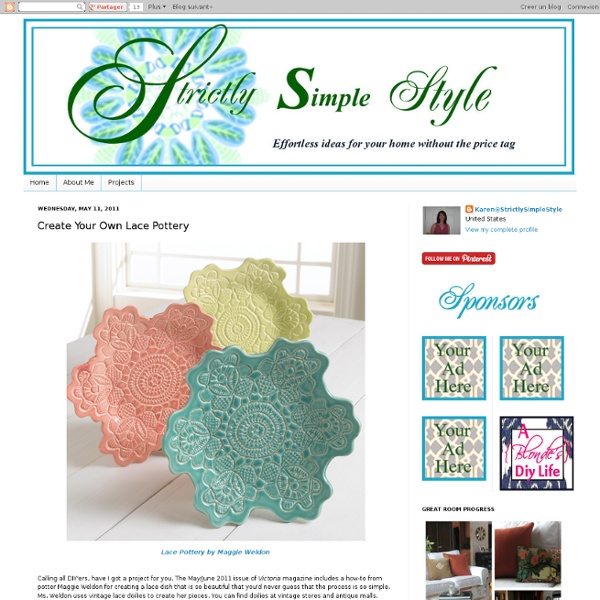
The End of Reinventing the Meal- Menu Planning and The Ultimate Menu Board | the creative mama The Creative Mama welcomes Clair Dickson with this guest post. I grocery shop weekly. That used to mean that I would menu plan weekly too. You know the dreaded menu planning routine– flipping through cookbooks and recipe cards, penciling a few ideas on the back of a phone bill, and frantically glancing at your calendar hoping to avoid planning a meal that you won’t have the time to cook. I got so tired of reinventing the meal… I mean wheel. What I love about this particular design— 1) It’s weekly. 2) Ingredients are listed on the back of the meal cards which measure 1 ½ by 4 ¼ inches. 3) Using the two pockets (made from 16 count crayon boxes,) I can store all of my meal cards right on the board. 4) Clothespins mean no slipping of the laminated meal cards and no pin holes. 5) The base is an 11×14” picture frame, so it’s a cinch to hang. At the end of this article is a one week sample of what I am currently serving along with a few favorite recipes. See Clair’s Customized Chore Charts too.
Flokati Rug Tutorial I really love flokati rugs. I have two that are safely tucked away in my parents basement awaiting our reunion. When I learned that I would be having a child and building a nursery for him, I wanted a flokati. A gray one. I’m going to show you how it’s done, but let me warn you- while this rug was super inexpensive to make with the resource of money- it was very costly in the resource of time. And now, this is how to make your very own latch hook rug. Supplies: Latch hook canvas latch hook tool old t-shirts scissors or rotary cutting tool/mat seam binding masking tape dye (optional) All of these things should be available at your local craft store, with the exception of the old t-shirts. On to the making! Once you’ve gathered all of your shirts, use a rotary cutting tool and mat (you can certainly use scissors but the results are less precise) to cut the shirts into 1 inch strips. Once you have all of the strips cut, it’s time to dye them if you’d like. Now you’re ready to hook! xo elle
diy wednesdays: catch-all shelf there’s nothing better than emptying your pockets as soon as you get home after a long day, but we find that we leave little piles of change, keys, and bills all over the house unless we have a designated place to put them. this ubiquitous wooden magazine holder from ikea turned out to be the perfect catch-all shelf for our stuff, and all we had to do was put a coat of stain on it, turn it on its side and mount it in the corner of our entryway. problem solved! CLICK HERE for the full project and instructions or just click “read more” below. happy crafting!derek & lauren here’s what you’ll need: wooden magazine holder stain and/or paint (optional) two screws and two washers
Repurposed Hardcover Book to Notebook Tutorial I’ve told you before I’m a bit obsessed with books. I love all books where I intend to read them or not. A local library has a huge book sale every year where you can pick up a grocery bag of books for $3! What you need-Hardcover bookPaperDecorative paperSmall bit of ribbonPaper cutterWhite glueHot gluePadding compound (optional)Clamps or bulldog clipsFirst you need to cut the pages out of your book so your just left with the cover. Slather on a nice layer of white glue to the inside of your cover. Apply your decorative paper. Also cut a piece of thin recycled cardboard the size of your notepad and a piece of decorative paper about 3 inches by the width of your notepad (this will be used to wrap the top edge of the pad). Once dry, fold your decorative paper around your pad to create the creases, then apply glue to the paper, wrap the pad, and allow to dry. While all that is drying, grab the scarp of ribbon and a writing utensil to use as a spacer. Enjoy!
DIY Duvet Cover I’ve been on the hunt for a cover to replace, or hide an aging blanket on one of my beds. I haven’t been able to justify doling out the big bucks for a beautiful organic duvet cover. On a recent shopping trip to Marshall’s (I must admit, I love the discount stores: Marshall’s, TJMaxx, and Homegoods), I found some beautiful bamboo sheets, and remembered a trick my mom taught me. There are a few different meanings and interpretations for duvet covers. Why use a duvet cover over a blanket? Why make a duvet cover from two sheets? A duvet cover is like a giant pillowcase. What you need: a blanket to cover 2 flat sheets exactly the same size – the same size as the blanket thread pins scissors sewing machine optional: buttons, big snaps, Velcro or ties What to do: 1. 2. 3. 4. 5. 6. 7. • Sew buttonholes by hand or machine. 8. EcoNesting Related:5 DIY Rugs50 Great Uses for Mason Jars Homemade Safe Candles
How to Make a Custom Clock September 20th, 2013 Email 347 users recommend I used a photo I took—you can use a picture of you with your loved one or anything else personalized! Lee Meredith I can carry supplies around in my working clock! Contrasting colors really make this clock pop! Photo: Lee Meredith Everyone needs clocks in their homes, and there is so much creative possibility with them that I think custom clocks are a fantastic DIY gift idea for anyone on your gift list! You'll need: A working clock to take apartOptional new body to become a clockPicture(s) for the faceOptional buttons or other small objects for number marksE6000 glueWhite glueScissors (and an X-Acto knife will be helpful)Optional basic tools (screwdriver, wrench, pliers), depending on your clock To find your clock, head out thrift-store shopping with a AA battery in your pocket, so you can test out the clocks you find to make sure you choose a working one. Now take apart the clock.
The "Times" They Are A-Changing: How to Make a Basket from a Newspaper May 3rd, 2012 Email 1339 users recommend A charming basket (or comfy pet bed) is crafted from an issue of the Sunday New York Times. Recycling never looked so good. Jeff Rudell Weaving newspapers is a perfect activity for kids who are stuck inside on a rainy May Sunday (and it works with adults, too). A simple ribbon or two can turn even the most modest of materials—in this case an old newspaper—into a thing of beauty. Photo: Jeff Rudell The entire 126-year-old farmhouse I grew up in was insulated with old newspapers, wadded up and stuffed behind the walls and between the studs. With such a long history with newspapers, it struck me as odd recently to realize that most of what I did with newspapers these days (besides read them) was bundle them up and deliver them to the curb once a week in anticipation of the 6:00 a.m. recycling truck that comes every Monday to retrieve them. View 3 member project galleries