
These DIY Toilet Tablets Bust Through Clogged Drains. How to Build a Car Mount for Your Cellphone from Office Supplies. Outdoor. Print Waterproof Plastic Maps. Water is the nemesis of printed paper maps.

It creates a pretty rainbow effect as the ink bleeds into the paper. Nice abstract art but, useless for orienteering. The 5 minute instant hand warmer! Everybody has seen them, the instant hand warmers sold during the winter months for insane prices.

Auto. Vehicle Immobilizer. Home-made penetrating oil. This weekend I did a front brake job on my vehicle.

After using 2 cans of commercial penetrating oil (lubricant) I still could not remove the rusted brake rotor from the axle spindle. I had tried various additional things like a bigger hammer, heat and rapid cool, it would not come off. Now this is not my idea, it took about 2 hours of internet browsing to find a solution and people who tried it were singing it's praises and now I am a believer also. One person on another site said there was actually a study comparing this home-made to commercial brands and the home-made required 30% of the torque of commercial brands to loosen rusted bolts. And it is by far cheaper than the commercial brands like WD-?? Repair threads with a home made tap. On-Board Air Compressor / Welder for vehicles. Tech. Using AC with LEDs (Part 1) The subject transformer was made for many AT&T cordless phones, it is rated for 110v/60Hz and has a 10VAC 500mA output. First, we have to be aware that the 10V rating is known as the RMS voltage, and is the effective average power of the sine-wave.
The maximum voltage, which we will subject our LEDs to, is about 1.4 times higher. We can demonstrate this by hooking up our transformer and taking some measurements. The second image shows 10.8 VAC, which the unloaded output of the transformer. So we should expect a peak voltage of 1.4 x Vrms or 15.3v Next we add a simple diode with a smoothing capacitor and measure the voltage across it: 14.5VDC. This number is about .8v less than our calculations because the diode has a voltage-loss across it of .8V. Using AC with LEDs (Part 2) - and make this handy counter light.
The simple and obvious way to get hundreds of volts down to a level to operate a LED at 20mA is to put a resistor in series with the LED.

To find out what values we are talking about, we'll use the peak value of 110v, which works out to be 150v for our example (it'll be double for Europeans and Ozzies) 150 / 20mA = 7500-ohms (we should subtract the voltage of the LED from 150v first, but the difference is minor) Maglite Hack (ROP MOD) Free/Discount. Free Electronic Samples. Did you know that some manufactures and suppliers will give away some free samples of their produces to customers and engineers to test them on their projects?

They are some rules you should know before you start getting free samples from the companies: You should never ask for more than you need, because you are not going to use the extra parts you are given, that means don't be greedy.Taking free samples from the companies and selling them on places like ebay to make your self an profit is an absolute no-no (unless the company says you can do it). Those parts are meant to be used for your projects, NOT for resale.Just to be fair to the companies where you got your samples from, buy some of their products. How to Get Student Discounts Forever. The Six Best YouTube URL Tricks. Guante de luminaria LED con tubos de silicona.
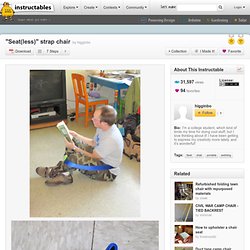
Bluetooth Glove: Talk to the Hand! Build Your Own Bicycle-Powered Battery for Emergency Power. Hackett's Bike Generator. Furniture. Plank Chair. "Seat(less)" strap chair. Materials:
Flat pack for storage Plywood Picnic Table. These picnic tables are each made from a single sheet of plywood, take about 30 minutes to mark out, and about 1 hour to cut out.

The sanding and painting is down to the individual, so I'll not quote any times for these two processes, but I have finished mine with a combination of wood preserver on the undersides and gloss paint on the topsides . A short video of me assembling and disassembling one of my picnic tables: You will need a copy of the plans, which you can download and save from here: To mark out the plywood, you'll need: a rule or tape measure, a pencil, a square, and a straight edge of about 4 feet long, or slightly longer; a planed 4 X 1 piece of timber just over 4 feet long, or a length of steel are ideal. Misc. Practical Necklace. Resealable (Cat Proof) Magnetic Window Insulation Tutorial. Before I got Elliot the Cat, I used to put up those plastic shrink wrap sheets over my windows (the kind that came with double sided tape).

They worked well but I had to redo them every winter and I couldn’t open the windows without ruining the plastic film. I stopped putting up the plastic window insulations after I got Elliot because he tore them to shreds. This year I came up with a cat proof way to seal in the heat … take a look! (This is not a super detailed tutorial … I’m going to assume that you have general DIY/crafting skills and know how to caulk and paint) 1. 2. Practical Origami: instant handles for paper bags. How to Mooch Off of Your Friends (Without Them Ever Knowing) Clothing. Bicycle Tube Belt. Jacket mod: stop the zipper from catching the fabric! How to make an iPod hat. Power LED Backpack Lighting system. There have been many LED instructables, so I will mainly focus on what's different about mine and leave you to fill in the details by reading elsewhere.

I won't go into calculating resistor values, series vs. parallel, or things like that. Partially because I did this a while ago and don't remember some of the stuff. First, the rationale: I don't want lights on my bike because they're theft magnets, are more fragile, and more cumbersome. Shop. Woodworking. Make Sandpaper Last Longer. Handy tricks to find square. Note* this trick is the only one that uses math and it is only really to explain how it works.

Convert a hand-held circular saw into a table saw. Woodworking: Making wood projects without using nails, screws, or glue. Make knock-apart shelves, hinges, latches, books, chairs, cabinets, spice containers, doors, desks, and toolboxes using only wood to hold them together. Almost any wood project can be made without using any metal fasteners or glue. Easy Single-Handed Concrete Mixing with a Tarpaulin. I needed to mix around 20 cubic feet of concrete for setting some fence posts. DIY spray paint. Making your own custom spray paint is easy and produces some interesting results. Maybe they don't sell the exact colour you're looking for, or you just want to a use for all those old almost-empty cans of paint you have hidden in your garage.
Time to put them to good use and make your own spray paint! Using the spray mechanism found in standard spray cans and some common discarded items you can make your own spray paint. This project uses a bicycle pump to pressurize a small PET pop bottle, and by varying the amount of pressure you pumped into the 'can' and the types of paint added you can produce different effects. The style I got based on the paints I used and the pressure applied is reminiscent of a graffiti mop style. Enough talk, let's make our own spray paint!
*Inspiration for this project was drawn from the short movie splay. How to Make Anything (Using Acrylic and Machine Screws) Well maybe not anything, but what follows is an Instructable about how we at oomlout.com build everything we produce. It is a technique we call Interlocking T-Bolt Construction. It consists of a T-cutout in one piece of acrylic (or any 3 mm stock) and a receptacle in another piece. These pieces can then be bolted together making a very secure 90 degree joint. A deceptively simple technique that has unlimited possibilities. Make Your Own Chalkboard Paint. Glass File. Food/Drink. DIY MREs.....a tutorial... JOE ON THE GO BRACELETS. 1. Carry any Bottle with a JUG KNOT Handle.