

Super Simple Leggings: {only 2 fabric pieces} Chilly weather keeps creeping in.
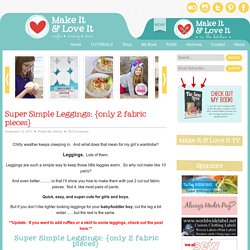
And what does that mean for my girl’s wardrobe? Leggings. Lots of them. Leggings are such a simple way to keep those little leggies warm. So why not make like 10 pairs? And even better………is that I’ll show you how to make them with just 2 cut out fabric pieces. Quick, easy, and super cute for girls and boys. But if you don’t like tighter looking leggings for your baby/toddler boy, cut the leg a bit wider……but the rest is the same. **Update: If you want to add ruffles or a skirt to some leggings, check out the post here Super Simple Leggings: {only 2 fabric pieces} (And I know, those pink stripes aren’t matching up along the center seam. Leggings aren’t super pricey at the store. But when you think about how simple the seams are, how little fabric they use………why not make your own? And keep it cheap by using old Tshirts (make sure they’re stretchy), old stretchy pants of your own, skirts, dresses, etc. Zaaberry. DIY cloth training pants!
**update: These cloth training pants are now available for purchase at my shop www.etsy.com/shop/theflannellamb First of all, I have an important announcement: Abbey slept in big girl pants all night last night!!
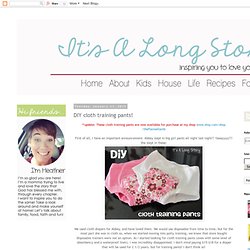
Yaaayyyy!!! She slept in these: We used cloth diapers for Abbey, and have loved them. We would use disposable from time to time, but for the most part she was in cloth so, when we started moving into potty training, we knew that store bought disposable trainers were not an option. So, now I was on a mission! What's that? PUL is the laminated fabric that is used to make the outer liners of cloth diapers, and you can now buy it at both JoAnn AND Hobby Lobby! I started by making my pattern; I used wax paper, pinned it around the trainer, and traced the seams of the reinforced section. I ended up with this: If you look closely, the bottom section is about half an inch longer than the top section. I labelled my pattern, just to be safe. Things for boys. Slashed 80's Vest. Here’s the story—I was going through Grace’s drawers and reorganizing her clothes when I came across THIS VEST that I made for her.
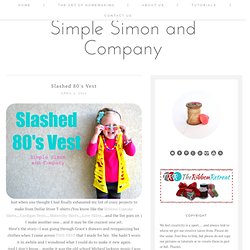
She hadn’t worn it in awhile and I wondered what I could do to make it new again. And I don’t know…maybe it was the old school Micheal Jackson music I was listening to (Beat It…Thriller…Billy Jean…) but I decided to turn it into a slasher style vest like some shirts I had way back in the day. So I took that vest and gave it some slices with my rotary cutter like this: and Grace ended up with a vest that would have made Debbie Gibson (or Tiffany) proud. Did I say proud? (Especially after all the accessories were added.)
So there you have it. -liZ PS—My husband just told me that he doesn’t remember Tiffany! Are you kidding me? She was only the coolest person in the entire world when we were in 6th grade…the awesome vests and jackets…that feathered hair….the mall appearances… And just to be fair here’s a little Debbie Gibson goodness as well. Cook Clean Craft: Men's Jeans to Toddler Pants Tutorial. I’ve seen a few blog posts for converting men’s pants or jeans to toddler-sized jeans, but they all seem to involve a lot of seam-ripping, deconstructing and lots of sewing.
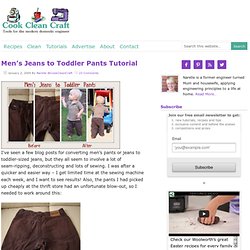
I was after a quicker and easier way – I get limited time at the sewing machine each week, and I want to see results! Also, the pants I had picked up cheaply at the thrift store had an unfortunate blow-out, so I needed to work around this: I prefer flat-front pants (where there is only elastic in the back) as I think they look a bit snazzier, but you could erasily do this with a full elastic waist. Here’s my quick and easy method to convert thrifted mens pants into toddler/boy pants: Materials RequiredMen’s jeans or pantsElastic to fit in waist-band (I about 9 inches of 1/2 inch wide elastic)ThreadSewing MachineSerger/Overlocker (optional)ScissorsSeam ripper ProcedureStep 1. Step 4. Step 5. Step 6. Step 7. Step 8. Step 9. Step 10. Step 11. Step 12. Quilted Up: My Stylish Storage Box Tutorial. Since I'm celebrating National Quilting Month I thought I'd share one more quilted project tutorial: My Stylish Storage Boxes.
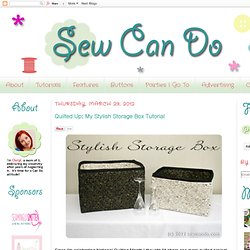
Firm walled, padded, quilted boxes that are just perfect for storing anything - wine glasses, plates, magazines, clothes, etc. Pretty enough to keep out, but also ideal on a shelf or in a closet. Using two coordinated prints means they make a perfect pair: I used these fabulous Script prints from the Library collection by Timeless Treasures. They make things look classy, but still understated: The quilting adds some nice texture and the lettering on the black print is a shimmery gold so it's a really lovely effect. Note: I made these boxes really big to hold lots (the large is 17in x 13 in x 11in), but you could scale them down to just about any dimensions. First cut out the bottom and side pieces from outer, inner, batting and stabilizer using the following measurements: