
A Winter Holiday Tablescape. This post is sponsored by Roots Canada, whom we are excited to be partnering with this holiday season!
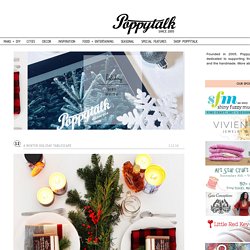
This past weekend we created a tablescape for a winter's holiday breakfast gathering using products from the Root's General Store, a collection of quintessentially Canadian products perfect for holiday gift-giving. We created a festive centrepiece using evergreen boughs and winterberries. We loved how the evergreens contrasted with the white of the table and the red of their Buffalo Tea Towels (which we adore by the way). A little demo of how we made the centrepiece and an explanation of what is on the table below. We attached the evergreens to a bare branch we found in the backyard. There's something cozy about surrounding yourself with the warmth of candles for a meal, and their natural soy wax Maple Scented Candles crackled like a campfire when lit (and made the house smell of maple cookies when you entered).
A little mulled hot apple cider bar with treats! Visit Roots online: DIY Gold Leaf Pine Cone Garland. I had a vision for today’s DIY projects many weeks ago.
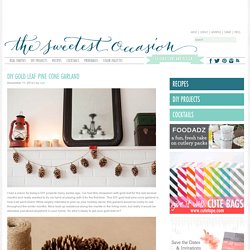
I’ve had this obsession with gold leaf for the last several months and really wanted to try my hand at playing with it for the first time. This DIY gold leaf pine cone garland is how it all went down! While largely intended to jazz up your holiday decor, this garland would be lovely to use throughout the winter months. Mine took up residence along the mantle in the living room, but really it would be adorable just about anywhere in your home. So who’s ready to get your gold leaf on? Supplies - Pine cones (forage for them outside or score them at a craft store)Jute twineGold spray paintGold leaf + adhesive (available at most craft stores)Foam brushesSpray sealantScrew eye hooks (I picked mine up at Lowe’s)Pliers The first step is to apply the gold leaf adhesive to your pine cones using a foam brush. The next step is to let the pine cones dry completely. DIY Botanical Poster. A few weeks ago, I was browsing around the interwebs and stumbled upon this incredibly beautiful poster shown in this sweet living room post.
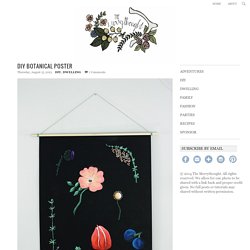
I fell in love. I’ve been trying to convince myself to practice painting, so I decided this was the perfect opportunity to break out the paint and try to make a version of my own! What you need: -Black poster board -Paint & brushes -Wooden Dowel -Hot glue gun -String How to do it: Cut your poster board to a manageable size. Sketch out some plants and flower – I searched for some vintage botanical prints to give me inspiration while I was drawing them out. I just love it!! Xo. Free Botanical Art Prints. What’s better than free art?!
Besides maybe free ice cream, but I don’t have any of that for you, sorry. Today, I’m sharing a new (to me) resource for free botanical art. TOTALLY FREE, courtesy of Botanicus.org. Botanicus is a free, Web-based encyclopedia of digitized historic, botanical literature from the Missouri Botanical Garden Library. They have been digitizing materials from their library since 1995, focusing primarily on beautifully illustrated volumes from their rare book collection.
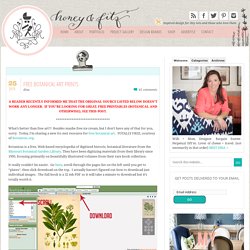
It really couldn’t be easier. Here are some of my favorite prints along with the corresponding pages you can find them on once you download the book. And in case you need any more inspiration/motivation, take a look at how great a series of these framed up can look. Thank you Botanicus! Get inspiration delivered straight to your inbox! Free Download: Botanical Prints. Speaking of botanical prints, this weekend I made us some wall art for our kitchen as we were all getting tired of staring at blank walls and longed for a little more coziness inside!

I've been admiring vintage botanical prints for some time and found some really pretty ones that I thought might work - nice for the summer? I fixed them up a bit in photoshop and created pdf's to print out (thinking to share with you also if you so wish)! These are all 8.5" x 11" making it easy for any printer. I just taped mine up temporarily with gold striped washi tape till I can pick up some frames (probably white - like the RIBBA's from IKEA that I photoshopped the images into below). I'm thinking of also trying to make some poster sized ones with some of these as well - hope to share those with you soon too! Download: Fig. 1 | Fig. 2 | Fig. 3 | Fig. 4 | Fig. 5 | Fig. 6. Images courtesy of Biodiversity Heritage Library.