
Simulations in Houdini: Fireworks & Ocean. Introduction Hi everyone, my name is Thibaut Van Waeyenbergh, a junior FX Artist from Antwerp, Belgium, and I currently work as a Tech Runner at DNEG London.

Being a recent graduate from Digital Arts and Entertainment, Howest, I’m at the very beginning of my journey. My first experience with 3D took place about a couple of years earlier when I used Cinema 4D for my first little projects. It was at that point when I decided to become an artist. Learning Houdini. HOUDINI Smoke Falling from Mountain. Custom Pyroclastic Solver.
Pump. High Resolution Explosion. Houdini Micro Solvers 1 – Ceyhan Kapusuz. Micro Solvers are building blocks in Houdini simulation.
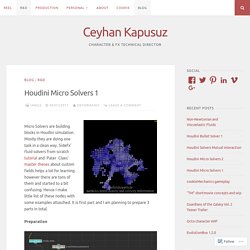
Mostly they are doing one task in a clean way. SideFx’ fluid solvers from scratch tutorial and Pater Claes’ master theses about custom fields helps a lot for learning however there are tons of them and started to a bit confusing. Hence I make little list of these nodes with some examples attasched. It is first part and I am planning to prepare 3 parts in total. Preparation Lets start with multi solver as we will apply many micro solvers fin each time step . 1.EmpityObject : is a container which can have various types of data attached to it. 2.The Scalar Field DOP creates a Scalar Field data that can be attached to simulation objects and manipulated by solvers. 3.The Vector Field DOP creates a Vector Field data that can be attached to simulation objects and manipulated by solvers. 4.Sop Geo for importing external objects in to simulation.
Houdini vorticle test. Your Bag of Tricks: The mushroom effect...on getting rid of it at the start of a sim and adding details. Three things that contribute greatly to the mushroom caps: coarse sub-steps, temperature field and divergence field.
All of these together will comb your velocity field pretty much straight out and up. Turning on the velocity visualization trails will show this very clearly. If you see vel combed straight out, you are guaranteed to get mushrooms in that area. If you are visualizing the velocity, best to adjust the visualization range by going forward a couple frames and adjusting the max value until you barely see red. That's your approximate max velocity value.
Anatomy of Houdini smoke solver. Part 1.
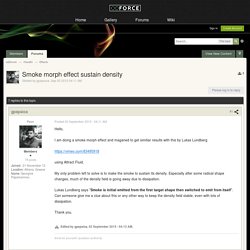
Houdini Pyro Shape Comparisons. Comparsion volume renderers 001. Houdini Control Smoke. Leeroy johnson FX blog. Smoke morph effect sustain density. Nice, your movie looks great.
Quote "emmit from itself" I read that quote as well and I interpreted that to mean that he simply turned off Activation in the Source Volume node after frame one. This did not work for me as the smoke just dissipated away (NOTE: I did not try force fields to contain the dissipation as he mentioned). But what might work is if you time the activation to the same frame as the shape switch and then 'pulse' the volume with the presence of the new shape for a single frame by animating Activation from 0 to 1 for a single frame. Here is my continued development for this effect with continuous activation. Smoke Beat - Countdown. Get rid of mushroom effect in explosion and add details in the opening - Page 3 - Effects - od.
How to do this Houdini MotionTrail.
Pyro smoke. Anatomy of Houdini smoke solver - Houdini. H12.5 Pyro2 fire RnD. Curl Calculation. Pyro: custom control fields. Pyro 2 explostion R&D. How to emit Colored Smoke. Sanostol, on Jul 10 2009, 08:12 AM, said: Hi,I'm trying to emit smoke in different colors. for example I have three emitters, and everyone should emit a different color.
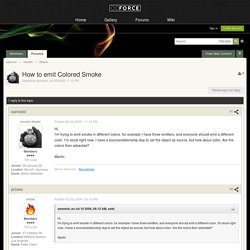
I'm stuck right now. I have a sourcerelationship dop to set the object as source, but how about color. Are the colors then advected? Martin Have a look at this file, it sort of works, although there is still some problem with the rest attribute for the smoke. Volume shade test. Houdini - Tornado Breakdown. Unified Noise. Presents a unified interface and uniform output range for all the noise types available in VEX.
This node lets you play with parameters on the Construction tab to design an interesting noise with 0-1 output, and then use the parameters on the Output tab to condition the output to the range you need. This node is designed to have most of its interface promoted up to the parent material. to promote the UI for this node, you must choose Promote Interface > UI + Links + Inputs to trigger scripts on the node to promote and create parameters up on the parent node. Tip The noise functions sometimes give artifacts or an area of static results around offset 0, so you want want to always begin designing your noise with non-zero values in the offset. Inputs The data type of the position (pos) input is controlled by the Signature parameter. Pyro 2. While the Pyro shader can be intimidating with many parameters and deeply nested tabs, it’s actually fairly straightforward, and constructed from a few repeated blocks of parameters.
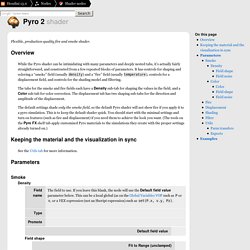
It has controls for shaping and coloring a “smoke” field (usually density) and a “fire” field (usually temperature), controls for a displacement field, and controls for the shading model and filtering. The tabs for the smoke and fire fields each have a Density sub-tab for shaping the values in the field, and a Color sub-tab for color correction. The displacement tab has two shaping sub-tabs for the direction and amplitude of the displacement. The default settings shade only the smoke field, so the default Pyro shader will not show fire if you apply it to a pyro simulation. This is to keep the default shader quick. Smoke trail on path. Hi guys, I've got the scene from this thread: so all credits for this setup go to Rob and SESI...I've just tried to develop it further and adapt it to work on a fast moving object at long distance and during my work I've always faced the same problem with cutting the density at the container's borders.
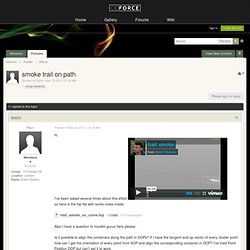
In the initial scene they use average velocity in 'Sourse Volume DOP' to blend the velocity among all containers and this works for slow moving and fast dissipating smoke but for а fast moving smoke you will need a different way to equalize all fluid forces between containers. And since every container is simulating independently and limited by borders I was thinking to zero out all internal pyro forces, buoyancy, diffusion, cooling rate, etc...and use external forces which stay relatively equal during whole simulation as generating velocity from the curve tangents. Volume Blending - Side Effects Software Inc. ** Realistic Fire with Pyro ** - Side Effects Software Inc. h12 pyro RnD 01. Video Copliots explosion tutorial, but in H12. Particles -- you can set up a pop net pretty quickly in Houdini.

The big thing to note is that you basically need some point velocities. You can actually customize point velocities rather easily in Houdini without actually having a point move. Vop Sops (and vop pops) are really good for adding noise and direction to point vels. It's a little daunting at first, but super useful later. Opacity in Fire - Side Effects Software Inc. You might find this set of tutorial videos quite useful.

It gives a lot of details about the pyro tools in Houdini12. They might be slightly different now in H13 but much will be the same. Opacity in Fire. You might find this set of tutorial videos quite useful. It gives a lot of details about the pyro tools in Houdini12. They might be slightly different now in H13 but much will be the same. Pyro Material Displacement Problem !
Rendering smoke. The pyro shader can be used to completely re-shape the volumes it is fed in so yes, absolutely, the shader is crucial in achieving "your" look. Think of the volume coming in as just the start and in many cases, a not so good start that mandates a lot of tweaking in the pyro shader. Here is the general method used for reshaping a volume being fed in to the Pyro shader whether it is used as density (smoke) or fire: Referenced_Volume | Fit Range | Ramp | Multiply | Sharpen Filters | Final_Multiply Any one of the steps above can completely change how you render the smoke. For example if you invert the slope of the ramp, you take any value of 0 and flip it to 1 and 1 to 0 literally inverting the density value of the smoke turning it inside out. Pyro Shader Displacement. Houdini 12 Pyro - Shape Settings Wedge Tests. Houdini 12 Pyro - Shape Settings Tests. Houdini 12 Pyro - Shape Settings Tests (Explosions)
Houdini 12 Pyro - Shape Settings Tests (Flames) Fuel Air Explosion. 【pyro】Pyroよ、貴様はもう用済みだ! ちょっと前に自由な生活とおさらばして再び会社に戻りました。 最初は躊躇したんですが、マルチプロセッサのマシンを使わせてくれるというのでついおっけしてしまった… というわけで作業環境も一新され、ようやくTP5を触れたのです。 そろそろTP6が出てもおかしくないですが^^; さっそく気になってたGeometryとやらをリサーチ。 メッシュの情報を取るには今までIntersectを使って特定の方向にrayを飛ばすことで取得可能でしたが、新しい(?) GeomParticleを使えばパーティクルに一発で最も近い表面の情報が取れるようになりました! これほしいですね奥さん。 意味はあんまりないですが、簡単な使用例を作ってみました。 レベルⅠ 従来のNodeでは一度一つのオブジェクトしか読み込めなかったが、Objectでは複数を一気に読み込めます。 レベルⅡ レベルⅠとさほど変わらない、パーティクルの発生ポイントをサーフェスから頂点に変更と発生の数は頂点と同じぐらい。 レベルⅢ 壺さんとオブジェの距離によってパーティクルの数が変化。 以上、オブジェの面積と頂点数が取れるようになったことがお分かりいただけたでしょう。 これも最初はGeomParticleを使いますが、オブジェでなくサーフェース上の一点(point)を探したいのでアウトプットはClosest Object By SurfaceからClosest Point By Surfaceに変更します。
Geometryはどうやらポイント情報とか面積とかで活躍できそうです、ついでにノードそれぞれも軽く触ってみて、大体こんな感じでした:Object 作戦に参加するオブジェの登録担当(meshに限らずsplineも登録できます。 GeomObject、GeomVertex、GeomPoint 最終的この三つのタイプからデータが取れます。 Gridless advection.
Rest Field.