
[BPI-M3] New image: Android 5.1 (Version:V3) - Banana Pi BPI-M3 / Image - banana pi single board computer official forum SinoVoip BPI team. I'm trying this Android image on the emmc, unfortunately I need an hdmi-dvi cable to use it.
![[BPI-M3] New image: Android 5.1 (Version:V3) - Banana Pi BPI-M3 / Image - banana pi single board computer official forum SinoVoip BPI team](http://cdn.pearltrees.com/s/pic/th/computer-official-sinovoip-164032998)
I've also installed Ubuntu Mate 16.04 on a microsd and managed to enable hdmi-dvi cable editing the file /media/pi/BPI-BOOT/bananapi/bpi-m3/linux/sys_config.fex and enabling hdmi_cts_compatibility = 1 in [hdmi_para] section and then:fex2bin /media/pi/BPI-BOOT/bananapi/bpi-m3/linux/sys_config.fex >/media/pi/BPI-BOOT/bananapi/bpi-m3/linux/script.bin Is there any way to enable hdmi-dvi in this android image booting Ubuntu mate from micro-sd?
When I boot from micro-sd I see those partition on /dev/mmcblk1 (I think they are the Android partitions on emmc since /dev/mmcblk0 seems to be the micro-sd): P.s. BananaPro/Pi:SD card installation - BananaPro/Pi. How to Install most OS images (except Android) This method will install most of the OS images available from our website (but not the Android ones – see further below).
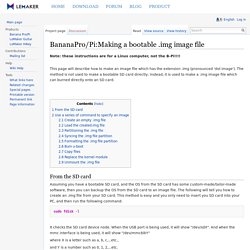
Windows Insert the SD card into your computer. The size of the SD should be larger than the OS image size, generally 4GB or greater. Class 4 or higher is good. BananaPro/Pi:Making a bootable .img image file - BananaPro/Pi. Note: these instructions are for a Linux computer, not the B-Pi!!!!
This page will describe how to make an image file which has the extension .img (pronounced 'dot image'). The method is not used to make a bootable SD card directly; instead, it is used to make a .img image file which can burned directly onto an SD card. From the SD card Assuming you have a bootable SD card, and the OS from the SD card has some custom-made/tailor-made software, then you can backup the OS from the SD card to an image file. The following will tell you how to create an .img file from your SD card. It checks the SD card device node. Where X is a letter such as a, b, c,...etc and Y is a number such as 0, 1, 2,...etc.
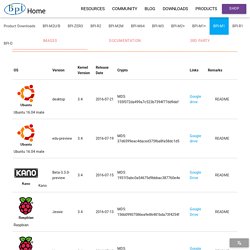
In the following, the phrase ${card} indicates either "/dev/sdX" or "/dev/mmcblkY". m1-download. About this Image User Name: pi/root.
Raspberry Pi and Arduino Connected Using I2C - Oscar Liang. With Raspberry Pi and I2C communication, we can connect the Pi with single or multiple Arduino boards.
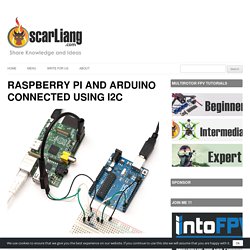
The Raspberry Pi has only 8 GPIO’s, so it would be really useful to have additional Inputs and outputs by combining the Raspberry Pi and Arduino. There are many ways of Linking them such as using USB cable and Serial Connection. Why do we choose to use I2C? Pure Pi: Control custom stompbox effects on a Raspberry Pi with a smartphone - All. Pure Pi: Digital Effects with Pure Data running on a Raspberry Pi. Pure Pi (version 1) controlled by TouchOSC on a phone Ever wonder how digital effects are created?

Want to customize your favorite effects without picking up a soldering iron? Then Pure Data may be your best option. Pure Pi: Digital Effects with Pure Data running on a Raspberry Pi. Entrées/sorties GPIO sur Raspberry Pi. Cet article est un cours d’introduction aux entrées et sorties numériques sur carte Raspberry Pi, permettant de comprendre leur fonctionnement, leur connexion et de les tester depuis le shell, avant de voir leur programmation dans différents langages.
Banana Pi, Webcam sur CSI, GPIO avec le BPIDuino et le module 6LEDs, horloge RTC, quatrième partie. Dans cette quatrième partie, je vais continuer à tester le Banana Pi et plus précisément les GPIO, le connecteur CSI pour la Webcam, le module ARDUINO en version Banana Pi c’est à dire le BPIDuino, ainsi qu’un module 6LEDs.
Vous trouverez aussi, une procédure pour installer la distribution multimédia « XBMC » qui s’appelle maintenant « LeMedia« . Pour terminer, vous trouverez des outils comme USBIT pour « USB Image Tool« , des solutions pour vous connecter à distance avec Putty et Xming en duo, via le mode console mais aussi en mode graphique. BPI-SINOVOIP (Banana Pi -BPI) BPI-SINOVOIP/BPI-WiringPi: Supports BananaPi BPI -M1 / M1Plus / M2 / M2P / M3. BananaPro/Pi:How to login to the system - BananaPro/Pi. Using the HDMI cable 1.
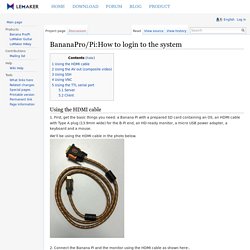
First, get the basic things you need: a Banana Pi with a prepared SD card containing an OS, an HDMI cable with Type A plug (13.9mm wide) for the B-Pi end, an HD-ready monitor, a micro USB power adapter, a keyboard and a mouse. We'll be using the HDMI cable in the photo below. 2. Connect the Banana Pi and the monitor using the HDMI cable as shown here:. 3. Using the AV out (composite video) The AV cable is usually yellow and of the RCA connector/phono type – it normally comes bundled with similar red and white versions. GitHub - LeMaker/WiringBP: This is a GPIO access library for Banana Pro/Pi. It is based on the original WiringPi for Raspberry Pi.
Access GPIO from Linux user space. <a href=' marketing</a> GPIO mean "General Purpose Input/Output" and is a special pin present in some chip that can be set as input or output and used to move a signal high or low (in output mode) or to get the signal current status (in input mode).
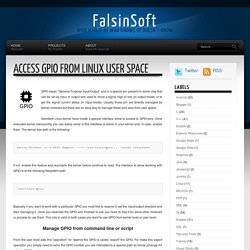
Usually these pin are directly managed by kernel modules but there are an easy way to manage these pins also from user space. Program an AVR or Arduino Using Raspberry Pi GPIO. Wiring To program an AVR from the Pi you'll need to have 4 GPIO pins free on the Raspberry Pi. These pins will connect to the AVR's ISP/ICSP MOSI, MISO, SCK, and RESET pins. In addition you'll connect the Pi's 5 volt power and ground to the AVR to power it during programming. Gordon Hendersons Projects pages. WiringPi updated to 2.36. PURE DATA forum~ Banana Pi, Webcam sur CSI, GPIO avec le BPIDuino et le module 6LEDs, horloge RTC, quatrième partie. Banana Pi, Webcam sur CSI, GPIO avec le BPIDuino et le module 6LEDs, horloge RTC, quatrième partie.
WIKI. Banana Pi, Webcam sur CSI, GPIO avec le BPIDuino et le module 6LEDs, horloge RTC, quatrième partie. BananaPI en France. Tutoriel : Mettre en place le reset automatique du Module d'extension Arduino. - BananaPI en France. Un nouveau tutoriel permettant de mettre en place le reset automatique nécessaire à l'envoi des programmes sur le module Arduino pour BananaPi ! Il faut tout d'abord effectuer un montage très simple afin de pouvoir utiliser la fonction d'auto-reset : Il faut connecter grâce à un fil, le GPIO 17 (broche physique 11) au reset situé sur le ICSP (broche en bas à gauche).
Un schéma des broches (CON3) pour vous aider (la pin 1 est celle en haut à gauche, la pin 2 est celle en haut à droite): Un script est disponible sur un répertoire GitHub : Liste_de_distributions_linux_et_unix_optimisees_pour_raspberry_pi [Swissraspberry.ch] Cette liste recueille les systèmes d'exploitation expressément optimisés pour Raspberry Pi Débutants Distributions officielles. Sound configuration on Raspberry Pi with ALSA. While setting up a Raspberry Pi to play streamed music using UPnP, I have had quite a bit of trouble understanding how to configure the sound on my Raspberry Pi.
This is partly because I am running it in headless mode (no graphical desktop) and partly because sound on Linux is fiendishly complicated. Anyway, I am making progress in understanding what’s going on but I am no expert. Here are my findings on how to control the ALSA system from the command line. All I am focussed on here is getting control of the sound output by the 3.5mm stereo socket. BPI-SINOVOIP/BPI-WiringPi: Supports BananaPi BPI -M1 / M1Plus / M2 / M2P / M3. Raspberry Pi and realtime, low-latency audio. The Raspberry Pi can be set up to handle realtime, low-latency audio but it requires quite some tweaking. Hence this Wiki article in which some common bottlenecks as well as some possible optimizations will be described.
Last but not least this article will explain how to get JACK aka jackd running on your RPi. Powering the RPi If you use the micro-USB power input to power the RPi you might encounter sudden reboots when plugging in or unplugging USB devices. If you want to be sure your RPi doesn't reboot in such cases you can try backfeed powering your RPi by connecting the power supply to one of the USB ports or use a powered USB hub that backfeeds. Wiring Pi. Blink is the “Hello World” of the GPIO interfacing world. It’s the simplest program and circuit that lets you see something happening. If you have the following saved in a file called blink.c: #include <wiringPi.h> int main (void) { wiringPiSetup () ; pinMode (0, OUTPUT) ; for (;;) { digitalWrite (0, HIGH) ; delay (500) ; digitalWrite (0, LOW) ; delay (500) ; } return 0 ; } then to compile and run, you would enter: GitHub - BPI-SINOVOIP/BPI-WiringPi: Supports BananaPi BPI -M1 / M1Plus / M2 / M2P / M3.
Welcome to Bananian Linux - Bananian Linux. Sans titre. Minimal Debian 8 (Jessie) armhf Image using official Debian repositories (no Raspbian dependencies) architecture: ARMv7 logterm supported Linux kernel versions default kernel: 3.4.111 (sunxi) optional kernel: 4.4.7 (mainline) init system: SysVinit (systemd also available in the repository) supporting the Banana Pi (M1), Banana Pi M1+, Banana Pro and BPI-R1 with just one single image separate image for the Banana Pi M2 pre-configured with focus on performance and security consumes less than 25 MB of RAM on default install Docker support (Kernel 4.1 or later) binary compatible with all Raspbian (.deb) packages and binaries temperature probe ('lm-sensors' compatible) bananian-config: set up timezone, locales, hostname, root password, video acceleration, hardware platform, OTG port and expand filesystem bananian-update: upgrade your existing Bananian installation without losing any data or settings.
Advanced Features - Armbian Documentation. If you are running legacy kernel and you want to switch to vanilla, development or vice versa, you can do it this way: wget -q -O - | bash You will be prompted to select and confirm some actions. Jackd and cirrus audio card. Helm getting ARM support! - LinuxMusicians. Raspberry Pi and realtime, low-latency audio. GitHub - igorpecovnik/lib: Armbian build tools. Armbian Documentation. Move Linux Banana Pi SATA Setup. The Banana Pi is a superior mini computer to the Raspberry Pi in terms of raw power. When I read about the Banana Pi I knew it would be a formidable opponent as a home media server, for HTPC serving purposes, the Banana Pi does everything the Raspberry does, just faster.
For those with less patience (sometimes myself) but want to keep their electricity bill down, the BPi is a wise choice. One of my reasons for choosing the Banana Pi was its SATA port and the ability to connect an SSD to run Linux (Debian, Ubuntu, Raspbian) so everything is snappier, overcoming the slow input/output speed of SD cards which significantly limits the RPi. My SATA cable arrived and I got to work, this guide will show you how to partition your SATA hard drive for the Banana Pi, copy the operating system onto the SATA hard drive and configure the SD card to point to the SATA hard drive during the boot process. The Banana Pi has the awesome feature over the Raspberry Pi of having a SATA port. D w n p Change it to. Move Linux Banana Pi SATA Setup. Mkctbbq: Installing ttymidi on Ubuntu Studio. Arduino: Create your own touch sensitive MIDI-keyboard/-controller. Did you ever wish to play an instrument and interact at the same time with another instrument?
As an example: Your audience is listening to your great guitar playing. But you want to give them more than that: With one touch on a piece of fine cutted aluminium foil you can trigger a MIDI control command and add whatever you like to your musical performance: Loops, drums, keyboards... With a little trick you even do not have to touch the foil but only have to wave your hand (or feet) above it to start the MIDI control command. Sounds good but is certainly much too expensive? RPi audio software repository. Raspberry Pi and realtime, low-latency audio. Move Linux Banana Pi SATA Setup. Auto Install Remote Control for Raspberry PI (X11VNC) for non-Geeks. Index of /A20/ Banana Pi Images, Documents,Quick start Download. BananaPro/Pi:How to login to the system - BananaPro/Pi. USB to TTL Serial Cable - Debug / Console Cable for Raspberry Pi ID: 954 - $9.95.
The cable is easiest way ever to connect to your microcontroller/Raspberry Pi/WiFi router serial console port. Inside the big USB plug is a USB<->Serial conversion chip and at the end of the 36" cable are four wire - red power, black ground, white RX into USB port, and green TX out of the USB port. The power pin provides the 5V @ 500mA direct from the USB port and the RX/TX pins are 3.3V level for interfacing with the most common 3.3V logic level chipsets.Because of the separated pin plugs, this cable is ideal for powering and connecting up to the debug/login console on the Raspberry Pi or BeagleBone Black. Connect the pins as shown to power the Pi or BBB and establish the RX/TX link.Also handy for hacking WiFi routers to install alternate OS's, or nearly any other 3.3V logic serial port.
This is easier to use than an FTDI cable in many cases because the wires are separated. Banana Pi Pro Home Media Server Installer + Image.