
Sock Dragon - Free Sewing Pattern. After designed, developed and shared several sock toy sewing patterns with you, here is another sock toy pattrern which is more challenging to sew, Drake the sock dragon.
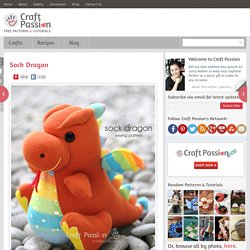
If you have mastered the sock toy sewing skill from the previous sock toy pattern, then probably you will find this not as tough as it looks. Drake the sock dragon is the evolution specie from the Japanese famous reptilian sea monster, Godzilla. Unlike it’s ancestry, Drake is a kindhearted dragon who affectionates on peace and love. Drake no longer an amphibian, it can’t live in the water, instead it develops a pair of wings for him to fly. However, Drake has inherited the furrowed brows, Spiky back and tail and strong foot.
Drake is slightly difficult to sew as it has more parts to sew and attach. Frankly, if you find that sewing all those little parts are so time consuming, you may adapt the wings and spikes to using felt. “Gimme, gimme, gimme a BIG HUG!!!” Mini dog. Tiny Jack Russell terrier of felt.
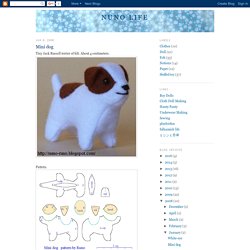
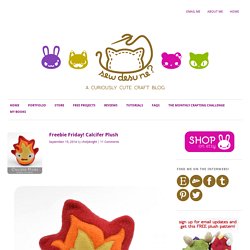
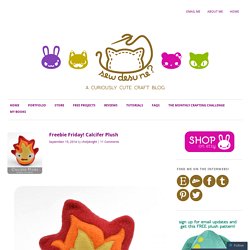
About 4 centimeters. Pattern. Cutting. It needs seam allowance (3 millimeters), except ears. Sew the head and the body. Sew the middle of the body. Sew the speckle of the back. Sew the belly to the body. Freebie Friday! Calcifer Plush. Difficulty: It’s actually pretty easy, but some tight curves and all the appliqué might throw you off if you’re a newbie Makes one 5 1/2” x 6” x 2” plush Materials & Tools: • 1/4 yd. red fleece • Batting • Micro pellets (optional, see step 4) • Matching sewing thread • Basic sewing tools (sewing machine, scissors, iron, needles, pins, fabric marker, seam ripper)Appliqué supplies: • 10” x 7” scrap of orange fleece • 7” x 5” scrap of yellow fleece • 2” x 3” scrap of white appliqué fabric • 1” x 2” scrap of black appliqué fabric • 1” x 2” scrap of red appliqué fabric • 1/8 yd. of 20” wide light or heavy duty fusible web Before you begin: 1.
Print out the project pattern here 2. Lay out the pattern pieces on your fabric and cut them out 3. DIY Fuzzy & Fluffy Soot Sprites Tutorial. Hello Kawaii JapanLovers!
Our resident Kawaii Illustratior Little Miss Paintbrush has prepared this easy & fun tutorial for all My Neighbor Totoro & Spirited Away fans! A pair of googly eyes + ball of black yarn = Susuwatari (Japanese ススワタリ; "wandering soot"), also called Makkuro kurosuke (真っ黒黒助; "pitch-black assistant"), is the name of a fictitious yōkai which was devised by Hayao Miyazaki, drawn by Ghibli studios and known from the famous anime-productions My Neighbor Totoro and Spirited Away where, in the former, they are identified as "black soots" in early subtitles and "soot sprites" or gremlins in the later English dubbed version. DIY Felt Craft Kittens. This project needs to carry a cuteness overload warning label!
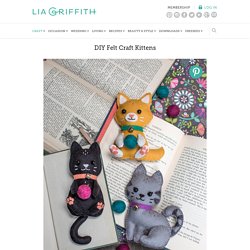
These three little felt craft kittens are such fun to make and might just be the cutest felt animals we have designed yet – it’s ok for me to say that right?! I think it’s the detail in the designs that makes them extra special. The pink paws, the little whiskers, the bead eyes and the teeny bell on the collar all contribute to making these felt kitty cats simply irresistible. Begin by downloading the patterns at the foot of this post and cutting your pieces out of felt. Follow the tutorials below and you will have your own felt craft cats to give as a gift or keep all to yourself! This post is Sponsored by Felt on the Fly Black Cat – Black, Grey, Coral. Freebie Friday! Calcifer Plush.
Difficulty: It’s actually pretty easy, but some tight curves and all the appliqué might throw you off if you’re a newbie Makes one 5 1/2” x 6” x 2” plush Materials & Tools: • 1/4 yd. red fleece • Batting • Micro pellets (optional, see step 4) • Matching sewing thread • Basic sewing tools (sewing machine, scissors, iron, needles, pins, fabric marker, seam ripper)Appliqué supplies: • 10” x 7” scrap of orange fleece • 7” x 5” scrap of yellow fleece • 2” x 3” scrap of white appliqué fabric • 1” x 2” scrap of black appliqué fabric • 1” x 2” scrap of red appliqué fabric • 1/8 yd. of 20” wide light or heavy duty fusible web Before you begin: 1.
Print out the project pattern here 2. Lay out the pattern pieces on your fabric and cut them out 3. DIY Fuzzy & Fluffy Soot Sprites Tutorial. DIY Totoro Plush Tutorial : cheek and stitch. 32.9KEmailShare Hello all!
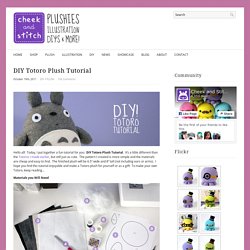
Today, I put together a fun tutorial for you: DIY Totoro Plush Tutorial. It’s a little different than the Totoros I made earlier, but still just as cute. The pattern I created is more simple and the materials are cheap and easy to find. The finished plush will be 6.5″ wide and 8″ tall (not including ears or arms). Ghilie.files.wordpress.com/2012/06/cupcake-pattern-boy1.pdf.
Good Cookie Creations. If you download a pattern, please leave me a comment.
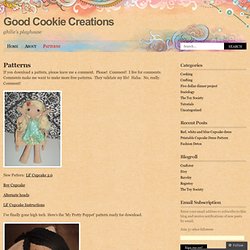
Please! Comment! I live for comments. List of Pokemon Patterns. How to Make a Kawaii Pikachu Plush from Felt. Pikachu!

A very special tutorial. Hopefully its liked by many. Pokeball Plush Tutorial. Sackboy Pattern. Yes, way off topic, but something fun to share.
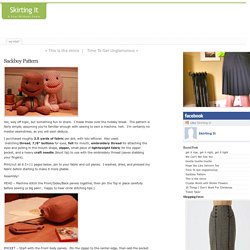
I made these over the holiday break. The pattern is fairly simple, assuming you’re familiar enough with sewing to own a machine. heh. I’m certainly no master seamstress, as you will soon deduce. I purchased roughly 2.5 yards of fabric per doll, with lots leftover. Also used: matching thread, 7/8″ buttons for eyes, felt for mouth, embroidery thread for attaching the eyes and pulling in the mouth shape, zipper, small piece of lightweight fabric for the zipper pocket, and a heavy craft needle (blunt tip) to use with the embroidery thread (saves stabbing your fingers).
Print/cut all 8.5×11 pages below, pin to your fabric and cut pieces. Assembly! HEAD – Machine stitch the Front/Sides/Back panels together, then pin the Top in place carefully before sewing (a big pain!.. POCKET – Start with the Front body panels.