
Hook and Eye Clasp - Basic Wire Working Technique Series. Today I will be sharing how to make a hook and eye clasp.

Why use a handcrafted hook and eye clasp over a ready made clasp? It will add much more interest to your design and give that extra unique quality that transforms it into a piece of wearable art. Tools and Supplies: Chain-nose pliers Round-nose pliers Stepped forming pliers Flush cutters (one side of the cutters are flush and make a straight cut, the other side makes a "V" cut) Small jewelers file Hammer Steel bench block (or something solid to hammer on) Wire: I've used 16 gauge copper for my photos. The picture above shows two pairs of chain-nose pliers, round-nose pliers, and flush cutters.
A note before I start the tutorial: In my photos I did not leave the looped end that will attach to the chain open. Hook Clasp Hammer one end of an 8" wire to flatten it. Place the round-nose pliers at the tip of the flattened area. Curl the wire around the pliers. Your piece should look like this. Use your fingers to bend the wire back towards Eye Clasp. Links: Beaded and Crazy -Tutorial - Basic Wire Working Technique Series. Welcome back to my teaching series featuring basic wire working techniques. I hope you've had a chance to practice the first technique in the series - "Wrapped Loops" - as it is a building block for today's tutorial "Links: Beaded and Crazy". If you missed it, you can check it out here.
Today I will be sharing how to make a few different styles of links; a couple with beads and one without, that I like to call a "crazy" link. The link is an important technique to learn because it will allow you to incorporate uniquely handcrafted chains into your jewelry. Tools and Supplies: Pliers: round-nose and chain-nose Flush cutters (one side of the cutters are flush and make a straight cut, the other side makes a "V" cut) Small jewelers file Wire: I've used copper for my photos.
Beads of your choice Single Beaded Link Begin by making a wrapped loop (click here to refer to my earlier tutorial on wrapped loops). DIY Ring Base « Craft Snob. A lot of you have been asking where to get ring bases for the projects here and here.
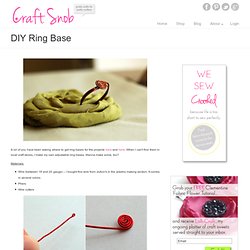
When I can't find them in local craft stores, I make my own adjustable ring bases. Wanna make some, too? Materials: Wire (between 18 and 20 gauge) – I bought this wire from JoAnn's in the jewelry making section. It comes in several colors. Cut a piece of wire 6 inches long. Once the base is made, use E3000 glue or a brad to attach a fabric flower, button, or other fanciful item to the top of the spiral. The Real Deal: It costs less than $0.25 to make one ring base.
Flinkhand.de - Redirect. Anleitung für den Türkenbund mit Bildern und Schablone. Mit einem Türkenbund können auch Besen und sonstige Stiele die zum Splittern neigen gesichert werden.

Äxte und so , können wir da mit vor Zeitigen Verschleiß schützen. Als Verzierung können Türkenbunde auch genutzt werden. Die Tabelle über Buchten und Schläge hilft beim konstruieren des Türkenbund.Das Gitternetz zum Schluß kann man vergrößern und passend ausschneiden. Die Anzahl der Buchten ergeben die Dicke oder den Umfang .Die Anzahl der Schläge ist für die Länge des Türkenbundes verantwortlich In der Tabelle sehen wir in der obersten Zeile die Anzahl der Buchten ,links sind die Schläge aufgeführt.Die Knoten die mit "O "gekenzeichnet sind, können geknotet werden. 5 Buchten x 8 Schläge Um ein einfaches Knüpfgerät zu bauen nehmen wie eine Papprolle (Rohrisolierung aus Schaumstoff eignet sich auch).
Die fünf untere und obere Wendepunkte für das Tauwerk werden durch Stecknadeln dagestellt. Flinkhand.de - Redirect. Perlen - Shop.feines-metall.de Materialien für Kreative mit Schmuckphantasie: Flinkhand.de - Redirect. Funkelkram.de - Perlen Online Shop. Woven_Wire_Trinochopoly_Arm_Ring.pdf (application/pdf-Objekt)