
Crochet Rope Basket. Customisable Crochet Basket I’ve been looking for a basket of specific dimensions for a while without any luck.

Then I saw a circular version of this idea and realised I could make my own! This uses a technique similar to thrumming, where you crochet over another thread to add bulk to a fabric. If you have ever crocheted over your ends to avoid weaving in, this works the same way. In this case I used rope instead of another yarn, which is a lot bulkier but great for adding stiffness and making each row deeper. The resulting basket is rectangular with rounded corners. Finished article You will need: Length of rope (mine was 38m in length and 6mm diameter, for a 22x42x17cm basket)Stash yarn (I used 310m of Patons 100% cotton 4ply in a cream colourway)Size 5.00mm crochet hook (use a metal hook if possible as the work is quite stiff), or larger if your rope is thicker.
Pattern: Foundation row: Decide what size base you need. Ch 30 (or number required for you desired dimensions) +2, turn Secured end. Esdovi.com ( El Señor de los Ovillos ) Esta es la segunda parte de la realización de los zapatos de ganchillo.
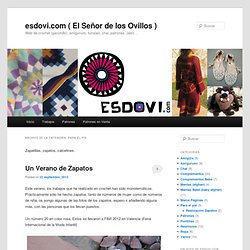
En la primera parte expliqué los materiales y herramientas necesarias y la forma de realizar la plantilla. En esta segunda parte voy a explicar la parte de ganchillo y la parte de realización de la suela, viendo el resultado final. Una vez que se tiene la plantilla con los agujeros realizados, podemos empezar con la parte de ganchillo propiamente dicha. En primer lugar realizo la parte del empeine del zapato, esta parte se hace independientemente y luego se une a la parte que está realizada en la suela.
Después de la parte del empeine, se empieza a realizar la parte delantera del zapato, ahí ya se va realizando la labor haciendo uso de la plantilla, pasando el hilo por los agujeros de la plantilla. Cuando se termina la parte delantera, se cose la parte del empeine a la parte delantera, de esta forma ya se tiene toda la parte delantera del zapato terminada. My Rose Valley: ♥ My Tutorials. How To: Make clean, even stripes in the round. Making stripes in the round is such a challenge.
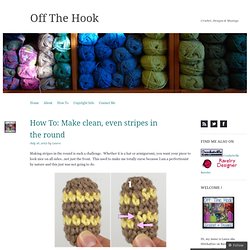
Whether it is a hat or armigurumi, you want your piece to look nice on all sides…not just the front. This used to make me totally curse because I am a perfectionist by nature and this just was not going to do. From Planet June Blog Below is an excellent video by June Gilbank of Planet June which shows her method for making perfect stripes. I personally use her invisible method when making most things in the round as I am cutting off a color for a new one anyway. While she shows this using single crochet, I have used it with hdc and dc stitches. Like this: Like Loading... My Rose Valley. How to Crochet the Slip Stitch. The slip stitch (abbreviated sl st) is the flattest (or smallest) of all the crochet stitches.
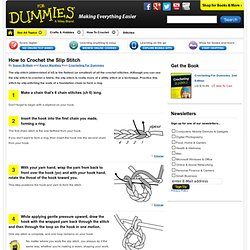
Although you can use the slip stitch to crochet a fabric, the slip stitch is really more of a utility stitch or a technique. Practice this stitch by slip-stitching the ends of a foundation chain to form a ring. Make a chain that's 6 chain stitches (ch 6) long. Don't forget to begin with a slipknot on your hook. Insert the hook into the first chain you made, forming a ring. The first chain stitch is the one farthest from your hook.
If you don't want to form a ring, then insert the hook into the second chain from your hook. With your yarn hand, wrap the yarn from back to front over the hook (yo) and with your hook hand, rotate the throat of the hook toward you. This step positions the hook and yarn to form the stitch. While applying gentle pressure upward, draw the hook with the wrapped yarn back through the stitch and then through the loop on the hook in one motion.