
RF Sniffer – open gates, cars, and RF remote controlled devices with ease. Part 1 of 2: Home Automation with Arduino and OpenHAB – Wireless Sensor Integration. Home automation and sensing using Arduino, OpenHAB, and MQTT.
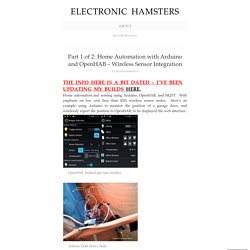
With emphasis on low cost (less than $20) wireless sensor nodes. Here’s an example using Arduino to monitor the position of a garage door, and wirelessly report the position to OpenHAB, to be displayed the web interface. OpenHAB Android app user interface Arduino Field Device Node. XRF Wireless RF Radio UART RS232 Serial Data Module. 73-4604.pdf. Achieving 3.4km with default XRF antennas - OpenMicros.org. When I received my 4 XRF radio modules I did some initial testing, worked flawlessly from the very beginning and communicated through thick stone walls like they weren't there, so for fun I set out to see just how far their signal would travel in a line-of-sight scenario.
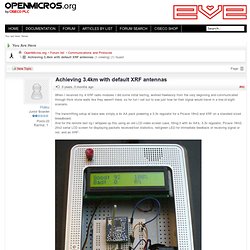
The transmitting setup at base was simply a 4x AA pack powering a 3.3v regulator for a Picaxe 18m2 and XRF on a standard sized breadboard. And for the remote test rig I whipped up this using an old LCD video screen case, filling it with 4x AA's, 3.3v regulator, Picaxe 18m2, 20x2 serial LCD screen for displaying packets received/lost statistics, red/green LED for immediate feedback of receiving signal or not, and an XRF: (bottom button=power, top button=LCD backlight for night tests) The XRFs used in the long range tests had default 82mm whip antennas and all default settings, however I did drop the radio data rate down to 1.2k because it apparently increases radio sensitivity. Low power UHF modules. LightwaveRF/Siemens/JSJS protocol - help? - OpenMicros.org. Hi all,
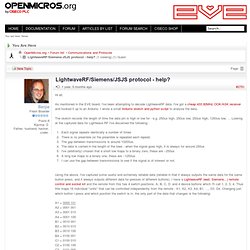
LightwaveRF RF Protocol - about:benjie. Following on from yesterday’s success, I’ve done a big data capture of various commands and have figured out (mostly) the protocol.
As you saw yesterday, each command comprises 10 bytes. But actually, each of these only ever take one of 16 values, thus they really represent nibbles. Reverse Engineering LightwaveRF - about:benjie. I’ve been stumped for a little while trying to decode LightwaveRF data using a cheap 433.92MHz receiver and a Arduino Nano.

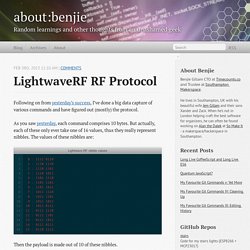
Today I’ve finally cracked it! Thanks to Geek Grandad’s LightwaveRF GitHub repo I finally figured out the missing link - my zeros were not zeros, but instead 10s! Sure, this doesn’t make sense yet, but let me explain. The setup To capture the radio data, I used a cheap 433.92MHz receiver hooked up to an Arduino Nano. For example, if it was low for 250us (microseconds) then high for 350us then low for 250us, the sketch would output the equivalent of “250, 350, 250”.
In the image above the regular bits is the sensible data (4 different button presses, each automatically repeated to help with collisions) and the areas in-between are just noise. More 433Mhz RF Hacking. I touched on the smoke detectors and door/window sensors I ordered last week: – here are a few more details.

The smoke detectors were £5.75 each – (all now sold out, but more available on a separate listing from the same seller – The door/window sensors were £2.50 each – (shop link if/when the listing ends – The RF signals broadcast by both devices are not decoded by the RFXCom receiver/transceiver RFXtrx433. EXP TECH. Wireless Arduino-compatible miniatures. The IoT platform GroveStreams is a new IoT platform in the cloud designed to interact with users and remote M2M networks.

Setup Nordic nRF24L01 RF modules to both Arduino UNO and Raspberry Pi. In my process of building a Wireless Sensor Network, I obtained a few low cost RF module from Inhaos that are compatible with Nordic Semiconductor nRF24L01.
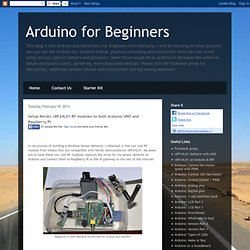
My plans are to have these low cost RF modules replaces the wires for my sensor network on Arduino and connect them to Raspberry Pi as the IP gateway to the rest of the Internet. This entry will show you on how to setup both Arduino UNO & Raspberry Pi to connect to these nRF24L01 modules. Some basic information on these low cost RF modules, they communicate using SPI to the microcontroller and works on raw speed of 250Kbps, 1Mbps and 2Mbps. I'm using the following hardware & software:- Getting Started with nRF24L01+ on Arduino. Nordic’s nRF24L01+ 2.4GHz RF radios are a great way to communicate wirelessly between Arduino’s.
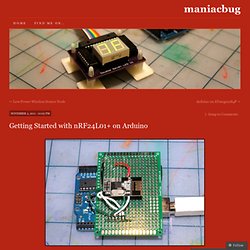
They’re cheap, and powerful. Unfortunately, they can be a little daunting to beginners to get started. Today, I want to make it easy for total beginners to get up and running on nRF24L01+ radios quickly and easily. Stuff we need First, we have to go shopping. Reasonable substitutes for this stuff can also be found at Sparkfun if you like spending a lot more money. Preparation We only need one of the 2×4 pin female headers. Here’s what it looks like all ready to go.
Solder it up The 8-pin male header goes in position C09-16.The 6-pin male header goes in position V13-18.The 2×4-pin male header goes in position K16-N15.The wires are connected as follows: Here’s what it looks like with all the wires in place, up close and personal. Software Get the RF24 library from github.
From the File menu, select “Examples”, then “RF24″, and finally “GettingStarted”.