...love Maegan: DIY Tie Dye Nails ~ Red, White, & Blue Manicure for the 4th. I’d been planning a festive red, white, & blue manicure for the 4th of July but hadn’t really come up with any original ideas until I featured a fun tie dye manicure tutorial on BlogHer Style over the weekend and was instantly hit with inspiration. But let me just warn you… this is not a project for the impatient or short-tempered, and why I decided to tie dye only six of my ten nails.
However, my nails are very short at the moment and this, along with many nail art techniques are far easier with a larger canvas to paint on. Obviously then, my thumbs turned out the best. But I think with a little practice, the results could be even better, though I do love the final product and how they kind of look like stars AND stripes.
Here’s what I used… 1. NAILED IT! Photos + post design by Kristin Ess Who doesn’t love a soft, faded floral pattern?
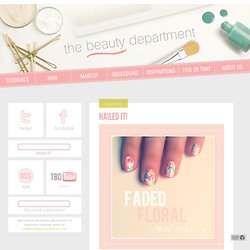
You can basically do this mani in any color combo you want– we chose a spring-y palette. Here’s how you get the look: YOU WILL NEED: Nail polish remover, 4 small paint brushes, a plate or something to put your polish drops on, a white nail polish + 3 of your favorite polish colors that look good together. Place a dot of each color on your plate. Good luck with your pretty faded florals and as always, tweet us a picture when you’re done! (Special thanks to Kimberly, our new nail intern for showing us this technique!!)
Owl Nail Art Tutorial. For this design, you will need several colors of polish, I used OPI San-Tan-Tonio, Color Club Almost Famous, Color Club Twiggie, Sally Hanson Lacey Lilac and a Black and white. YOu will also need dotting tools, or your prefered method of making dots. I used a small detail brush for some elements, but you could also just use the dotting tools or a toothpick. I started with a base coat of San Tan Tonio, this color is prefection and a must have, in my opinion! I then used a large dotting tool to add two large circles connecting in the middle, this will make the mask for the owl, I used the same color and a detail brush to add the wings. Next I added in white with the large dotting tool. The Usinga smaller tool, I added in the black to finish up the eyes I used yellow to add the little feet and a beak.
12 Amazing DIY Nail Art Designs Using Scotch Tape. Beauty By TotallyLoveIt | If you’ve ever wondered how girls get perfectly geometric nail art, the execution probably involved something as simple as cut-up Scotch tape.
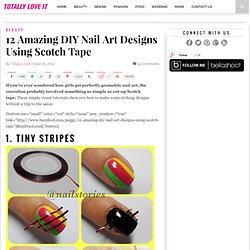
These simple visual tutorials show you how to make some striking designs without a trip to the salon. [button size="small" color="red" style="none" new_window="true" link=" Click here for the full tutorial. Click here for the full tutorial. Click here for the full tutorial. Patchwork Colour Block Tutorial. A little while ago, Sally Hansen got in touch to see if I'd like to be a Nail Art Ambassador for their I ♥ Nail Art campaign.

As you'll know if you've been reading for a while, my undying love for Sally Hansen is no big secret around here so of course I was more than happy to get involved! Each month there's a new theme and you can submit your nail creations for the chance to win amazing prizes. I'll be bringing you two tutorials every month and for the month of April, the theme is Colour Blocking! Before you start, make sure you have everything you need: A quick drying top coat. Some Scotch tape, or anything similar. Start by painting on your base colour, this is the colour that will show at the sides. Sticking scotch tape to wet nails is a big no no so wait until it's completely dry before moving on. Apply one piece of scotch tape diagonally across your nail... ... and then another at a right angle to that piece. Apply the second batch of tape in the same way. Useful tips on DIY nails.
Two pictures show you how to make a unique nails design by yourself!
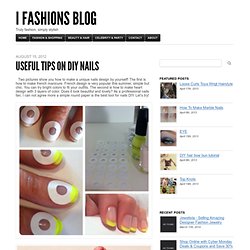
The first is how to make french manicure. French design is very popular this summer, simple but chic. You can try bright colors to fit your outfits. The second is how to make heart design with 3 layers of color. Does it look beautiful and lovely? >How-To: Newsprint Manicure « A Pretty Penny. I saw this newsprint manicure over on The Daily Nail and thought it was adorable (especially for bookworms and word lovers like myself).

I did a little Google detective work to see how to recreate it, and was surprised at how easy it is! All of the tutorials I found called for vodka or other clear distilled spirits, but we were fresh out. I used isopropyl alcohol instead, and it seemed to get the job done.