

Stars for Streetlights. Things From Diva "Tutorial for graduation skin + hair + make. Prometi que o tutorial de hoje ia ser caprichado, não foi?
Nail Art Tutorial: Pink + Black Designs. Materials needed: -Pink Nail Polish -Black Nail Polish -Nail design tool (with round pointy metal to create dots) -Base coat -Top coat or dry polish Step 1: Brush the pink polish onto the tip of the nails like so... step 2: Use the tool and dip the end into the black nail polish.
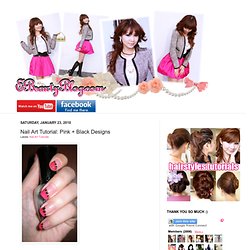
***I found it's actually easier if you place a little bit of the nail polish onto your hand or napkin and use the tool to dip from there*** Step 3: Start making dots on your nails along the pink line... PIN IT UP, GIRL. Our email box is literally flooded with requests for updos so here’s a fun one to get us all going!
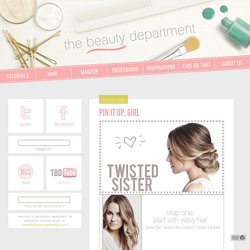
This is always a favorite for attending an event. This updo looks gorgeous on any hair color but particularly amazing with hilighted hair because it gives the hair lots of depth and dimension. For lack of a better word, I love the way it becomes “swirly”. Best thing is; it’s easy to do, gorgeous and keeps your hair out of your way for the night. I made this a printable tutorial, so all of the steps are next to the photos. Tools you’ll need: curling iron (to prep the hair with waves), sectioning clips, teasing comb or brush, clear elastic rubber band, bobby pins, light to medium holding hairspray (to mist over at the end). Tags: bride, bridesmaid, date, hair, hair style, hair tutorial, how to, kristin ess, kristin ess hair, lauren conrad, prom, sister, special occasion hair, the beauty department, thebeautydepartment.com, tutorial, twisted, updo, wedding, wedding hairstyles.
How to make wrapped leather bracelets « Rings and Things. Triple-wrap leather bracelet with blue tigereye beads Let me begin by stating the obvious – this style of wrapped leather bracelet is EVERYWHERE this season.
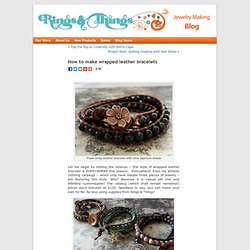
Everywhere! Even my athletic clothing catalogs – which only have maybe three pieces of jewelry – are featuring this style. Why? Because it is casual yet chic and infinitely customizable! Five different leather wrapped gemstone bracelets designs: green opal, mookaite, African turquoise, hematite and rhodonite The supply list is pretty short: OutsaPop Trashion recycled style DIY fashion eco sustainable refashion blog.
R4y2r.jpg (JPEG Image, 788x3110 pixels) How-To: The Cascade/Waterfall Braid. The waterfall braid also known as the cascade braid recently exploded as the new "trend braid" of the season.

The waterfall effect looks cool and complex, but it's easier to style than you think. Give this beautiful braid a try when Beautylish takes you through the how-to! Section Off The waterfall braid works best on straight or loose waves. Brush out all the knots with a wide tooth comb. Braid As Usual Braid your strands regularly three times, beginning from the right strand. Drop the Strand This is where it gets tricky. Step and Repeat Repeat this process—French braid the left strand, drop the right strand, and pick up an adjacent new piece. Pin and Secure Once you've reached a comfortable point to stop your braid, secure it to your scalp with bobby pins. Stainless Steel Facial Hair Remover. Para habilitar los descuentos por volumen en este sitio, utilice el código de cupón: BULKRATE durante el pago.
Verá aparecer un descuento aplicado en la parte inferior de la cesta de la compra. Precios competitivos disponibles. Póngase en contacto con nosotros para más detalles. ¿Qué es el Bulk Rate? BulkRate es un sistema semi-mayorista con artículos con precios separados de la venta al por menor. Welcome - asuyeta [ah-soo-yeh-tah] clothes & accessories. handmade with love. Make-up Magnet Board. We all know with craft blogs that original ideas are often hard to come by, we find ideas we love and make them our own but we didn't come up with the idea ourselves.
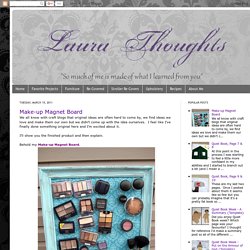
I feel like I've finally done something original here and I'm excited about it. I'll show you the finished product and then explain. Behold my Make-up Magnet Board. I have a friend who is beautiful and stylish and has always loved make-up but recently took a course that intensified her love. Her renewed interest has worn off on me and it made me remember eye shadows I'd hidden away that were gathering dust.
The basket was a mess and I was overwhelmed with all my choices never knowing what to use, digging through to see what I had and find what I wanted was a pain. I painted it (The hard way, with a brush instead of spray paint. I went to the hardware store and picked up some metal and had them cut it to fit inside my frame. Here comes the brilliant part though. Next I wanted a place to store my brushes and liners though. Headband Makeover {How to Make a Bow} Mrs.
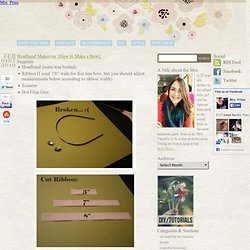
Priss Headband Makeover {How to Make a Bow} Feb01st2010.