
Vray grass tutorial part 1 « Peter Guthrie. The 3 individual blades of grass were modeled as a plane object with 8x1 segments, collapsed to an editable poly and then I moved the vertices into position in the left and front viewports.
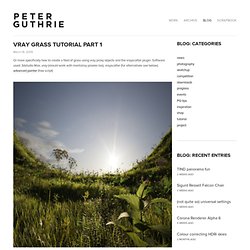
You could use a bend modifier as well, just make sure the final object has as few polygons as you can get away with. I then used a very handy script called advanced painter to 'paint' about 100 blades of grass over a 1m x 1m plane object. Set advanced painter to randomize mode, tell it to scatter as copies (not instances), pick the 3 blades of grass as the objects to be scattered and set the min and max scale and z rotation values to something like 0.75 - 1.25 and -45deg +45deg. Then select the plane object, click paint and paint the grass on until it looks like a natural clump of grass. I usually scatter some smaller blades round the circumference of the circle to the clumps blend together better when rendered. 3dsmax and Vray Rocks Tutorial Part 1.
V-Ray Studio Setup Pro. CGschool releases free 90-minute Onyx Trees tutorial. Proxys. 3D Ground Cover Modeling in 3D Studio Max. Following a great thread in the finished works section of the forums, Chris (blowback) was very kind to send me a ‘Making-Of’ article about the 3D modeling of the ground cover in the architectural visualization of ‘Jeff’s House’.
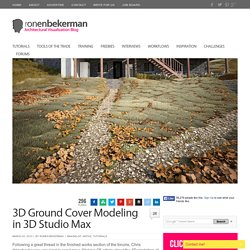
I hope you’ll enjoy this article and learn from it as much as I did! I started the process of modeling the ground with a simple plane, adding a displacement modifier to it. To the bitmap slot of that modifier I then added a ‘Height map’ that I manually created in Photoshop.