
Water Balloon flip flops. I thought It would be Fun for another Flip Flop Tutorial this week!

Remember my Scrappy Flip Flops Last Week? Summer is in full force, and it's time to head to the pool. Today I'm going to share with you how to up-do a plain pair of little girl flip flops and make them full of summer fun! Whats more fun than water balloons? Here is how you can make these ..... Supplies Needed: Water balloons and flip flops. Wait there is one more thing.. Remove metal prong from center of clip. Mom said don't run with scissors.... but she did not mention glitter! Anthro Necklace Week – Paisley Rebirth Necklace.
Anthro Necklace Week Day 4!
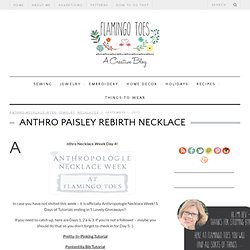
In case you have not visited this week – it is officially Anthropologie Necklace Week! 5 Days of Tutorials ending in 5 Lovely Giveaways!! If you need to catch up, here are Days 1, 2 a & 3. If you’re not a follower – maybe you should do that so you don’t forget to check in for Day 5. :) Pretty-In-Pinking Tutorial Pontentilla Bib Tutorial Narcissus Net Tutorial Today we are creating the Adorable Paisley Rebirth Necklace.
Where on earth do they come up with the names for these?? Here is mine: And here is theirs: This one is a blast to do. I went with a little darker colors than they did because I just fell in love with the fabric in the scarf I found. Here’s your handy dandy tutorial!! Materials: Sewing Machine (you can hand sew it, it will just take longer) Supplies: Scarf or lightweight fabric (you need enough for a 33″ x 12″ piece)Silver chain – 4 yardsSmall pieces of different chains2 Large beaded pieces or pins (I bought these at Michaels)Needle and matching thread. Hardware Store Necklace Tutorial. April 27, 2011 7:52 am I was really inspired by a couple of these necklaces that I had seen on the runways this year.
After taking a closer look at them I knew I could make something similar. Here’s what you’ll need from your local hardware store: -varying sized washers -bike chain -gold metal wire I also needed extra gold chain. First, tie a ribbon to make your bike chain connect. This will be the strong base of your necklace. Spray them gold on both sides. Now, attach a piece of your chain to the bike chain and begin stringing the washers by wrapping around them once. Keep stringing them until you get the heaviness you want for your look. Look how great the completed project looks! (my sister, Francesca was here from Arizona so I got a fresh faced model!) This entire project cost me about $7 and took me about 20 minutes. Who knew bike chains and washers could be so chic? This tutorial is also over at MODE Bay Area today along with some other great articles!
DIY Woven Chain Bracelet. Chain link bracelets, with colorful threads woven through them, have been popping up here and there.
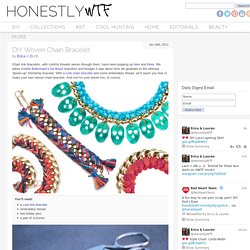
We adore Aurèlie Bidermann‘s Do Brazil bracelets and thought it was about time we graduate to the ultimate “grown-up” friendship bracelet. With a curb chain bracelet and some embroidery thread, we’ll teach you how to make your own woven chain bracelet. And one for your bestie too, of course. You’ll need:a curb link braceletembroidery threadtwo bobby pinsa pair of scissors Cut 2 sets of 15 strands of embroidery thread, with each strand measuring four times the length of the bracelet. Lay the second color (blue) over the first color (coral). Repeat the steps until you reach the end of the bracelet.
(top images from here and here, rest of images by Honestly…WTF) Chapstick Tutorial, Templet & Free Pinkalicious Label. One of my daughter's favorite things is Chapstick.
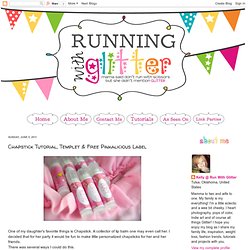
A collector of lip balm one may even call her. I decided that for her party it would be fun to make little personalized chapsticks for her and her friends. There was several ways I could do this.Martha Stewart has a great tutorial on making lip gloss hereI could order the supplies from CandleLynnSupplies on Etsy to do a little DIYI could buy Chapstick and replace the labels I decide to "sorta" make my own the #2 Etsy way. Here's how: Gather Supplies-Lip Balm Base, tubes, and flavorMelt your base in the microwave. Now for the Wrappers: I have already been warned by Aubrey's 5 year old boy friend that he will not eat a pink cupcake so I decided to spare her the embarrassment and make a few boy labels too. lol To make the wrappers I simply found images online and edited them in Picnik. Here is the Pinkalicious chapstick label I made. This was a huge time saver!
To attach my labels I used standard packing tape and plain printer paper..