
Establishing Your Grid In Photoshop - Smashing Magazine. Advertisement Creating a grid is typically one of the very first things you do when starting a design comp.

After all, it provides the basic structure on which the rest of your design will lie. In this article, we’ll provide two different methods for efficiently establishing a grid. These methods enable you to quickly and smartly form a grid so that you can spend more time designing. Method 1 The first method uses GuideGuide1 by Cameron McEfee2 to set up vertical columns. Set Up Your Grid in 5 Seconds Determine the margins, number of columns and gutter widths. An example of 12 columns with 20-pixel gutters and margins set to 120 pixels. You can also set a baseline grid this way, but you’d end up with a lot of guides. Method & Craft’s Extensible Baseline Grid Here is a brief summary of the steps for setting up an extensible baseline grid. Establish the grid’s baseline value, then create your pattern template. Adjust the opacity as desired. Advantages Drawbacks Method 2 Concluding Thoughts (al)
25 Amazing Photoshop Text Effects Tutorials. Photoshop users often want to create unique and interesting text effects to take their work to the next level.

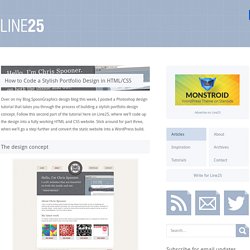
Photoshop has plenty of potential here, and fortunately there are a lot of great tutorials out there that lead you step-by-step through the process of creating amazing text effects. Looking for hosting? WPEngine offers secure managed WordPress hosting. You’ll get expert WordPress support, automatic backups, and caching for fast page loads. Visit WPEngine. How to Code a Stylish Portfolio Design in HTML/CSS. Over on my Blog.SpoonGraphics design blog this week, I posted a Photoshop design tutorial that takes you through the process of building a stylish portfolio design concept.

Follow this second part of the tutorial here on Line25, where we’ll code up the design into a fully working HTML and CSS website. Stick around for part three, when we’ll go a step further and convert the static website into a WordPress build. If you missed the post on Blog.SpoonGraphics, head over to find out how this design was put together in Photoshop. When you’re ready, continue on to start part two: The HTML and CSS. View part one: Creating the PSD concept Before coding up the website, we need to export a series of image graphics from the Photoshop concept.
Another image that needs to be exported is the logo. Toggle off the text and button layers from the header and export a selection of the grey background. <! The HTML page begins with a typical document structure comprising of the Doctype, head and body. Create an Extremely Simple Dark Web Design in Photoshop. This Photoshop web design tutorial will walk you through the process of making a clean, modern, dark-themed website layout from scratch.

The layout features an almost pitch-black color theme with some bright, glowing elements for contrast. Preview Click the following image to see the design in full size. Tutorial Resources PSD: Colorful Glowing Orbs by Richard Carpenter (GraphicRiver)Icons: Practika: A Free Icon Set by DryIcons (Smashing Magazine)Icons: WooFunction by Liam McKay (WooThemes)Stock Graphic: iPad by Kevin (deviantArt) Step 1: Set Up the Canvas Create a new 1200x1165px document (Ctrl/Cmd + N) with Background Contents set to Transparent.
The web layout we’re going to be making will have a width of 950px, so to ensure our layout contents stay inside this width, let us set up two Photoshop guides. Use the same process to add a vertical guide at 1075px. You should have something that looks like this: Step 2: Create the Layout’s Background Step 3: Create the Layout’s Header Drop Shadow. Modular Grid Pattern. 20 Excellent Web Design Tutorials Using Photoshop.