
Install Openmediavault On Debian Squeeze. Introduction. Installation d’OpenMediavault depuis Debian. I.
Présentation OpenMediaVault est une distribution orientée NAS (Network Attached Storage) créée par le développeur Volk qui est un ancien développeur de FreeNAS et de Debian. C’est une distribution nouvelle mais prometteuse basée sur Debian Squeeze, la plupart des fonctionnalités et des protocoles utiles pour un NAS y sont supportés. Dans ce tutoriel, nous allons voir comment installer OpenMediaVault depuis une machine Debian déjà installée. Open Media Vault – Set Up. Set Up So we need to log into the system, remember the IP address from before.
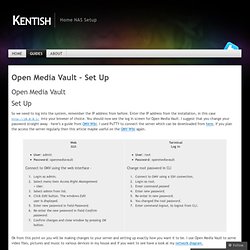
Enter the IP address from the installation, in this case into your browser of choice. You should now see the log in screen for Open Media Vault. I suggest that you change your password straight away – here’s a guide from OMV Wiki. I used PuTTY to connect the server which can be downloaded from here, if you plan the access the server regularly then this article maybe useful on the OMV Wiki again. Ok from this point on you will be making changes to your server and setting up exactly how you want it to be. If you ever forget the GUI password then log in via SSH and excute The following command is very useful if you forget the GUI logon. omv-firstaid. Build your own NAS device for free using OpenMediaVault.
For a long time now I’ve been experimenting with different hardware and software solutions, looking for an all purpose storage server I could use both at home and in the office.
At home I’ve basically just been after a centralised store for my photos, movies and documents with a level of integration that would also allow me to stream content to various different devices. In the office we need a bit more, so support for technologies such as Rsync, SSH, iSCSI, RAID drives and NFS have all been on my wish list. There has been a steady supply of devices that have caught my eye and through supporting our customers using BackupAssist I’ve had the pleasure/ pain of experiencing quite a few.
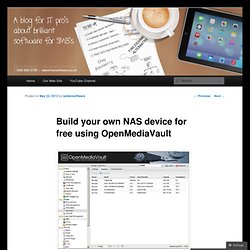
I’ve also tried out several software solutions including FreeNAS, OpenE Ubuntu server and even Windows Storage Server. All very good solutions but each with their own foibles. Build your own NAS part 1: Configuring storage in OpenMediaVault. Following on from my last post where I mentioned this fantastically simple software for creating your own NAS (ideal for BackupAssist‘s Rsync feature), in this post I’m going to take things a step further and outline how to go about setting it up.
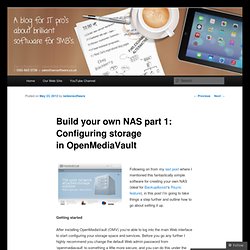
Getting started After installing OpenMediaVault (OMV) you’re able to log into the main Web interface to start configuring your storage space and services. Before you go any further I highly recommend you change the default Web admin password from ‘openmediavault’ to something a little more secure, and you can do this under the General settings tab. Allocating your disks and storage space Our next task is set up the physical disks we plan to use in OMV. OMV includes built in software RAID support for spanning, mirroring and even striping, so if you have several drives you want to add together to form a resilient volume, there’s plenty of options there to tinker with. Untitled. OpenMediaVault. View forum - Installation of OpenMediaVault. Openmediavault – Setup your own NAS(Network Attached Storage) box in minutes. OpenMediaVault is a Network-Attached Storage (NAS) solution based on Debian Linux.

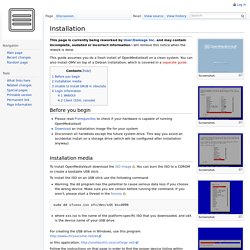
It contains services like SSH, (S)FTP, SMB/CIFS, DAAP media server, rsync, BitTorrent and many more. OpenMediaVault is primarily designed to be used in home environments or small home offices, but is not limited to those scenarios. We can use this distribution in large scale environments if we have sufficient hardware. It is simple and easy to manage via Web console and everyone can install and administrate a Network-Attached Storage without deeper knowledge. Installation - OpenMediaVault. Screenshot: This page is currently being reworked by User:Damage Inc. and may contain incomplete, oudated or incorrect information I will remove this notice when the rework is done.
Ajout de plugins dans OpenMediaVault. De base, avec OpenMediaVault, vous avez quelques plugins intéressants pour compléter votre serveur : cups, clamav, daap ( itunes ), ldap, lvm etc…Tout cela, paramétrable par l’interface graphique.
Bref, très simple comme on l’aime ! Mais cette liste est très restreinte et vous aurez peut être envie d’ajouter d’autres services, et là, vous devez le faire manuellement, ou pas Il existe un site nommé OMV-Plugins qui vous permet d’ajouter encore d’autres services. Je citerai : VPN, transmission, subversion, git, mysql, mini-dlna, autoshutdown etc… Voici comment faire pour en bénéficier : Rendez vous sur le site le fichier deb correspondant à votre version de OpenMediaVault,Dans votre interface web OMV, sous « Système » – « Plugins », cliquez sur « Télécharger »,Sélectionner le fichier deb téléchargé,Une fois le dépôt installé, cliquez sur l’icône « Vérifier ».
A vous les joies du paramétrage facile ! Open Media Vault - Une distrib libre pour monter votre propre NAS. Open Media Vault – Une distrib libre pour monter votre propre NAS Pour monter vous-même votre petit NAS open source, je vous avais déjà parlé de FreeNAS.
Index of /pool/main/o/ OpenMediaVault. The installation images can be found here.
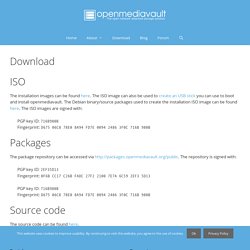
The ISO image can also be used to create an USB stick you can use to boot and install openmediavault. The Debian binary/source packages used to create the installation ISO image can be found here. The ISO images are signed with: OpenMediaVault.