
Using command-line Subversion. Getting started with command-line Subversion If you are participating in a development project that is using Subversion for version control, you will need to use Subversion to access and change project source files. You can browse the source code online to view a project's directory structure and files by clicking on the Subversion link in the left navigation pane for the project. The Subversion page displays with three subdirectories: branches/, tags/, trunk/ and one README file.
The README file gives a top level view of the Subversion repository. You can click Access options to view the Subversion client setup instructions. Getting a local working copy for your project : svn checkout To get a "working copy" of the latest source files, you must check out the source files, a process which copies the files onto your system from the repository. Svn checkout (projectname) --username [type-user-name-here] Enter your user password when prompted. Working with files in the Subversion repository. Redmine. Redmine est un système Open Source de gestion de projet en mode web.
Il est développé en ruby grâce au framework ruby on rails. Les fonctionnalités : gestion multi-projets ; gestion fine des droits utilisateurs définis par des rôles ; rapports de bogues, demandes d'évolutions ; Wiki multi-projets ; forums multi-projets ; news accessibles par RSS / ATOM ; notifications par courriel ; gestion de feuilles de route, GANTT, calendrier ; historique ; intégration avec divers suivis de versions : SVN, CVS, Mercurial, Git, Bazaar & Darcs ; identification possible via LDAP ; multilingue (25 langues disponibles pour la 0.7.0) ; prise en charge de plusieurs bases de données : MySQL, PostgreSQL ou SQLite. Installation Créer un utilisateur spécifique Pour des raisons de sécurité, il est préfèrable de créer un utilisateur spécifique à Redmine pour utiliser la base :
Installer Redmine sous Ubuntu. Redmine est un gestionnaire de projet technique exploitant Ruby on Rails et très inspiré de Trac, mais qui le dépasse fonctionnellement sur plusieurs points, notamment avec une gestion multiprojets qui fait cruellement défaut à son inspirateur.
Voyons comment installer et déployer la dernière version de la branche stable (0.8) sur une Ubuntu Hardy Heron LTS[1]. Toutes les opérations décrites ci-dessous se font en root, mais libre à vous d’utiliser sudo à chaque fois, ou une fois pour toutes en lançant la commande sudo -s. En préambule, on installe les quelques paquets qui nous seront nécessaires[2] : RedmineInstall. This is the installation documentation for Redmine 1.4.0 and higher.
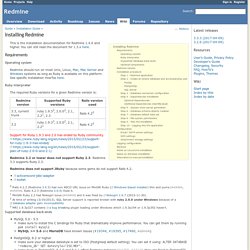
You can still read the document for 1.3.x here. Requirements¶ Operating system¶ Redmine should run on most Unix, Linux, Mac, Mac Server and Windows systems as long as Ruby is available on this platform. See specific installation HowTos here. Ruby interpreter¶ The required Ruby versions for a given Redmine version is: Support for Ruby 1.9.3 and 2.0 has ended by Ruby community. Redmine 3.2 or lower does not support Ruby 2.3. Install Subversion with Web Access on Ubuntu. This article covers installing subversion with the apache module so that it can be easily accessed from other systems on a public network.

If you want a more secure svn server, you could use svnserve+ssh, which isn’t covered in this article. To install subversion, open a terminal and run the following command: sudo apt-get install subversion libapache2-svn We’re going to create the subversion repository in /svn, although you should choose a location that has a good amount of space. sudo svnadmin create /svn Next we’ll need to edit the configuration file for the subversion webdav module. Sudo gedit /etc/apache2/mods-enabled/dav_svn.conf The Location element in the configuration file dictates the root directory where subversion will be acessible from, for instance: The DAV line needs to be uncommented to enable the dav module # Uncomment this to enable the repository,DAV svn The SVNPath line should be set to the same place your created the repository with the svnadmin command.
Linux and UNIX cp command help. Description cp syntax cp Quick Examples General Overview Options cp Examples Related commands Linux and Unix main page Description The cp command is used to make copies of files and directories. cp syntax cp [OPTION]...
[-T] SOURCE DEST cp [OPTION]... Cp [OPTION]... Cp quick examples Make a copy of a file into the same directory: cp origfile newfile Creates a copy of the file in the working directory named origfile. CAREFUL! If you want to be prompted before overwriting a file, use the -i (interactive) option. Cp -i oldfile newfile If newfile already exists, you will be prompted: cp: overwrite ‘newfile’? If you type y (or yes, Y, YES, or any other combination of upper and lowercase of these), then newfile will be overwritten with a copy of origfile.