
How-to Fashion Sketch, Threadbanger Projects. Dyi woven top. Circle Knit Shirt Tutorial. Post by Raechel of www.raechelmyers.com So.

I have a favorite shirt. I’ll be honest, it’s probably my favorite because it’s the most comfortable shirt I own, AND my husband bought it for me and he thinks I look cute in it. That’s really all I need. Oh, and it’s a great backdrop for a pretty necklace! Anyway, I wear it with a long tank top, leggings and either boots or black Toms, depending on the weather. Learn How to Sew a Giraffe Doll at WomansDay.com - Free Craft Ideas - Womans Day - StumbleUpon. Project excerpted from More Softies Only a Mother Could Love: 22 Hapless but Lovable Friends to Sew and Crochet I based this giraffe pattern on a collage I made out of vintage paper.
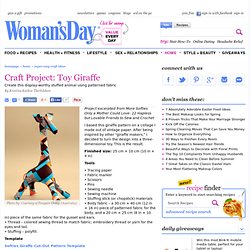
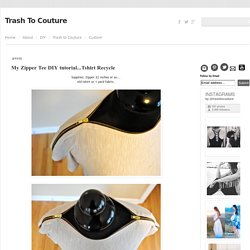
After being inspired by other "giraffe makers,” I decided to turn the design into a three-dimensional toy. This is the result. Finished size: 25 cm × 10 cm (10 in × 4 in) Tools • Tracing paper • Fabric marker • Scissors • Pins • Sewing needle • Sewing machine • Stuffing stick (or chopstick) materials • Body fabric – a 30 cm × 40 cm (12 in × 16 in) piece of patterned fabric for the body, and a 20 cm × 25 cm (8 in × 10 in) piece of the same fabric for the gusset and ears. DIY: Banana Republic Braided Neck Tee Shirt. My Zipper Tee DIY tutorial...Tshirt Recycle. Supplies: Zipper 22 inches or so... old tshirt or 1 yard fabric.
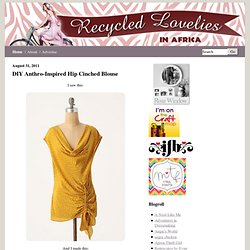
» DIY Anthro-Inspired Hip Cinched Blouse. I saw this: And I made this: All you need is: a shirt(t-shirt would even work), a piece of fabric, a ribbon, and a sewing machine. 1. find a shirt and turn it inside out. 2. lay your ribbon down, then cut a piece of fabric big enough to cover your ribbon. 3. pin the piece of fabric over the ribbon.
Lace insert tutorial. Wow!
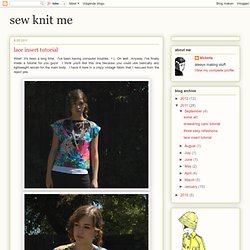
It's been a long time. I've been having computer troubles. >:( Oh well...Anyway, I've finally made a tutorial for you guys! I think you'll like this one because you could use basically any lightweight woven for the main body. I have it here in a crazy vintage fabric that I rescued from the reject pile. What you need is a piece of fabric that when folded is half your bust plus 10-12" wide and the length of which is what you want the finished length of the top to be, plus 1.5" for shoulder seams and hem. I have my piece sideways as you can see, which doesn't matter as long as patterns go the right direction. you need two measurements: Half your bust, and the length from the shoulder to the underarm. So here is a diagram for the measurements. on the bottom, "a" stands for half your bust. When you cut out the place where the lace goes, lay it over the lace to get the right size. you need 1.5" around the sides.
On the body, baste around the part where the lace goes, and clop corners. Very Pretty Japanese Handbag. This bag handle and pattern came to us with only Japanese instructions.
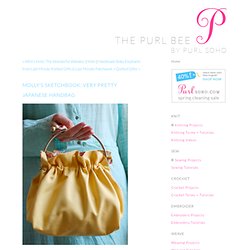
With a little help I was able to get it translated and share it all with you. Its pretty shape and cheery colors make it the perfect thing to sew in anticipation of Spring! Materials One Inazuma Handbag Handle BK-1052 (pattern templates included)1/2-yard of Kiyohara Yellow Canvas1/2-yard of Little Folks Voile from Anna Maria Horner1 spool of cotton thread in color 1600A water soluble fabric marker Cutting Cut out the pattern included with the handle. Press your outer fabric in half length-wise. Repeat this step again so you have two outer bag pieces. The BIG Bow - Metal Frame Purse. I have been meaning to try my hand at metal frame purses for some time now…and while browsing through People’s Style magazine, I came across a metal frame purse with a big huge bow on it!
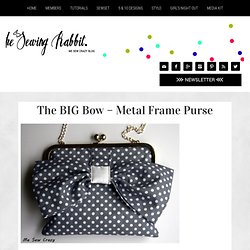
It pushed me over the edge :). Sure – the purse in question was only around $30 from JCPenny, but what fun is there in that?! And who doesn’t want a big, huge bow on the front of their purse?!! It says I am fun and flirty, and don’t care who knows it! Lol, well, at least that’s what it says to me :). Thanks to Google, I was able to find a great tutorial for making metal frame purses. For the free BIG Bow tutorial, click HERE. Big Bow Purse. Creative Guest: Snowflake Cutout Tank Tutorial by Honeybear Lane. Hi there!
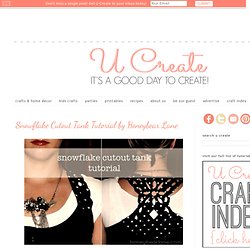
My name is Heidi from Honeybear Lane and I am so super excited to be a guest on UCreate! This blog is seriously amazing (as you all know) and I think that Kari is just awesome for bringing all these craft tutorials together. The Bustle Backpack from Chloe's Spring Collection! Every now and then, you make something you absolutely fall in love with.
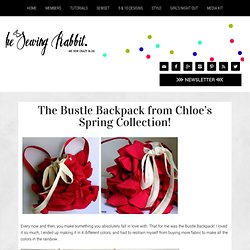
That for me was the Bustle Backpack! I loved it so much, I ended up making it in 4 different colors, and had to restrain myself from buying more fabric to make all the colors in the rainbow… Bustle Backpack. Tutorial: Puffy Pouch. Here comes the tutorial for the puffy pouch ;)As I promised, I am introducing two ways to make this pouch, one made with a 5" flex frame which may not be very accessible and the other made withvelcro which is fairly easily found at any craft stores.
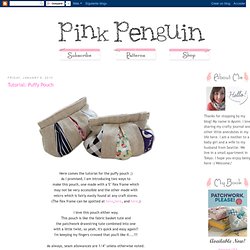
(The flex frame can be spotted at here,here, and here.) I love this pouch either way.This pouch is like the fabric basket tute andthe patchwork drawstring tute combined into onewith a little twist, so yeah, it's quick and easy again!! I'm keeping my fingers crossed that you'll like it....!!! As always, seam allowances are 1/4" unless otherwise noted. First off, pick out linen (or medium to heavy fabric)and three different print cotton fabrics that contrasteach other for the external shell. Cut out fabrics into pieces:Eight 1.75" x 5.5" pieces andTwo 2" x 6" from linenTwo 1.75" x 5.5" from each cotton fabrics. From the fabric for lining, cut out two 5.5" x 5.5" pieces. Let's start making the outer shell. Two patchwork panels like these. . 10 Awesomely Altered T-Shirts. By ashleyhackshaw | Do you have a bunch of t-shirts lying around that you just aren’t into anymore?
Don’t throw them out…..alter them into something amazing! I’ve rounded up 10 cute t-shirt tutorials that will make your friends ask “Where’d you get that adorable top?!”