
Inspired by the Creatively Made E-Course. Hello!!!

I know it’s been forever and I’m sorry but I’m back and I’m just full of inspiration – thanks to the fabulous E-course I’m taking by Jeanne Oliver. My first trimester was trying at times, tired, nauseous, weepy but now that I’m well into my second trimester I’m feeling like myself again. While my cravings for chocolate have yet to subside, a forceful urge to create art has emerged, so when I found this course via the Dreamy Whites blog I signed up immediately!
Jeanne has always inspired me with her whimsical creations and beautiful art, so what better teacher to help me break out of my creative rut?! Our first project was to assemble a vintage art journal. Cutting up a vintage book felt so naughty but I knew I wasn’t destroying it, just up-cycling it! Embellishing the cover with vintage costume jewelry and an old crystal drawer pull was so much fun! The antique illustration was taken from an old Shakespeare book…who can resist Romeo and Juliet? Xo, Like this: Like Loading... Caster Wheel Photo Paperweight. When I purchased the caster wheels for these bookends I made a couple of weeks ago, I also purchased this larger cast iron caster wheel.
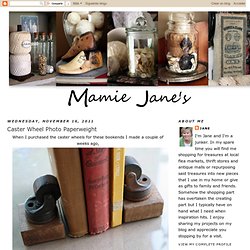
Since there was only one available I thought it would make a good paperweight. It would work "as is" but I decided to add some old photos of my Dad to the wheel to personalize it. I have a huge library of family photos on my computer so I sized five of the photos to fit the wheel and lined them up in a strip (I copied the photos to Word and resized and aligned in that program).
After cutting the strip, the photos were the perfect size for the wheel. If I was to do this again I would probably first change my photos to a sepia tone to better blend with the caster wheel. After gluing the photo strip to the caster wheel, I called it finished. I can now spin the wheel and see several different favorite photos of my Dad. This high school football photo is my very favorite.
My Dad is now 82 years old. Have a wonderful day. Jane. Man Crafts: bottle cap pins. Let's face it, button pins make everything more awesome.
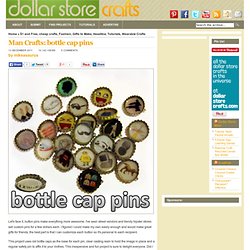
I've seen street vendors and trendy hipster stores sell custom pins for a few dollars each. I figured I could make my own easily enough and would make great gifts for friends, the best part is that I can customize each button so it's personal to each recipient. This project uses old bottle caps as the base for each pin, clear casting resin to hold the image in place and a regular safety pin to affix it to your clothes. This inexpensive and fun project is sure to delight everyone. Did I mention it's customizable? Project estimate: Handmade round vintage wood wooden brown sunglasses by TAKEMOTO. Tiny Polaroid Magnets. Hi there!
It’s felt like forever since I’ve last blogged, and has felt like an eternity since I’ve done anything crafty and nifty. Since my morning sickness has gone into full speed (yes, we’re expecting our third this fall!) I haven’t felt like myself. But nothing like inspiration to wake one out of a reverie — or nightmare, in my constantly sick state.
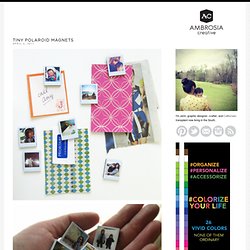
I came across these DIY Pantone chip magnets on How About Orange and wanted to do something similar. You will need: Cardboard (mine was the backing of a sketchbook — much thicker than the back of a regular spiral bound notebook) or 2-3 sheets of white cardstock or poster board spray-mounted together to use as a sturdy backing to the magnetsOpaque white marker (necessary only if your cardboard is not white) Craft knife Metal straight edge/ruler Clear packing tape or frisk film. Step 1: Download a Photoshop file of the Polaroid frames below. Step 2: Print out photos onto photo paper. Step 4: Trim out photos with craft knife. 487 Comments. Vintage Photo Mason Jars. Things i dig / diy.