

Minute to Win It Party. If you haven't seen the television show, Minute to Win It, you definitely need to watch it at least once.
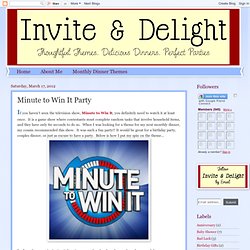
It is a game show where contestants must complete random tasks that involve household items, and they have only 60 seconds to do so. When I was looking for a theme for my next monthly dinner, my cousin recommended this show. It was such a fun party!! It would be great for a birthday party, couples dinner, or just as excuse to have a party. Below is how I put my spin on the theme... Invite: Create an invitation informing guests that they have been selected as one of the next contestants for the show. Decor: The show colors are royal blue, red, and white, so I went with that color scheme. I set my table with a red tablecloth, white plates, and royal blue napkins.
At each place setting, I created a label for a water bottle as my place card. Menu: I created a menu card at each place setting so guests could see how I played up the "minute" theme of the night. This is a partner game. Gumball Machine Fish Tank. Using a sharpie marker trace around the bottom part of the glass bowl (of your gumball machine) onto your glass.
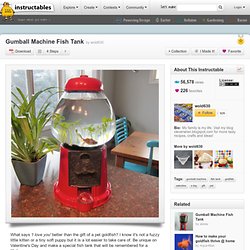
Using a quality glass cutter score the glass along the traced line. If you don't have breaking pliers you can try to break the glass with your hands but I highly recommend the breaking pliers for breaking glass. It is easy to cut yourself otherwise. Once you have a rough circle cut you will need to smooth the edges of the glass. A glass grinder is the fastest and easiest way to do this, however, you could use a file. Once the glass circle is cut and edges are smoothed lay it on the bottom edge of the glass bowl to make sure your cutting was accurate.
***Wearing safety glasses is always a good idea when dealing with glass. How to Get Rid of Popcorn Ceilings.
Pintura. Trucos & Ayudas. Lamparas,luz. Make-up Magnet Board. We all know with craft blogs that original ideas are often hard to come by, we find ideas we love and make them our own but we didn't come up with the idea ourselves.
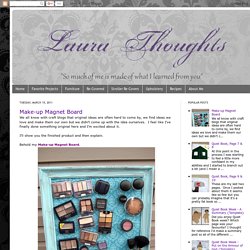
I feel like I've finally done something original here and I'm excited about it. I'll show you the finished product and then explain. Behold my Make-up Magnet Board. I have a friend who is beautiful and stylish and has always loved make-up but recently took a course that intensified her love. Her renewed interest has worn off on me and it made me remember eye shadows I'd hidden away that were gathering dust. The basket was a mess and I was overwhelmed with all my choices never knowing what to use, digging through to see what I had and find what I wanted was a pain.
I painted it (The hard way, with a brush instead of spray paint. "One Good Thing" by Jillee: Homemade Baby / Makeup Remover / Cleaning Wipes! Homemade Essential Oil Air Fresheners. Bring one cup of water to a boil in a small saucepan.
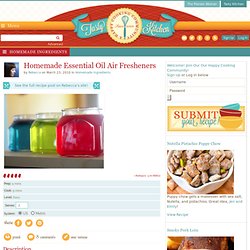
Sprinkle the gelatin over the boiling water and whisk until smooth and all the gelatin is dissolved. Add the salt and the second cup of cold water and whisk. Set aside. Add the desired amount of essential oil and food coloring, if using, to the jar(s). Quickly pour the hot liquid gelatin over the essential oil and food coloring. Allow to cool, uncovered on a heat-proof surface. Sweet Basil and Lemon Air Freshener * 20 drops Sweet Basil essential oil * 8 drops Lemon essential oil Rosemary Orange Air Freshener * 25 drops Sweet Orange essential oil * 5 drops Rosemary essential oil (the rosemary essential oil is mighty strong stuff—keep a light hand with this!)
Fresh Pine Scent Air Freshener. The House of Smiths - Home DIY Blog - Interior Decorating Blog - Decorating on a Budget Blog. DIY Magnetic Organizational Board I don't know about your house, but ours is filled with lists, coupons and receipts floating around here all the time.
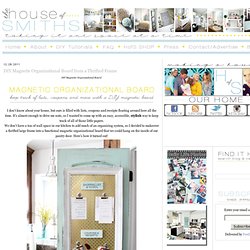
It's almost enough to drive me nuts, so I wanted to come up with an easy, accessible, stylish way to keep track of all of those little papers. We don't have a ton of wall space in our kitchen to add much of an organizing system, so I decided to makeover a thrifted large frame into a functional magnetic organizational board that we could hang on the inside of our pantry door. Here's how it turned out! I love the pop of happy yellow, and how all of those random little papers now have a specific place! Here's how we did it: First we started off with a large thrifted frame, in the size that we wanted the organizational board to be. Then we bought a large piece of magnetic metal from Lowe's, and cut it to fit the inside of the frame. The metal was so large that in the end it made two organizational boards.
Make an Embellished Grocery Bag Container!! {great item to keep in your car}