
Turn Kodachrome Slides Into Lampshades. How to make a conversation-starting pendant lampshade using 35mm slides.
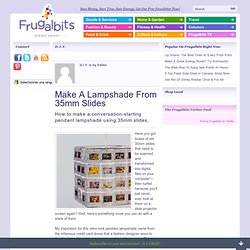
Have you got boxes of old 35mm slides that need to be scanned and transformed into digital files on your computer— then turfed because you’ll just never, ever look at them on a slide projector screen again? Well, here’s something novel you can do with a stack of them. My inspiration for this retro-look pendant lampshade came from the infamous credit card dress that a fashion designer wore to the Academy Awards ceremony a number of years ago. The construction method for both items is similar. How To Make A Slide Lampshade First, gather your slides together and separate them by theme. Next, purchase a lampshade form; I found my cube at a craft store.
For the electrical component, I found a ready-made socket assembly at IKEA, where they’re used for their pendant shade collections, and I attached it to my shade without a hitch because both my particular elements were standardized. Craft Ideas - Easy Crafts for Kids, DIY Crafts and Knitting Patterns. Holiday Project #1 - Wire Picture Holders. As I mentioned in my post last night, I have decided between now and Christmas to post nothing but holiday decorating, craft and gift ideas.
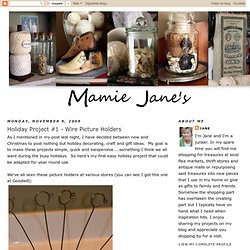
My goal is to make these projects simple, quick and inexpensive....something I think we all want during the busy holidays. So here's my first easy holiday project that could be adapted for year round use. We've all seen these picture holders at various stores (you can see I got this one at Goodwill): I have purchased these and cut off the picture holder part to use in several different projects. Here's a picture of some Halloween picture holders I made with wood blocks, scrapbook paper and a wire holders. The Technique Zone: Acrylic Paint Transfer.
Supplies needed: Acrylic dabbers, photocopy of an image, water spritzer bottle, paintbrush, card stock, craft sheet and heat tool (optional) Take the lid off the dabbers and brush the paint onto the card stock, ensure you get a good coverage Take your photocopied image ( remember that you will get a reverse of the image, so don't use bold words), flip it over and place it in the acrylic.

Lightly press it down making sure it's smooth and not wrinkled Leave to air dry for at least 15 minutes and then if you wish give it a blast with the heat tool Only move onto this step when you are sure your paint is completely dryTake your water filled spritzer bottle, spray the back of the paper no more than two squirts, you don't want it too wet Next start to rub the paper very gently with your finger Keep rubbing and extra spritzing if you need too Eventually you will get rid of all the paper, but it does take a bit of patience as you have to be careful not to wet it too much and rub the image away. The photo-to-wood transfer. This Christmas, I made most of my gifts.
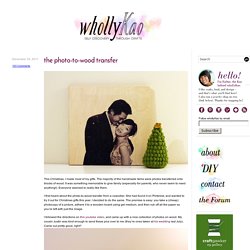
The majority of the handmade items were photos transferred onto blocks of wood. It was something memorable to give family (especially for parents, who never seem to need anything!). Everyone seemed to really like them. I first heard about the photo-to-wood transfer from a coworker. She had found it on Pinterest, and wanted to try it out for Christmas gifts this year. I followed the directions on this youtube video, and came up with a nice collection of photos on wood.
Tutorial: How to make a Polaroid Magnet Frame. I found these magnets on Photojojo a few weeks ago, and thought, “ These are cool.
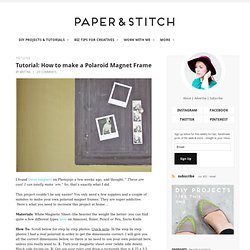
I can totally make ‘em.” So, that’s exactly what I did. This project couldn’t be any easier! You only need a few supplies and a couple of minutes to make your own polaroid magnet frames. They are super addictive. Materials: White Magnetic Sheet (the heavier the weight the better- you can find quite a few different types here on Amazon), Ruler, Pencil or Pen, Xacto Knife How To: Scroll below for step by step photos. Looks just like the real thing, doesn’t it? For more ideas for quick and easy projects, click here to visit the tutorials page filled with more than 40 diy’s.