
Fat Quarter Tutorials. Laptop Cover Tutorial. Firstly I wanted to keep everything really simple so I created a rectangular pattern I decided how far up the laptop the opening would be and how far down the flap would come. Make it a little wider that the laptop itself. See pic. This photo shows how high up the laptop and the section above is the flap which will come almost down the the base of the case. I then cut out two pieces of fabric. Free Cup Cozy (Java Jacket) Sewing Pattern & Tutorial. Free Cup Cozy (Java Jacket) Pattern comes in 2 sizes with your choice of Velcro or Button Closure options. While hanging out at the local coffee shop with friends, I noticed the paper wraps for coffee and tea cups were not only always falling down, they were quite unattractive.
(Gasp!) This really bothered me, and when something bothers me, I feel the need to fix it immediately. The Stitchwerx Designs Free Coffee Cup Cozy (aka Java Jacket) Pattern is my solution to this pressing issue. This free sewing pattern comes in two sizes with your choice of Velcro or Button Closure options. The first thing you will need to do is download the pattern by clicking on this link: Stitchwerx Designs coffee cup cozy pattern. Let’s get started! Just a note: Always prewash and dry your fabrics and batting to prevent cozy shrinkage in the wash! Choose the template for your cozy size and print it out at 100%. Large size cup cozies fit 20-24 oz. cups. Button Closure Version Only: Cut hair elastic in half.
Notes from Terry Ann: Best Press Bag. Which bottle of Mary Ellen's Best Press would you rather use? Tissue Case. Snippets of a Quilter. Tutorial for Little Clutch Purse. Mini Wallet Tutorial. Hi everyone!
As promised, here is the tutorial for the tiny little wallets that fit just perfectly into the mini clutches from my first official pattern, The Infinity Tote. It's perfect for the minimalist (like me) who wants just enough wallet to cart around a few credit cards, a bit o'change, and some greenbacks. After lugging a huge diaper bag around for 8 years with everything but the kitchen sink, it's so nice to be able to grab a tiny tote when I'm running a couple of errands or spending a day playing tourist.
It's also a great way to make use of extra little scraps you may have lying around, begging to be made into something useful and pretty. The front pocket is designed for coins, the middle area is for bills, and the back pocket holds credit cards/drivers license. I feel like I should issue a bit of a warning about this little wallet, though - despite its benign appearance, it's not exactly a project for beginners. The first step is to cut all the pieces. Laptop slipcover with strap tutorial « TeresaDownUnder. This slipcover is for an 11-inch MacBook Air.

To adapt this tutorial to your laptop, measure your laptop around for height and depth and divide each measurement by 2 and add one more inch to allow for seams. The resulting figure is the front and back rectangles. For example my laptop is 11.8 inches x 7.56 inches. If I add about an inch, and I square the measurements, I get 2 rectangles of about 9 in x 13 1/4 in. Fabric needs Front 2 x 2 1/2 in strips in black and white2 x 1 in strip in red stripes1 x 4 1/4 in strip in red with white spots Back and lining. 4 handmade iPad sewing tutorials « TeresaDownUnder. How to Make a Fabric Postcard Party Invitation. August 9th, 2013 Email 65 users recommend Quilt a fabric postcard in a snap, and then send it off in the mail.
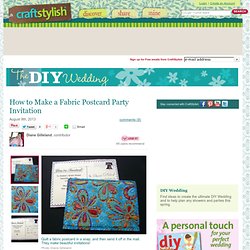
They make beautiful invitations! Diane Gilleland You can quilt along with the design printed on your fabric, as I've done here, or quilt an overall pattern. I mailed one to myself to see how it would hold up. Photo: Diane Gilleland When you're done quilting, turn the postcard over and apply a medium amount of craft glue to the back. At this point, you'll need a cardstock postcard of some kind to glue to the back. 12 free bag and purse tutorials. Zipper Installation for the Itty Bitty Bag. The Itty Bitty Bag. Gathered Clutch Tutorial.
Anna of Noodlehead is sharing the most beautiful gathered pouch tutorial.
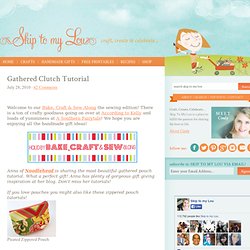
What a perfect gift! Anna has plenty of gorgeous gift giving inspiration at her blog. Don’t miss her tutorials! If you love pouches you might also like these zippered pouch tutorials! Pleated Zippered Pouch Lined Zippered Pouch How To Make A Gathered Zippered Pouch Materials needed: 1/4 yard each of three coordinating fabrics (you’ll definitely have scraps leftover)8″ zipper (you can always purchase a longer zipper and shorten it, just follow the directions on the packagescraps of medium weight fusible interfacing Cutting the pieces: For the main exterior, cut two pieces, one 5.5″ tall by 9″ wide, and one 5.5″ tall by 13″ wide (this will be the gathered front) Pieces of medium weight fusible interfacing for exterior pieces of clutch: (2) 5.5″ tall by 9″ wide For the front band, cut one piece 4″ tall by 9″ wide.
Turn tube right side out and press with seam in the middle. Grab the 13″ wide main exterior piece. Goodygoody.typepad.com/goody_goody/2008/04/tgif-quickie-fa.