background preloader

Ani - An animation library for Processing
Ani - An animation library for Processing
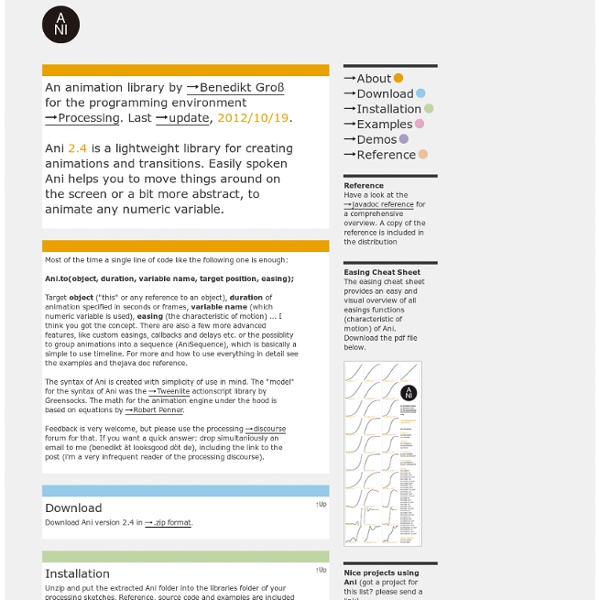
An animation library by Benedikt Groß for the programming environment Processing. Last update, 2013/02/28. Ani 2.5 is a lightweight library for creating animations and transitions. Easily spoken Ani helps you to move things around on the screen or a bit more abstract, to animate any numeric variable. Most of the time a single line of code like the following one is enough: Ani.to(object, duration, variable name, target position, easing); Target object ("this" or any reference to an object), duration of animation specified in seconds or frames, variable name (which numeric variable is used), easing (the characteristic of motion) ... The syntax of Ani is created with simplicity of use in mind. Feedback is very welcome, but please use the processing discourse forum for that. Installation ↑Up Unzip and put the extracted Ani folder into the libraries folder of your processing sketches. Demos Check the demos in the distribution of Ani (zip file), or have a look at them by watching the videos. Ani

Wiring Fritzing processing GUI, controlP5 About controlP5 is a library written by Andreas Schlegel for the programming environment processing. Last update, 07/30/2015. Controllers to build a graphical user interface on top of your processing sketch include Sliders, Buttons, Toggles, Knobs, Textfields, RadioButtons, Checkboxes amongst others and can be easily added to a processing sketch. They can be arranged in separate control PGraphics contexts, and can be organized in tabs or groups. → read more. Installation Unzip and put the extracted controlP5 folder into the libraries folder of your processing sketches. Details Keywords gui, ui, controller, interface, user interface Reference. Source. Platform osx, windows, linux Processing 2.2.1 Dependencies none User interface for the 'vulcano generator'. project synthazards, syntfarm. A complete list of features can be found on controlP5's github page. Features Custom FontsBy default controlP5 uses a bitFont to render text. Examples

Nest Nest A library by Eric Socolofsky for the Processing programming environment. Last update, 10/28/2013. Nest provides a high-level, simple scenegraph for Processing, modeled on the API for the scenegraph and display list implemented by ActionScript 3. Nest is targeted toward developers familiar with AS3, who wish to organize on-screen objects in a display list hierarchy. As with the AS3 display list, Nest establishes parent-child relationships, applies parent transformations to children, and allows easy manipulation of on-screen objects through member variables such as x, y, rotation, and scale. In addition to the scenegraph, Nest also includes an event-based communication system (built on the Observer pattern as implemented by Java's Observer interface), and some minimal UI components. Download Download Nest version 0.7.0 (9) in .zip format. Installation Unzip and put the extracted Nest folder into the libraries folder of your Processing sketches. Reference. Source. Tested

InstantSOUP / Physical Computing » Microcontroller Instant Soup support the following platforms: Wiring Wiring is a programming environment and electronics i/o board for exploring the electronic arts, tangible media, teaching and learning computer programming and prototyping with electronics. It illustrates the concept of programming with electronics and the physical realm of hardware control which are necessary to explore physical interaction design and tangible media aspects. Wiring is an open project initiated by Hernando Barragán (University of Los Andes | Architecture and Design School). Wiring website Arduino Arduino is an open-source physical computing platform based on a simple i/o board and a development environment that implements the Processing/Wiring language. The Team is composed of Massimo Banzi, David Cuartielles, Tom Igoe, David Mellis and Nicholas Zambetti, Gianluca Martino works with us on many projects providing help, ideas and taking care of the production. More about MicroControllers

Your Random Numbers – Getting Started with Processing and Data Visualization Over the last year or so, I’ve spent almost as much time thinking about how to teach data visualization as I’ve spent working with data. I’ve been a teacher for 10 years – for better or for worse this means that as I learn new techniques and concepts, I’m usually thinking about pedagogy at the same time. Lately, I’ve also become convinced that this massive ‘open data’ movement that we are currently in the midst of is sorely lacking in educational components. The amount of available data, I think, is quickly outpacing our ability to use it in useful and novel ways. How can basic data visualization techniques be taught in an easy, engaging manner? This post, then, is a first sketch of what a lesson plan for teaching Processing and data visualization might look like. Let’s Start With the Data We’re not going to work with an old, dusty data set here. Even on a Saturday, a lot of helpful folks pitched in, and I ended up with about 225 numbers. It’s about time to get down to some coding. OK.

arduino meets processing - PUSHBUTTON The Arduino meets Processing project intends to make it as easy as possible for anyone to explore the world of physical computing. All you need is an Arduino board as well as the Arduino and Processing software, which you can download on their project websites. On this website we explain how to: set up electronic circuits with various kinds of sensors, control and measure the sensors with the Arduino board, send the data to the computer, and use the received values to generate computer graphics with Processing. For all examples you need some basic electronic equipment such as a breadboard, resistors, the sensors, and some wires. The following sensors are dealt with on this website: All examples contain a list of the parts as well as the Arduino and Processing files you need. The Processing files have a DisplayItems class which paints a grid with values, a black or white background. Feel free to play around and have fun exploring the wonderful world of Arduino and Processing!

Night #6: Image Sequence Object (with variable speed) I have an example from Learning Processing which demonstrates how to package a “pre-made” animation (i.e. sequence of images) into an object in Processing so that it can be duplicated many times on screen. For tonight’s example, I’m going to make a new version that improves a few key points. First, in the original example the the image files are loaded in the class itself. This is problematic. We can fix this by loading an array of images in setup() and passing it to the object. Animation a; void setup() { // Load the image sequence first! The class then receives the array in the constructor and passes it to its own array. class Animation { // The array of images PImage[] images; Animation(PImage[] images_) { images = images_; } This way (as you’ll see in the example) if we make an array of objects, each one uses the same array of images (which we loaded only once). The original example used an integer to keep track of the current “frame” of the animation. Here is the example.

PIC vs. AVR smackdown OK, I know what you people want. You want ultimate fighting, embedded E.E. style. You want to know WHICH IS BETTER, PIC OR AVR? Well, I know what side I'm placing my bets on (AVR of course) but for 99% of beginners, it doesn't matter too much which way you start. Regardless, I'm tired of answering the same questions over & over, so here we go! In the last few years, D.I.Y. electronics has taken a major leap forward with the introduction of powerful yet low-cost, easy-to-program microcontrollers. Right now there are two major 'houses' of microcontrollers: the Microchip PIC family and the Atmel AVR family. I am not really an expert here, so please help me fill in this page with more useful info, post it in forum! This is the first point, one which I think is pretty important. Winner? Price is a tough one to compare because sometimes one chip will have more peripherals or RAM. 8-pin: PIC12F629 ($1.29) v. Winner? Parlez-vous turing completeness? Winner? On the AVR side, there's BASCOM.

Augmented Reality with #Processing - Tutorial by Amnon Owed All of the visuals in the above video were created using NyArtoolkit for Processing. NyARToolkit is an augmented reality toolkit built with 100% pure Java. It is derived from ARToolkit-2.72.1. Like Processing itself it’s open source and free! In this tutorial you will learn how to use it to place computer generated imagery correctly onto real world footage. To do this in real-time NyArtoolkit uses markers – black and white images – to determine the three-dimensional position and orientation in the real world. All right so let’s start with the general setup. 1. 2. 3. 4. All right, time to recap. Example 1: Basic The first example is basic, but holds all of the important techniques that are necessary for more advanced uses of the NyArtoolkit. If you input the following image (place it in the sketch’s data subdirectory)… …into the first code example, you should end up with something like this… Example 2: Dynamic Time to get a little more dynamic. Main Sketch ARObject

Related: