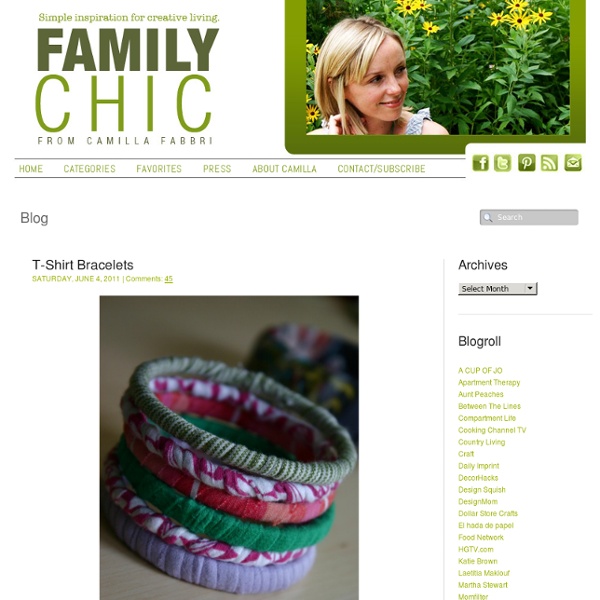
T-Shirt Bracelets
SATURDAY, JUNE 4, 2011 | Comments: 45 Brightly colored t-shirts that are too small for my daughters now, have found new life as bracelets. For this project you will need some old t-shirts and a bunch of bangle bracelets. Try using old bangles that you already own, check thrift stores or pick up some up for a few dollars at Target, Walmart – or even the sale bins at Old Navy. Cut t-shirt in 1/2" to 1" wide strips. Loosely tie one end of the t-shirt strip to the bangle and start wrapping fabric around bracelet – the tighter the better. Wrap fabric all the way around until you meet the first knot – untie the knot and tie both ends together to close. I found this technique worked well for us – but you could also use a glue gun to secure ends. We made a ton of these bracelets this morning – my daughters really enjoyed it.
Hoja 020 - Búho
Glass Etching
Have you ever done any glass etching? Well, neither had I before today. But wow. Such an easy, yet sweet little touch that you can add to any glass. Check out my new and improved etched Trifle Bowl. The perfect bowl for desserts of all kinds…..and even a great place for fresh fruit on the counter. Glass etching is also a great way to stamp your name on your pyrex dishes, to make sure they come back to you. And how about adding a little extra detail, just because…… (Edited to Add: The font used here is called Smiley Monster and I downloaded the font for free here.) Sweet in every way. Are you wanting to make your own? (This technique permanently etches your glass. First, you’ll need a piece of vinyl with an adhesive back, like the vinyl you buy for vinyl wall decor. Then peel away the shapes, leaving the negative space all in one piece. The Silhouette code for the bird/branch is: bird_on_branch_C00044_23067 01/18/2010 Then peel the vinyl backing away. See how there are air bubbles? Good luck!
poppytalkhandmade
How to make gift bags from newspaper
When I bought something at a store recently, the clerk handed me my purchase in a bag made from a newspaper. I liked it very much and had to make some more—thus today's DIY recycled newspaper project: gift bags made from the Wall Street Journal. You can vary the dimensions, of course, but here's what I used to create a bag that's 5" tall, 4.5" wide, and 3" deep. Stack two sheets of newspaper on top of each other. This will be a two-ply bag for extra sturdiness. Cut out a rectangle that's 15.5" wide and 8.25" tall. Fold a flap 1.25" down from the top. Cut two pieces of cardstock or chipboard to 4.25" x 1", then glue them on the widest two panels just under the top fold. Put glue on the outside of the 0.5" tab and bring the left-most panel over to form the body of the bag, aligning the cut edge of the panel with the folded edge of the flap. Upend the bag so the 2" flap is now up. Put glue on both flaps and fold them inward to form the bottom of the bag.
marble magnets
I finally gave in and made marble magnets. Not surprisingly they are quite fun, smooshing the glue out to make a perfect little magnified image is very satisfying. Here, in order of appearance, are the places I referenced: paper candy instructions with pictures (this is the first place I saw this project) dogmestic with instructions and pictures photogeek pictures ugly green chair cute ladybug magnets – pictures with packaging threads at Glitter:onetwothree I bought all of these supplies at Michael’s, including the glue I went back for since I got the wrong kind to start with. These are great packaged in those Altoid-sized tins, I’ve seen them in office/gift shops like that.
Related:
Related: