
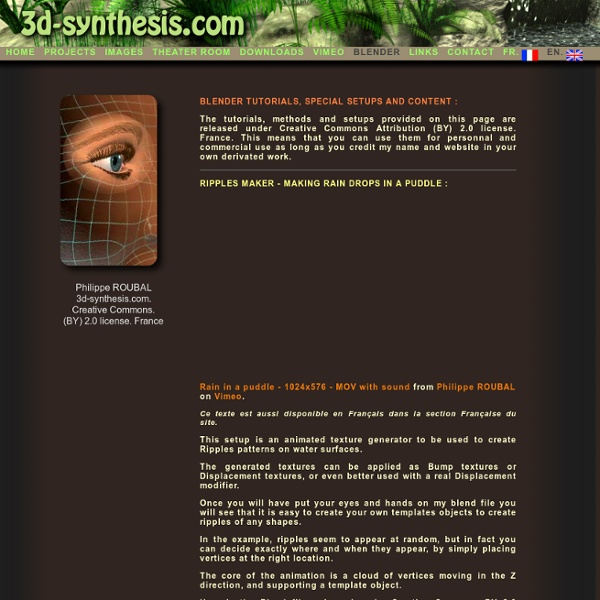
Tinker Code Creating Depth of Field Even though we’re creating digital renders in a 3d world, we need to keep in mind that we are still imitating a real world camera lens. Cameras and human eyes have something called ‘Depth of Field‘ (or ‘DoF’), which makes objects in the background and foreground appear blurry. When used correctly in your artwork, it can draw the attention to the subject and make the scene more aesthetically pleasing. When used wrong, it can seem like another overused tiresome effect. Learn the difference and how to use it effectively. To play along at home, download this light bulb scene. The final .blend will be provided at the end of the tutorial. Let’s get cracking! Step 1 Open the file and select the camera and press the ‘Show Limits’ button in the edit panel. This is the point that blender will focus on. However because this is only a still we can use the first method. Step 2 So by clicking the next arrow, make the yellow cross hair sit in line with the exploding light bulb. Step 3 Step 4 Step 5 Step 6 Step 7
Blender Make Head plugin. BLM-HEAD is a python script for human head modelling in Blender, the powerful 3D software for all platform (Win, Linux, Mac, etc...). Blender is a freeware: you can download it here. BLM-HEAD is based on RVK (relative vertex key) technology. The script is linked to three mesh objects, hidden in layer 20. This is freeware. Because of the 31 key limit, I have broken the head into three parts, to offer many more possibilities. INSTRUCTIONS Load blmh_beta2.blend: the script works only in this blender file, because it's linked to the specific objects hidden in the layer 20. DOWNLOAD Blmh beta 2, blend file (2.61 MB) Blmh beta 2, zip file (1.94 MB) A samples .blmh file Send suggestion and comment to Manuel Bastioni
[Animating in 2.5] Getting to grips with Keying Sets Over the past few months, I've been observing quite a bit of confusion over some aspects of the animation system in 2.5 that's all related to "Keying Sets". These are a rather important new feature aimed at improving the animation workflow, but which many people don't seem to be aware of. So, if you're wondering why you're getting a "weird" error message when trying to insert keyframes, or if you'd just like to learn some new workflow tricks to make animating easier, read on :) A bit of history first... (2.4x days) What many may not be aware of, is that you've (assuming you have used the 2.4x series) been using Keying Sets for a lot longer than you know. Back in 2.48, I did a round of animation system related cleanups, some of which included some cleanups to the keyframing code. Before this point, each menu entry in the IKEY menu corresponded to one of a series of "if-statements" calling "insertkey()" per channel of animation, in one nasty blob of code. Keyframing via operators (i.e.
How to make Puddles As I announced in my last video, the theme for this month is Weather! So to kick it off, I’m starting with a very important topic: Puddles. Because no rain scene is complete without them!Puddles are notoriously known amongst the 3d community for being difficult to achieve, and for very good reason! They are flush with the ground, partly reflective and subject to water physics. I used to just avoid them at all cost. Many of you have requested more text based tutorials, so today’s tutorial is sans-video Setting up the scene With a new scene, delete the default cube. Add a plane (Shift+A). In the top view, scale the plane to the shape of a rectangle. We will now UV texture the plane. To UV unwrap the plane, enter edit mode (TAB) and press U and select Unwrap from the pop up menu. Position the camera to the desired position for your scene. If you switch to texture view mode, you can see the texture in real time. Creating an environment Go the World panel and check Paper Sky. Adding reflections
Organizing your Files File organization is always important when using any application. With Blender, it's even more important because, over time, this will become an absolute mess if it's not managed from the very beginning. Over time, you will create countless models, tests, animations, scenes, characters, projects, etc. Below, you'll see one example way to keep your files organized: Feel free to modify this to meet your own needs and, don't be afraid to adjust things as your needs grow. Organize your folders and subfolders as logically as possible. Happy Blendering! technorati tags:blender, tutorial, 3d, help, graphics Blender 2.5 tutorials and training game · level · character Using the Blender tutorials and training available below, learn how to use Blender 3D for content creation and game development. Pick up essential skills for properly optimised models, efficient level design and texture making. In-depth, extensive and unique explanations of methods and principles you won't find anywhere else, seriously! Not just on using Blender 3D, but also the 'hidden' and less talked about core subjects associated with content and game development, all of if freely available to those looking for it. Blender modeling tutorials ^ Draw All Edges object property Sometimes being able to see the structure of a mesh in it's entirety is advantageous when working. Updated for the latest version of Blender. Learn Blender: make a simple map Tutorial on using Blender to make .map based levels (Quake format). Blender & activating Add-Ons Blender & two-sided materials Blender Metric & Imperial units Blender view, grid & camera properties Blender & collision hulls for game models
How to run Blender on iOS locally with Bochs The squidifier sent as a message that it is now possible to run Blender 2.5 through Bochs on the iPad. Of course without a keyboard Blender might be hard to use but this at least shows a way to actually bring the software to run on the iOS device as a first step. Here is the tutorial: Requirements: A jail broken iThing with 4gB of free space An Internet connection good enough to download 3.6gB of files.
Free blender models This post is a compilation of URL's to ten different blender model and rigs which are available on the internet and appear to the best of my knowledge to be released by their copyright owners under either a Creative Commons license or the Blender Artistic License. I've started to play around with them, and here is at least one way I intend to provide "attribution". I'll leave it as a game to the view to figure which is which. Blank Character;Game Knight URL: License: Creative Commons Attribution-Noncommercial-Share Alike 3.0 License. Otto URL: Creative Commons Attribution 2.5 License. In short, you are free to change and redistribute Otto as you like. Belinda URL: The clip and the model are available under the Creative Commons Attribution/ShareAlike license, so feel free to take it and run with it. Ludwig Suzanne (rigged) Blender Summer of Documentation Walk Cycle
3D Models <center><div class="site_errors"><div class="floatType_site_error_top"></div><div class="floatType_site_error"><table summary="layout table"><tr><td bgcolor="#000000"><font color="#ffffff"><h2><img src="/templateimages/redesign/modules/overlay/site_error.gif" title="Site Error" alt="Site Error"/>There's a problem with your browser or settings. </h2></font><font color="#ffffff"><p>Your browser or your browser's settings are not supported. To get the best experience possible, please download a compatible browser. If you know your browser is up to date, you should check to ensure that javascript is enabled. </p></font><p><a target="_blank" href="/home/How_to_enable_Javascript.html">› Learn How</a></p></td></tr></table></div><div class="floatType_site_error_bottom"></div></div></center> Follow this link to skip to the main content NASA - National Aeronautics and Space Administration Charles F. Lori B. Multimedia Images Videos Podcasts Interactive Features 3D Resources RSS Feeds Blogs 3D Models
Tutorial: Dissolve your Logo in Blender 2.62 Published: 16 February 2012 Using the Remesh Modifier and particles dissolving logos in Blender becomes easy. Dissolving text in Blender has always been a lot of work, but not anymore! Blender 2.62 got a great new addition - the Remesh modifier! It's power combined with a particle system make this awesome effect. For this great effect, you need Blender 2.62 or newer. Align the active camera to the view Now it's time to edit the text. Blender doesn't ship any more fonts but the default Blender fonts. 'Offset' controls the thickness of the fonts, 'Bevel' add a chamfer but also increases the thickness so you should first do the beveling and then change the offset if required. Next add some simple material to the text. Head over to the world settings and turn on 'Evironment Light' at the default settings. Now you can start to do the first test renderings. Deselect 'Blend' and select 'Horizon' under Influence. So far the look of the logo has been set up.
Urban design with Blender In this article I'll try to describe a bit of two large-scale urban development projects that were made mostly with Blender, and the different techniques used to achieve the goal. I tried to write something that would be interesting for both Blender users who don't do architecture and for architects or urban planners who don´t use Blender. This article is more meant to be an illustration, food for your creativity, than a complete accurate tutorial. Feel free to copy any material found here (but don't copy the projects, make your own!). These two projects were made at and by Cabeza Sastre, São Paulo, Brazil. Here is the kind of results we got: (Click images to enlarge) Project 1 : Almoloya de Juarez (México) – see full animation (GoogleVideo) Project 2 : Ciudad de México (México) – see full animation (GoogleVideo) Above we have Almoloya, the first one, and below México. The same with trees on: As you can see, there are very few objects. Here we used 2 different methods. Cheers Yorik
Welcome to BLENDER VIDEOS.COM :::: | Collection of Blender 3D video tutorials,Movies,Clips,Research and Development works, Demo-reels,interviews,features and many more :: Updated everyday Furniture prototype Hello everybody, I haven't been posting for quite a long time so here's a small project I'd like to share with you. It's a visualization job I did some time ago to our friends who run a small design studio (www.azedesign.pl) - pictures show sofas which would be in production this year. The images sent for print had obviously much more "commercial" feel, but I've decided trying to achieve more interesting look. These are the results: The scene was modeled using Blender and rendered in Cycles using GPU. Post production was partially done in Blender nodes (adding AO and enhancing shadows) but mostly in Photoshop.