
Lighting Effects One of the most popular posts of 2008 on this blog was 40 Photoshop Tutorials for Lighting and Abstract Effects. Since it has been close to a year since that collection was put together, a number of excellent tutorials for working with lighting effects have been published. With this post I’d like to present the second edition of tutorials. Photoshop and Illustrator Grid and Glows (update: this tutorial is no longer online) Looking for hosting?
Create a Slick and Minimalist Web Layout in Photoshop In this Photoshop web design tutorial, we’re going to learn how to create a slick and minimal-looking website layout. We will use the 960 Grid System as a template to make it easy to align the design elements on the layout. Preview Here’s a preview of what we’ll be creating together, click the image to enlarge. Create a new Photoshop document 1 We’ll be using the 960 Grid System (download it at as a starting template. Creating the background 2 First of all, right-click on the Background layer in the Layers Panel and then choose Layer From Background. 3 Now select the Gradient Tool (G), set your Foreground color to #efefef and your background color to #cacaca. Designing the header section 4 We’ll add a new horizontal guide at the 50px mark from the top of the document to set our top borders. 5 We’ll start adding our title and slogan; select the Horizontal Type Tool (T) and type your site’s name and your slogan. "YourName" "some awesome slogan" Creating our navigation Conclusion
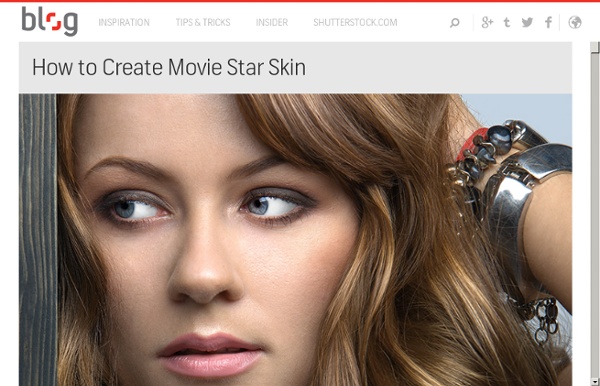
Photoshop tips, tutorials and lessons for photographers Remove Background Without Removing Hair « Clipping Path & Masking Service Provider Blog The 3 Rs of Photo Editing Ten megapixel Polaroids don’t essentially bring about million-dollar photos. Actually, the probability is that the nature of your Polaroid will just catch the imperfections and unwanted questions in your snaps all the more exactly and vividly. In any case fuss not, with the right devices this might be sorted. These “devices” are, obviously, photograph altering instruments which empower you to improve and change your pictures. To utilize them successfully you have to see first what you’re altering and afterward not to escape with your freshly discovered aptitude. Repair presentation issues Presentation is a flaw which is tricky to spot when taking photos, however it hits you like a terrible stench when you see your shots up close. Gap and screen pace are the two principle settings that focus presentation. Pictures that are excessively dull are the aftereffect of under-uncovered photos. Evacuate red-eye Restore old photos
100 Photoshop Tutorials Photoshop tutorials are one of the most popular subjects on the web, as the digital art community continues to grow and new designers bring their unique skills. However, quality Photoshop tutorials that teach you a useful effect, have a quality finished result and are well explained are harder to find, and with the large number of tutorial sites available, it can be hard to sort the quality from the mundane. In this massive roundup, we’ve collected the top 100 best Photoshop tutorials that have ever been created, that yield professional results, teach you a useful effect, are well explained, and will have you designing like a pro in no time. These tutorials are collected from niche tutorial sites around the web, and range in age from creation in 2008 to a few tutorials that were created just last week. If you liked this post, check out our other design tutorial roundups: Design a Traditional Liquefied Car Create Dynamic Distortion Effects Create a Spectacular Grass Text Effect in Photoshop
How To Make Fake High Dynamic Range Photos In Photoshop Whatever the case may be, the results can be pretty impressive, but how is it done exactly? Do you need a fancy camera and special HDR software? Not necessarily. If you have only one JPEG image, you can create a fake high dynamic range photography look with just a few quick steps in Photoshop. It’s an easy yet effective way to enhance your favorite photos. What Is HDR? High Dynamic Range (HDR) photography is simply about capturing a greater range of tonal detail. So, How To Make High Dynamic Range Photos Here’s the photo we’ll be working on. First off, open up the image in Photoshop and duplicate the Background layer by dragging it to the Create a new layer icon at the bottom of the layers palette or by hitting Ctrl + J (Command + J on a Mac). With the layer copy selected, set the blending mode to Overlay. Now, go up to the menu bar and click on Image. After that, go to Image > Adjustments again, but this time click on Invert (Ctrl + I or Command + I on Mac). That’s it. Bonus Tip
80+ Photoshop Actions for Giving Your Pictures a Vintage Look | Freebies - StumbleUpon Photoshop actions are great. With just a click of a button you can apply a complicated effect to a photo instantly. One of the most popular type of actions is the vintage or retro style. Instagram Filters (13 actions) Lomocam (10 actions) Lomo Action Hard Lomo Action Holgarizer Vintage Light Leak Action Vintage Heaven Action Vintage Dream Action Retro Cross Action Vintage Matte Action Faded Film Action Old Film Action Retro Style Actions (10 actions) Instant Hipster (10 actions) Prestalgia (10 actions) Vintage Gold Action Aged Black & White Action Glory Days Vintage Actions (7 actions) Muted Colors Vintage Action Old Tones (6 actions) Vintage-Inspired Actions (4 actions) Minty Tint Vintage Action
Text Effects I'm not gonna write any tutorial today. Instead I have a compilation of the best text effect tutorials on the web for all you text crazes out there. Some of them are a little bit complicated, a little bit advanced but really worth your time once you got the final effect. Follow the link to go to the tutorial page and enjoy trying new effects on your text.. And if this isn't enough, check out our collection of Text Effect Actions with the possibility to get the effect you want in one click of a button in Photoshop..that will sure makes your life easier.. Metallic 3D EffectView tutorial Put Small Text on your TypeView tutorial Glowing Neon TextView tutorial Stylish Shining TextView tutorial Create Colorful Lines Retro TextView tutorial Hot and Fire TextView tutorial 3D Exploding TextView tutorial Funky 3D Text EffectView tutorial Cool Western Text EffectView tutorial Add Transparent Text on your ImageView tutorial Neon Grunge Text EffectView tutorial Text on the Wood, Wooden Text EffectView tutorial
Flyerdesign im retro-grungigen Look: Flower-Power-Oldtimertreffen – vom Entwurf bis zum Druck … die Inhalte von PSD-Tutorials.de stehen nur registrierten Mitgliedern zur Verfügung. Damit wollen wir den Communitygedanken weiterführen. Als Mitglied trägst du - wenn auch nur im Kleinen - zum Puls der Community bei. Und nur so ist es möglich, weiterhin hochwertige Inhalte für alle bereitzustellen. Niemand kauft gerne die Katze im Sack, auch wenn sie kostenlos ist. Achtung: Du kannst den Inhalt erst nach dem Login kommentieren. Normalerweise erstelle ich Backgroundgrafiken in Photoshop, platziere diese in einem InDesign-Dokument und layoute den Flyer bis zum PDF-Export in InDesign. Neues Dokument erstellen Als Erstes erstelle ich ein neues Dokument. In der Regel wollen die Druckereien eine Beschnittzugabe von 2-3 mm, damit der Flyer auch ordentlich beschnitten werden kann, ohne dass weiße Papierreste zurückbleiben. Daher rechne ich dem Standardmaß von 210x297 mm jeweils 2 mm zu jeder Seite hinzu und stelle folgendes Maß ein: 214 x 301 mm. Die Auflösung beträgt 300 Pixel/Zoll.
41 Nicest Photoshop Photo Effects [Photoshop Tutorials] Looking at how powerful Photoshop can be in terms of photo editing, it’s probably not important if you suck at taking photographs or being labeled an amateur photographer. As long as you picked up a couple of Photoshop photo editing skills, it will still impress those who sees it. So the next time you want to publish some photos online, consider editing them so they look more impressive. Mental Wave Explosion EffectHow to create a crazy explosion, like a mix of Magneto’s ability with Peter Petrelli’s power.
Remove Background in Photoshop This is the second of a series of tutorials thought for Photoshop beginners. I’ll explain in depth those features that can result difficult to understand for a newbi. Today I’ll show you 6 techniques you can use to extract a person/object from its background. From now on extraction won’t have secrets for you! Extraction is one of the worst enemies for those who start using Photoshop. While it’s simple to extract a geometric figure from its background, it is difficult to do the same with a tree or a blonde flowing hair model. Do you want to learn Photoshop basics with simple yet effective tutorials? How to: Before we start: in the following exercises I take for grant you’ll unlock the background layer when you open a new image in Photoshop before start the exercise. For mac users: alt=options. ctrl=cmd. Exercise 1: How to extract simple form objects Objects with simple forms are easy to be extracted. Open the screw image in Photoshop. Why to press shift? Why to press alt? Why red channel?
Waben (Bienenstock) Erstellen einer Wabenstruktur mit Adobe Photoshop. Dies soll die Überarbeitung meines ersten Tutorials sein, da dort leider noch einige Unklarheiten aufgetreten waren. In diesem Tutorial werde ich detailiert auf jeden einzelnen Schritt eingehen. Das erste was wir uns erstellen müssen ist ein Muster, damit wir unsere Waben einfacher und schneller erstellen können (Das erste Mal als ich die Idee mit den Waben hatte, habe ich eine Wabe mti dem Polygonwerkzeug erstellt und zigmal dupliziert, das war kein Spass, das kann ich euch sagen ^^). Wir legen ein Neues Dokument an, Grösse 200x200px und färben den Hintergrund schwarz. In der neuen Ebene erstellen wir nun ein neues Polygon, achtet darauf, das die Kanten absolut grade sind! Nun wählen wir mit dem Auswahlwerkzeug die untere hälfte dieser Wabe aus und drücken Strg+C, danach Strg + v. Als nächstes kopieren wir die linke Hälfte der Hauptwabe, so wie wir es mit der oberen und unteren Hälfte gemacht haben. Abgeflachte Kante und Relief:
Photoshop Light Effect Tutorials | @designshard - StumbleUpon I’ve selected various Photoshop tutorials that I’m liking at the moment for light effects, some have quite cool techniques on how to achieve the end result that can be applied to a million different designs (try and experiment with them), check them out below. You might also enjoy: Design a Vista Styled Wallpaper Windows Vista Aurora Effect Design a Vibrant Blackberry Inspired Ad NoPattern “Jumper” Effect Mysterious Lighting Effect How to Create Brilliant Light Streaks Creating a Mac-Type Background Luminescent Lines Create a Glowing Light Painting Effect Abstract Dust And Spray Effect Make a dreamy abstract background Digital Bokeh effect Abstract Lines Background Abstract Light Rays Drawing an Abstract Lightbulb How to create 3D abstract circles Comments Do you have any favourite tutorials that you have seen for light effects?