
Newly Released Free Photoshop Tutorials of 2013 Just when we all believe there is not much to learn in Photoshop, Adobe launched a new product called Photoshop CC that means you still have a lot to learn while practicing new techniques and offers with the help of fresh Photoshop tutorials. There are abundance of Photoshop tutorials some of which are must to check out in order to begin designing but even then the rate of releasing new fresh Photoshop tutorials is surprising. Each new tutorial manages to trigger any designer to learn new techniques and understand the application of new style. I am sure with the launch of new Photoshop CC we will be seeing a lot more tutorials in future that reveal the potential of this cool graphic design software. Post updated on 5 July 2013 In today’s post we took a different approach where we compiled only fresh and free Photoshop tutorials that have been released in last two months. Recommended Reading: Few Available Calendar Design Tutorials & Free Calendar PSDs Poster Mockups in Photoshop
Tutorial Magazine - 33 Best Photoshop Tutorials of April 2009 photoshop Recreate the Iron Man Interface Effect This tutorial will show you how to create the screen interface from the hit movie Iron Man. | 41410 views | by abduzeedo How to use type as a creative effect Unlock the power of the Distort tool in Adobe Photoshop to create this enigmatic image. | 35561 views | by digitalarts Create Watery Text in Photoshop No towel included. | 32799 views | by Minervity How to Create colorful posters Learn how to recreate an awesome ad campaign by RayBan, called colorize. | 26588 views | by abduzeedo A Comprehensive Intro to the Type Tool We've all used it at least once, but do you know all its potential? | 22497 views | by psdtuts Malleable Effects with Colorful Lines In this tutorial, you'll learn how to create fantastic colorful effects using only Photoshop. | 21850 views | by psdtuts How to color in lineart in photoshop When you get to this tutorial, click on the image to view the whole thing :) | 20649 views | by kuitsuku Turn a Texture into a Tiled Background
10 Ways Photoshop Actions Can Improve Your Workflow Photoshop actions are an extremely easy way to automate all of the mundane daily tasks that have made their way into your design workflow. Whether you’re in web or print design, odds are there are a few repetitive tasks that you could let Photoshop handle for you. Perhaps the biggest hurdle to automating your workflow is simply coming up with ideas for where Photoshop actions could help you out. Today we’ll help you solve that problem by going over 10 ways Photoshop actions can improve your workflow. Wielding Actions as a Designer Just about everyone that uses Photoshop knows about actions. The thing is, they’re largely underutilized in the design world. I think one of the biggest hurdles is simply coming up with ideas for how to use actions effectively. To help you out, I’ve compiled ten ways that I use custom actions in my workflow. How Do Actions Work? For those new to actions, I’ll give you a quick primer. Remember that Photoshop actions record every little thing you do. 1. 2. 3. 4.
Eye Sharpening - Photoshop Tutorial With this tutorial you can create amazing, bright eyes within minutes. First retouch, adjust levels and do all necessary colour corrections on your image. With a Lasso Tool (L) select the eyes (hold Shift key to add to selection). Hit Ctrl+J to copy selection to a new layer. You can copy the whole layer instead of selecting eyes but applying the filter to the large area like this may take a while on slower computers. Use Smart Sharpen filter on the eyes, the choice of right settings will depend on the size of your file. Add a layer mask to the sharpened layer, then using a white soft brush on 50% bring back paint only iris’ and pupils to expose the sharpened eyes. Using levels brighten the whole picture and then copy mask from previous layer to select only eyes by holding Alt while dragging the sharpened mask (“layer 1” in the pic) onto the “levels 2” layer. Reduce opacity of the colour layer to make the eyes look more natural. And voilà, the image is ready.
Beautiful Water Effect in Photoshop CC It's been quite a long time since I played with water textures. I was checking some amazing artworks on Behance and Pinterest when I saw some examples that really inspired me to try something and learn a little bit more about Photoshop and the Displace filter. So for this tutorial I will show you how to create a really cool effect with water texture and the displace filter. Step 1 Open Photoshop and create a new document. Step 2 We will need a nice photo of water and some ripples or waves. Step 3 Go to Layer>New Adjustment Layer>Hue and Saturation. Step 4 Go to Layer>New Adjustment Layer>Levels. Step 5 Go to Layer>New Adjustment Layer>Brightness and Contrast. Step 6 Add a new layer on top of all other layers, including the adjustment ones. Step 7 Add your logo to the design. Step 8 With the layer of the logo selected go to FIlter>Distort>Displace. Step 9 This is the result you will have so far. Step 10 Go to Filter>Blur>Gaussian Blur. Step 11 Conclusion Download Photoshop file
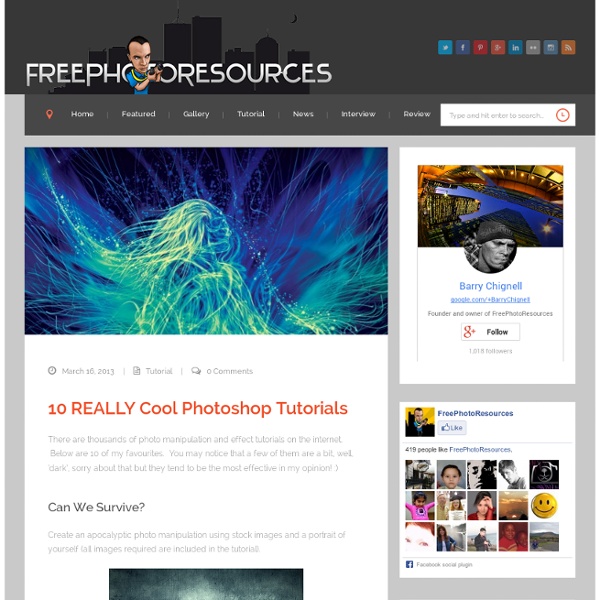
Awesome Surreal Photoshop Tutorials Smash Materials Menu Browse: Home » 2011 » 12 Best Surreal Photoshop Tutorials Ever 12 Best Surreal Photoshop Tutorials Ever · by admin · in Tutorials Spectacular surreal Photoshop tutorials which will guide you through the necessary skills required to give your designs a magical effect. The Making of Mystic How to Apply Textures to Uneven Surfaces Scared Photo manipulation Tutorial Create a Surreal Apocalypse Photomanipulation Photoshop Tutorial Unbelievable Surreal Abstract Artwork with Photoshop Design a Surreal Desert Scene in Photoshop Amazing Abstract Heart Surreal Photoshop Tutorial Fantastic Tree Photoshop Tutorial Fantasy Banana Ship in Photoshop Create a Vibrant Conceptual Photo Manipulation in Photoshop Photoshop Tutorial: Create a Surreal Turtle Image Design a Surreal Floating Eiffel Tower Scene In Photoshop Tags: abstract artwork, fantasy, image design, magical effect, photo manipulation, photoshop tutorials, surreal Photoshop Tutorials, turtle image 9 Responses Leave a Reply Categories Tags
18 Creative Photoshop Text Effect Tutorials Even a highly-experienced Adobe Photoshop user has something to learn because there are a lot useful tricks and techniques that can help to polish your skills. Artists from all over the world create lots of useful tutorials every day. They share their knowledge and you can learn much watching them. Advertisement How to Create Custom Dirt Typography In this tutorial, I wanted to share the workflow I have developed to create custom typography using a combination of real-world materials, photography, and Photoshop. Create an Illuminated Text Effect in Photoshop In this tutorial, I will show you how to create a text effect that is illuminated with tracks of small lights using several Photoshop tools including vector shapes, brushes, Layer Styles, and Adjustment Layers. Create a High-Gloss, Bubble Gum Text Effect in Photoshop In this tutorial, I will show you how to create a glossy, bubble gum text effect using a combination of Photoshop’s Pen Tool and Layer Styles. “Painted on Wood” Text Effect
Photoshop Tutorials :: Coolorus — One Color Picker to rule them all 40+ Incredible Photo Effects tutorials Photoshop is a master of special effects. Any effects can be created if you know how to play with Photoshop. In this article I have tried to prove that. Don’t believe me then check out the tutorials below. Watercolor painting Water reflection Oil painting Halftone Dots and Linear Light Add Realistic Rainbow To A Photo Age Progression Eery-Eye Photo Manipulation Fantasy Art How To Turn Your Photo Into Movie-Like Effect Watercolor Effect Photo mosaic Pencil sketch Coloring effects Create a Flaming Photo Manipulation How to Make a Melting Camera Scene Blend a Planet Transparently into a Photo Manipulation How to Create a Severed Arm in Photoshop Water effect photo montage tutorial How to Create a Sparkling Fantasy Photo Manipulation Create dynamic distortion effects Electrifying Energy Beam Photoshop Tutorial How to Create a Fantasy Atmosphere Style Car Ad How To Create a Post Apocalyptic Photo Manipulation How to Place a Fantasy Creature in a Misty Landscape How to Integrate 3D Images into Dynamic Scenes
Animación de personajes con Illustrator, Photoshop y After Effects Red Giant todas las Suites para Adobe CS6 (Win/Mac) | Cursos del CFP Red Giant Master Suite for Adobe CS6 preactivated 64bit (Win) d Red Giant Complete Suite CS6 for Mac OS X | 418 MB extabit.com1extabit.com2extabit.com3extabit.com4extabit.com5 Red Giant Magic Bullet Suite for CS6 Includes Magic Bullet Colorista IIMagic Bullet Cosmo 1.0Magic Bullet Denoiser II 1.2Magic Bullet Frames 1.1Magic Bullet Grinder 1.5Magic Bullet Instant HD 1.2Magic Bullet Looks 2.0Magic Bullet Mojo 1.2Magic Bullet PhotoLooks 1.5 Download Win: Mac: Serial Numbers: Magic Bulled Cosmo – MBO231718931123456589 Magic Bullet PhotoLooks – MBPF1000878235500959 Magic Bullet Mojo – 18351606147844912995 Magic Bullet Colorista II – 17591720194287199895 Magic Bullet Frames – 90122886123484181079 Magic Bullet Looks – 84992923234555688189 f Me gusta: Relacionado