
Lego Bookreader: Digitize Books With Mindstorms and Raspberry Pi Step #1: Gather the Parts PrevNext For this project you'll need the following: In this project we use the EV3 system. Step #2: Build the Bookreader The Camera is Placed Squarely Above the book. In our example, we used the Lego Mindstorms EV3 kit. The trickiest part of setup lies with the motor connected to the wheel. A closer look at the page turning mechanism. In the Dexter Industries Github Code Repository, there is a test code called arm⎽test.py to help you calibrate the arm for perfect movement. Step #3: Set Up the Camera Raspberry Pi Camera mounted with Lego. The Raspberry Pi camera packs a lot of punch: there are a lot of options; it’s easy to set up; and the image quality is acceptable for our project. After connecting the camera, there is one more thing to do: change the focus of the Raspberry Pi camera. After setting up the camera, take a test image to see that it is properly focused. To take a test picture, simply run "raspistill -o image.jpg" aplay /usr/share/sounds/alsa/* Now, wait.
Tutorial: Most Useless Machine EV3R Most Useless LEGO MINDSTORMS Machine EV3 This useless machine is inspired by the “Most Useless Machine EVER” by “SaskView”. Now you can build one too, using the instructions below. Leave a comment if you build one – let’s see how many pointless machines we can build together! Video Program The Most Useless Program. Building Instructions Step 1 Step 2 Step 3 Step 4 Step 5 Step 6 Step 7 Step 8 Step 9 Step 10 Step 11 Step 12 Step 13 `Step 14 Step 15 Step 16 Step 17 Step 18 Step 19 Step 20 Step 21 Step 22
Take a Hike: Train Your Robot Dog to Walk with a Virtual Leash Introduction Have you ever walked a dog on a leash? A well-trained dog will not tug on the leash or try to run off in a different direction — it will follow you around and behave well. If your dog is not well behaved on a leash, you can spend a good deal of time trying to train it to behave the way you want. In this project, you will build your own robot dog and "train" it to walk on a leash by writing a program to control its behavior. But you will not use a real leash — instead, you will use a flashlight beam as a "virtual" leash! Figure 1. But how, you may ask, could you possibly get a robot to follow a flashlight beam? Figure 2. Training a robot dog to follow a flashlight beam might seem like a cool idea, but how exactly will you get it to work? Important: This project is not intended as a complete introduction to NXT programming. Light Sensor The Light Sensor block can be found in the "Complete palette" tab under "Sensor" (Figure 3A). Figure 3. Motor Figure 4. Move Figure 5. Math Loop
LEGO Sky Parade for MIT Mini Maker Faire I showed up at the Maker Faire at around noon, after lightnin, kaschm, and champika had set up the course. Luckily, we were able to do a table swap to get a corner of the tent. A ton of children came and built all types of floats for the LEGO parade, many of which you can see using the hashtag #MITSkyParade on twitter. Interestingly, Twitter ended up capping the number of photos that we could post, so a second Twitter account needed to be created! Perhaps the most challenging part of the activity was resetting templates after people finished their designs. I wasn't around for the cleanup, which was probably the most difficult part – imagine what the sorting will be like! Overall, it was incredibly rewarding to see so many kids building their own original creations and testing them out.
Capteur de couleur pour mBot Ignorer la navigation Cacher Solution au problème posé dans le règlement de la Robocup Junior. La résolution de l'épreuve "Rescue" de la RoboCup junior avec un robot mBot équipé de la carte mCore pose un problème technique. Il existe cependant le capteur Me color sensor v1 pour mBot permettant au robot de détecter les marques vertes aux intersections de la zone A de l'épreuve "Rescue" de la Robocup junior. Comme imposé dans le règlement, la détection d'une bande verte à une intersection doit donner le sens de rotation du robot. Se procurer le capteur Lien vers le capteur depuis le site makeblock (store.mblock.com). Mise en place du capteur sur le robot Installation de l'extension Me-color-sensor v1 dans mBlock Remarque : L'installation a été testée sur deux environnements windows. Portable Asus core i5 6Go RAM (windows 7 64bits)Fujitsu 4 Go de RAM windows 7 Pro 64 bits accroché à un serveur winscribe. Exemple de programme
LEGO Teacher Doublez les ports sur le Mbot, en faisant communiquer 2 cartes La résolution de l'épreuve "Rescue" de la RoboCup junior avec un robot mBot équipé de la carte mCore pose un problème technique. En effet, d'après notre étude, il nous semble que le nombre de ports sur la carte mCore du Mbot est insuffisant. Nous vous proposons donc cette solution afin de doubler le nombre de ports et cela pourrait permettre de différencier le programme de la partie A et de la partie B du parcours imposé par le concours. Dans cet exemple, nous installons les deux cartes en parallèle, afin d'utiliser au mieux les ports infrarouges, et d'éviter au maximum les perturbations éventuelles. Côté programmation, les blocs et sont utilisés. Le programme Core 1 est le programme implanté dans la carte en bas. Attention, pour comparer le message reçu, ne pas oublier les guillemets(" ") car le message est sous la forme d'un texte. Télécharger le programme Core1 Le programme core2 est le programme implanté dans la carte du haut. Télécharger le programme Core2
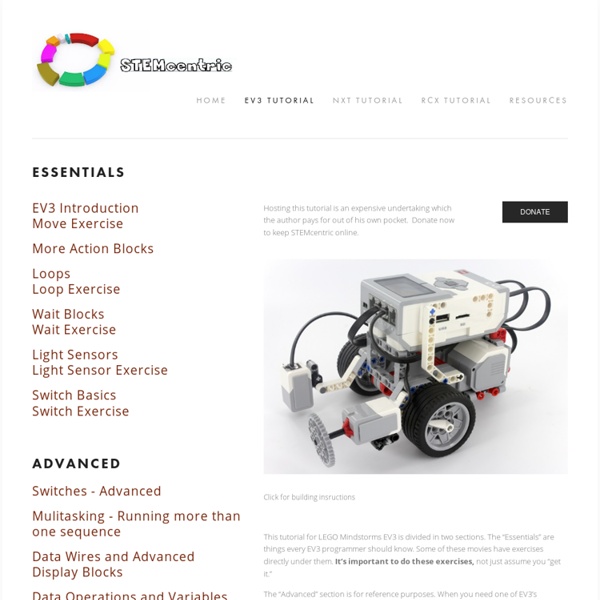
Other EV3 courses - MIND-STORMS.COM Dr. Graeme in Tasmania has good EV3 tutorials (he is gradually updating his NXT tutorials for the EV3). These tutorials work with both the retail and education versions of the EV3. HERE are some more 'EV3 tutorials for students by students' (fifth graders i.e. 10 year olds). Youtube has, of course, about a million videos about the EV3 and a billion videos about the NXT. Check out these books: Classroom Activities for the Busy Teacher: EV3 by Damien Kee is the basis of my robotics classes.