
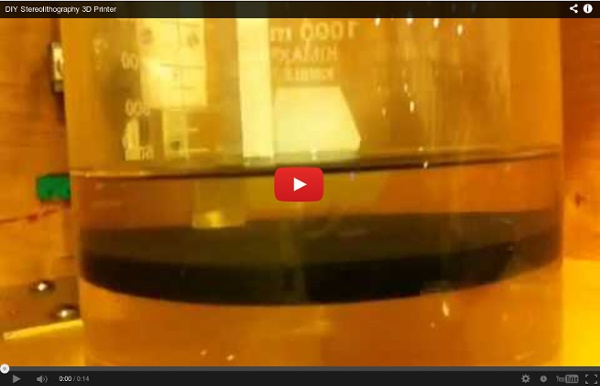
Build a Laser 3D Printer - Stereolithography at Home Here is how to make a Stereolithography 3D Printer. It is still a bit of a work in progress but so far it is working pretty well. This is mainly an experiment which started as a Delta Robot Stereolithography Printer but ended as a more traditional Cartesian Stereolithography Printer. "I'll be honest, we're throwing science at the walls here to see what sticks. Stereolithography (SL or SLA from Stereolithography Apparatus) is an additive manufacturing process using a vat of liquid UV-curable photopolymer "resin" and a UV laser to build parts one layer at a time. I have wanted a 3D Printer for a while now and there are some very reasonably priced kits available like the Makerbot, Ultimaker and the RepRap project. I decided to enter this in the Epilog Challenge Contest because I could really use a laser cutter :-) I also have some ideas how to redesign this project, for creation on a laser cutter. This project is Open Source Hardware.
3D printed replicas of people and pets from Captured Dimensions I met Jordan Williams at the Inside 3D Printing Conference and Expo. When I asked him what he did he pulled out a tablet and showed me this: That’s him holding a 3D printed bust of himself. Jordan runs a startup called Captured Dimensions and he just revamped the website, so we exchanged a few emails about the company. Jordan: We make our models of living subjects using the process of Photogrammetry. 3DP: That sounds expensive. Jordan: There was a great deal of trial and error throughout the initial phases of our setup. 3DP: What print services do you use? Jordan: Throughout development, we have sourced prints through several providers such as Shapeways, Sculpteo, local companies, etc. The photogrammetry method that Jordan uses takes hi-res pictures from 64 (and rising) angles at the same time and then stitches them all together to create a photorealistic 3D model. Related
How to make a tool set Life without tools is barbaric. But even simple tools can be expensive in rural parts of developing countries. Import duties bump the costs up higher than they are in the States or elsewhere, and sometimes only low-quality brands are available anyway. So, to hold off future barbarians, we'd like to show how to build a simple tool set on a very low budget. Larry Bentley, the man who figured out how to make these tools, said a wise thing: "Without tools, kids don't take stuff apart, and without taking stuff apart, you don't learn how things work." These tools, Bentley says, could be in the hands of the next William Kamkambwa,who made a working wind power generator from backyard scraps in a village in Malawi. Here's Larry's quick guide to DIY tools. The tools in this guide: Saw Pliers Wooden vice Wood drill bit / star drill bit Chisel Strap hinge vice
The Revolution will be Caramelized - The CandyFab Project Top 10 Things You Can Upgrade with a Little Electronics Hacking it is a skill to do a good solder joint, it comes with LOTS of practice. so most people who rarely do it will ever get good at it. Bingo. Of course, part of the issue is having a soldering iron at the right temp with a properly tinned tip. Newbies aren't using soldering stations but a cheap iron they got at rat shack (You have questions? We have deer-in-the-headlights... erm... answers!). I don't expect to ever master tricky stuff like smts or even multilayer pcbs so I'm not much better then a newbie, anyway - and I totally suck at sweating pipe joints. Ah, well... SMT is actually a bit better than through-hole once you get the hang of it.
new tech Electronic Projects For Beginners I made a guide for those people who are still starting with their electronics hobby. I started connecting wires, batteries, bulbs, buzzers and motors when I was 4 years old . Now that I am 13 years old, I now have a good amount of experience to build complicated electronic circuits. It took me hours to finish making this guide since there is no software editor in the Sibmit>Guide in the "Submit Instructable Section" I had to type every word and picture using HTML codes which I learned from school. These are my all time favorite projects in instructables, I find them simple and easy to make. How To Solder by: noahw Third Hand by: rstraught Making A Customized Circuit Board by: ASCAS How I built a Solar iPhone Charger ($50) by: akbrennan Make a USB iPhone iPod Charger On The Cheap! Build a Simple Circuit from a Pizza Box (No Soldering) by: matt.e.jenkins Solar Cockroach Virbobot by: JoshuaZimmerman Water Powered Calculator (Original) by: ASCAS Munny Speakers by: fungus amungus
The Mark One Carbon Fiber 3D Printer We took a look at a surprise 3D printer unveiled this week: Mark Forg3D’s Mark One, after a year of secret development work. At a glance, it looks like any other personal-sized 3D printer, albeit with a very slick metal case. But then you look at what’s being printed. Carbon Fiber. Yes, this device can actually 3D print carbon fiber. Carbon fiber produced by the Mark One is said to be 20X stronger than ABS - and even slightly stronger than aluminum! We were surprised to learn that you don’t need to 3D print objects made entirely of carbon fiber. According to Mark Forg3D, a typical part would be printed in a combination of nylon and carbon fiber. The Mark One has another very unique feature: it’s removable print bed has capabilities we’ve not seen before. The Mark One has a very healthy 305 x 160 x 160mm build volume and can manage up to 0.1mm accuracy.
Lesson Plan for Making a Speaker Laboratory ©1995 The Regents of the University of California by Regan Lum Introduction: A speaker is a device that converts an electronic signal into sound. The speaker you will build (see figure 1) consists of a Styrofoam or paper cup, a coil of wire, a permanent magnet, and a signal source. The electronic signal goes through the coil and creates a varying electromagnet. figure 1 Purpose: In this laboratory, you will explore how a speaker works. Materials: 1 permanent magnet 2 feet of wire 1 pencil tape or glue 1 Styrofoam or paper cup 1 signal source (tape player) 1 plug with alligator clips for tape player Procedure: Assemble material as shown in figure 1. Leaving about 10 centimeters on the end, wrap the wire around a pencil to make a wire coil and tape or glue it to the bottom of the cup. Conclusion Does the volume control on the tape player work on your speaker? Return to CEA Science Education Home Page
How to make Char Cord / Char Rope How to Make Char-Twine Wimoto motes - Your Sixth Sensor Wimotos are a family of small, wireless sensors for your iPhone, iPad, Android, Linux or Raspberry Pi device that measure environmentals such as ambient temperature, humidity, light, soil moisture, soil temperature, object temperature, human presence and movement. They last for about a year on a single battery and don't require an Internet connection to work. You can upload your data to our cloud service for analysis via our free app, or use the optional Wimoto Cloud Cube to do it for you in realtime via Wifi. Instead of launching a weather app, wouldn't it be nice to know what the weather right outside your home is right now? Or if it's too dry or cold at night in your baby's bedroom? Or how long it take my fridge to cool down every time the door is opened? The Climote has literally hundreds of uses where you need precision temperature, humidity and light information. Imagine coming home from work, and your lawn telling you that it needs to be watered? A Great Looking App Press Coverage
Build Your Own Server | Why pay somebody to do it for you when you can build it yourself! [global] panic action = /usr/share/samba/panic-action %d workgroup = "Name" netbios name = "Server name" invalid users = root security = user wins support = no log file = /var/log/samba.log log level = 3 max log size = 1000 syslog = 1 encrypt passwords = true passdb backend = smbpasswd socket options = TCP_NODELAY dns proxy = no passwd program = /usr/bin/passwd %u passwd chat =*Enter\snew\sUNIX\spassword:* %n\n *Retype\snew\sUNIX\spassword:* %n\n . obey pam restrictions = yes pam password change = no null passwords = no #Share Definitions [homes] comment = Home Directories browseable = yes writable = yes security mask = 0700 create mask = 0700 #!/bin/sh x11vnc -nap -bg -many -rfbauth ~/.vnc/passwd -desktop "VNC ${USER}@${HOSTNAME}" \ |grep -Eo "[0-9]{4}">~/.vnc/port