
Full and Textured Fabric Flowers We can never seem to have enough flowers in our house. Or fabric. So, to satisfy both things……..I made some new fabric flowers. Kind of similar to these. But easier and less uniform. And much harder to mess up. They are a bit rugged. . But my first thought……..is always in the hair. There’s something about the texture of the fabric. (And yes, the edges are raw……but they’re made with a bunch of circles and this helps keep the fabric from fraying very much. But if it does fray a bit, it only adds to the charm.) I’m even crazy about them on my littlest one’s head. And just for fun…….here’s a zoom out of our photo shoot. If he’s home, he makes the best assistant. Thanks baby girl. Would you like to make a few fabric flowers? To begin, decide on how big you want your flower to be. To make a flower that size, I cut out a circle that was 1 3/4 inches in diameter and used that as my circle pattern piece. And then folded my strip again and again until I had several layers to cut through. Now make more.
The Magic With Corks If you enjoy in good wine and you didn’t trow away the old corks you can create interesting home gadgets that are both interesting and creative. Home decorating can be improved using one of the 25 home ideas with corks we presented here. You don’t need to spend money for your home, you can easily recycle and reuse the old corks for coasters, maths and much more. Stamps Thread Spool Corks Wreath Magnetic Cork Planters Cork Ball Key Chains Coasters Cork Letter Placecard Holders Trivet Bathmat Plant Marker Cheese Knives Cork Candles Cork Candle Votives Simple Cork Necklace Embroidered Cork Necklace Wine Corkboard Champagne Cork Knobs Wine Charms Lampshade Fridge Magnets Animal Sculptures Cork Pen Journaling corks arts, corks usage, diy corks
Gift Ideas for poor creative souls (6) You know how it goes, a friend calls you and invites you to dinner at the last minute. OMG! What gift can you take?! I thought this was a wonderful idea. Supplies : Patterned paper-one 12 x 12" sheet. These directions will give you one flower. 1. 4. 5. Tip: For single sided paper. 6. Note: Florist tape is stretchy, just play with it and pull gently but firmly as you move down the stem. 7. Note, you will have to play around with the height of the petals, and where on the petal you start your tape. 8. 9. 10. 11. 12. For tutorials on how to market yourself online, go here. MAGAZINE ENVELOPES 18K+ Well I got this idea from our friend Nina. She was making these super cute envelopes out of scrapbook paper and I really wanted to make some! So I came home and made some! They are so so SO simple and add a personal touch to your envelopes. You will need: An old magazine, scissors, an envelope, a glue stick and a Sharpie. Tear out some magazine pages that you like. Carefully pull the envelope apart. Trace the envelope on a magazine page. Cut the envelope shape out. Turn the envelope over as well as the magazine cut-out. Unfold everything and separate the magazine cut-out from the envelope. Glue the bottom flap down to the two side flaps. And you've made your own envelope! The great thing about making these envelopes our of magazine pages is that the envelopes have a character all of their own.
31 Ingenious Ways To Make Doing Laundry Easier Sac besace Featured: Messenger Bag by Ecolution Originally created for hard-working couriers, the classic Messenger Bag has been in circulation for several decades. Known for its long-lasting rugged durability and distinctive “envelope” styling, the classic Messenger has been adopted around the world as the everyday all-purpose carryall. Make a simplified version for yourself in hemp, similar to the featured tote from eco-friendly, Ecolution. You will need: 1 ¼ yds. [1.2 m] of hemp or organic cotton canvas, 54″ [137 cm] wide.½ yd. [0.5 m] of cotton sateen lining, 54” [137 cm] wide1 ½ yds. [1.4 m] of fusible interfacing, 45″ [114 cm] wide.1 closed zipper, 12” long *1 buckle slider, 2” inner dia. *1 belt tip hardware, 2” wide *matching cotton threadgrid paper * Match zipper to colour/metal of hardware. BAG DIMENSIONS: approximately 4″ x 11.5″ x 14″. [10 cm x 29.5 cm x 35.5 cm] Scale: 1 square = 1 inch (25mm) Add seam allowances to all pattern pieces. Bag Body – cut 1X self; cut 1X fusible 1. 2. 3. 4. 5. 6.
How to Turn a Pallet into a Garden Good news and bad news. I had planned to film a short video showing you how to make a pallet garden, but the weather didn’t cooperate. I was stapling the landscape fabric onto the pallet when it started drizzling and got really windy. That’s the bad news. So keep reading my pallet loving friends, instructions on how to make your own pallet garden are just a few lines away… Find a Pallet The first thing you need to do is–obviously–find a pallet. Don’t just take the first pallet you find. Collect Your Supplies For this project, you’ll need the pallet you found, 2 large bags of potting soil, 16 six packs of annual flowers (one six pack per opening on the face of the pallet, and two six packs per opening on the top of the completed pallet garden), a small roll of landscape fabric, a staple gun, staples, and sand paper. Get Your Pallet into Shape Once you’ve dragged your pallet home, give it a once over. Let the Stapling Begin! Lay the pallet face down. Now for the sides. Caring For your Pallet
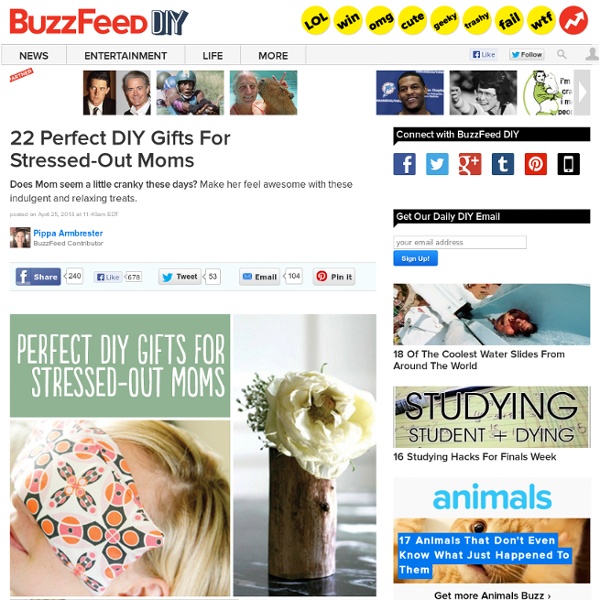
Biscuits and Jam A while back, I bought a cute fabric headband at Union Rose (you can see it here and here). I love it, because it keeps my hair out of my face but doesn't give me a headache like normal headbands. Today I used the headband as a pattern and made myself four more. I'm hoping they'll help me look more pulled together after the baby comes and I haven't washed my hair for days. It's a really easy sewing project, so I thought I'd share the steps with you (and if you find my instructions confusing, there are plenty of other tutorials online--for instance, this one and this one). 1. 2. 3. 4. 5. 6. Voila--you have a headband!
{Everything} In A Jar – Handmade Gifts With just a little over 10 weeks until Christmas, it is already time to start thinking about gifts! The more gifts that can be taken care of ahead of time, the easier the holiday season will be. I came up with a really fun idea that can be customized to pretty much any person or occasion called: {Everything} In A Jar Today, I am going to show you the ones I made for teachers! {energy} in a jar Peanuts White Chocolate Hot Drink Mix Suisse Mocha Latte Mix White Chocolate Macadamia Nut Energy Bar Milk Chocolate Truffles {pampering} in a jar Cozy Socks Sunshine Daisy Lotion Sunshine Daisy Fragrance Spray Moisture Rich Hand Creme Soothing Massage Bar Soap Eye Treatment Cream Facial Scrub Lip Balm {refreshment} in a jar Facial Cleaning Towelettes Wrinkle Release Spray Disposable Mini Toothbrushes Tide To Go Mini Pen Peppermint Gum Peppermint Altoids Mini Brush and Mirror Combo The first step for assembly is to stuff the goodies into the jars. I designed some labels to print off and put on the jars. Beef Jerky Nuts
Gift Ideas for Poor Creative Souls (21) Posted by: Cathy on Oct 06, 2012 Tagged in: Untagged I saw this idea a few times on the Martha Stewart site and I would really like to make these as stocking stuffers this Christmas. It seems like such an easy thing to do and would really take no longer than baking a cake. Materials: Baking soda Cornstarch Citric acid Spritzer bottles Food coloring Glass bowl Essential oil Baking molds 1. 2. 3. If you wanted to have a different shape, you simply just need to use a different mold, like ice-cube molds. This would give you a different way of being able to package them, like putting them in jars. Source For tutorials on how to market yourself online, go here. Submit tutorials here for free and get more traffic.
Making reversible bag from top of straps to bottom of bag: 50 cm / 20 inchesheight: 28 cm / 11 incheswidth: 40 cm / 16 inches I don’t know because I used leftover fabric for my bag. You can print the pattern and place it on your fabric to make an approximation. Fort similar bag, you can check Charlie bag by Burdastyle ($1.99). Please go to the bottom of this post to download the PDF pattern and tutorial. Disclaimer: You may use the finished products for both personal and commercial use (craft shops or markets only – no mass production). 1. 2. If you use my pattern, sew the darts before sewing the bottom and sides of bag. 3. 4. 5. Pull out each of the remaining straps. 6. 7. 8. 9. 10. A reversible bag! Thank you for reading and I hope this post is useful for you! Click to download:
Braided Rag Rug pin your three sewn strips anywhere you can be comfy (you are going to be there for a while! i did mine to my runner on my dining room table) this is the start of your braid. once you get close to the end of your braid you are going to fold over the end of your strip and snip with your a slit. grab the end of your new strip (the end without the slit) and pull through both slits (from behind) this will adjoin your strips and you will be able to continue your braid this is what it should look like, now keep braiding. once you get close to the end of your braid you are going to do the same as you did before and make a slit at the ends of your braided strips and at the beginning of your next strips this time wanted to add color so i took one strip of the honey bun and two of the white strips i cut out. it should now look like this. this will be what you do through out the whole process of braiding your rug. one color in the middle and two whites on the outside. look what you made!
Tutorial: Personalised Tea Bags Loose leaf tea is my new obsession. You can mix and match a thousand flavours to make a special tea all of your own And when you have a special tea…you obviously need special tea bags This DIY tutorial is perfect for personalising the tea bags for all your friends…tea to reduce stress, tea to help you sleep, tea to wake you up…choose a tea for each friend and personalise the tea bag tags! And team it with a gorgeous vintage tea pot for the perfect Christmas present. Now, go get creative! xx Rosie Rosemary Hunter Photography Tools Required Empty tea bags (available at most tea shops) Loose tea leaf Photocopied pages from your favourite story book (or other pictures you love) Embroidery thread and needle Non-toxic glue stick Step 1 Assemble all tools and supplies. Step 2 Spoon 1-2 teaspoons of loose tea leaf into each empty tea bag. Step 3 Fold the top of the tea bag over and into a cute triangle shape to keep the tea trapped in the bag. Step 4 Sew a tiny stitch to keep the folded tea bag closed. Step 5
Cake postcard tutorial Supplies Materials needed to make two cake postcards: 1 large sponge (yellow paints the best)Serrated knifeX-Acto or utility knifeSpray paint (brown, yellow, pink or white)1 tube acrylic latex caulk (brown, cream or white)Spray adhesive (3M Super 77 works great!)Cardboard, kraft paper or scrapbook paper Instructions Cut sponge into wedge shape With a serrated knife, using a sawing motion, cut a sponge into two, cake wedge shapes. Cut a center groove into sponge Using an X-Acto or utility knife, cut a section of foam from the center of the sponge. Paint the sponge wedges in desired color. Trace the slice of cake When the sponge wedges are dry, trace around them on a piece of cardboard, kraft paper or colorful scrapbook paper. Spray glue the postcards to the solid, flat sides of the sponge wedges. Using a caulking gun and your desired caulk, fill a plastic disposable piping bag with half of the caulk. Pipe the center of the cake Pipe the icing on the top Note from the editor This totally works!