background preloader

50 great photoshop tutorials
50 great photoshop tutorials
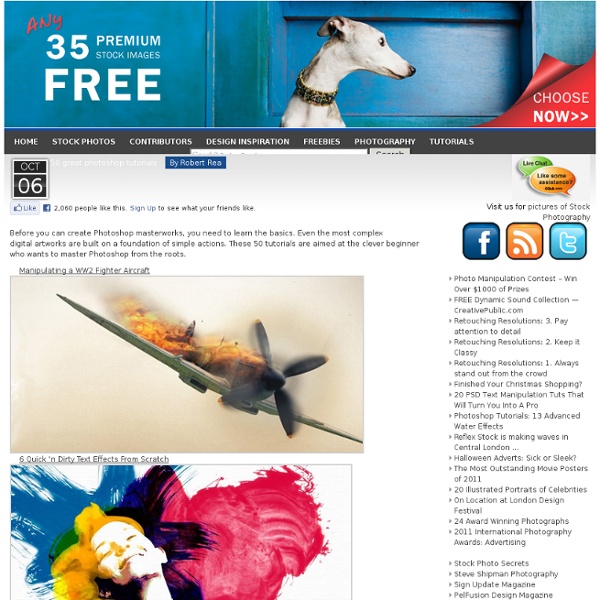
Oct 50 great photoshop tutorials By Robert Rea Before you can create Photoshop masterworks, you need to learn the basics. 1. 2. 6 Quick ‘n Dirty Text Effects From Scratch 4. 5. 6. 7. 10 Step Lighting Effect 8. 3D Transform a Colorful Cube Design 9. 10. 11. 12. 13. 14. 3D Pixel Stretch Effects 15. 16. 17. 18. 19. 20. 21. 22. 23. 24. 25. 26. 27. 28. 29. 30. 31. 32. 33. 34. 35. 36. 37. 38. 39. 40. 41. 42. 43. 44. 45. 46. 47. 48. 49. 50. Note this article is from tutplus If you Liked these you might also like 82 earth shattering zbrush tutorials 40 best photoshop tutorials for creating buttons and badges 50 free resources to improve your photography skills Related posts: Categories : Tutorials 1 Comments Amazing Sky and Space photoshop tutorials :: Reflex Stock Photo Blog November 10th, 2009 at 9:44 am [...] 50 Great Photoshop Tutorials [...] <div style="display:inline"><a href=" Visit us for pictures of Stock Photography Popular Posts Friends: Categories Translator

How to Create an Ice-cold Poster with 3D Text In this tutorial, you'll learn how to combine stock images and 3D text into a cool poster. We'll use an icy theme for it and color it the way we want. You'll see it's not that hard to create a simple appealing poster with effective use of text and imagery. Final Image Preview Before we get started, let's take a look at the image we'll be creating. Video Tutorial Our video editor Gavin Steele has created this video tutorial to compliment this text + image tutorial. Step 1 For this tutorial I'll recreate the poster on a smaller canvas. In my case, after resizing, it did not cover all of the canvas. Step 2 To darken the texture, we first desaturate it. Step 3 Create a new text layer with the text "ICE ICE ICE" in a white color (font: Century Gothic bold). Go into the Blending Options (Right-click the layer and select Blending Options...) and give it an Outer Glow. Step 4 Create a new layer and use a soft brush at 180px to create a light blue (#34d1f8) area like in the preview. Step 5 Step 6 Step 7

950+ Photoshop Tutorials To Keep Your Skillset Updated I know how much everyone loves tutorials, I know I love writing them too. Well in this post I have taken my time to roundup some Photoshop Tutorials and some Photoshop Roundups that I think is valid to be featured in this post. I know quite a few people are going to love me for this, but let’s keep it professional. Design a Brilliant Product Advertisement Source Create a Stunning 3D Liquid Explosion Artwork Source Design a Slick 3D Ice Text Effect Source Logo Design Tips: Letterspacing & Typefaces Source Make a Retro-Space Typography Poster with Colorful Lights Source Create a Grunge Snowboard Poster for the Winter Olympics – Photoshop Tutorial Source 60 Tutorials Creating High Quality Design Icons Source 31 Outstanding Logo Tutorials Source 20 Amazing Tutorials to Help you Make Icons Source 20 Tutorials for Creating HDR Images Source 55+ Exceptional Logo Design Tutorials Source 17 WordPress Theme Design Tutorials Source 15 Fresh and Quality Text Effect Tutorials Source Source Source Source Source Source Source

How to make a see-through to image text effect in Photoshop This is a really simple trick to creating an ordinary photograph with some text into an engaging image. I also have a GIMP version! See-Through Text Effect in Photoshop 1. Open your chosen image in PhotoshopNow, add a New Layer – Fill with a colour that matches:I used a Dark Blue: 1a2932 Starting-Photograph and Colour (Click to view larger) 2. Grab the Text Tool – make a text box, same size as imageType your ‘text’ in capitalsSettings: Font: Gill Sans Ultra Bold, Size: 720px, Justify: Right, Spacing: 600, -100, (Dependent on image size, mine is: 4592×3506 pixels)Space out your text best as possible, as shown:Click the image to check settings: Adding Text (Click to view larger) 3. Now on Text layer, go Right Click –> Rasterize Layer Then, go Select –> Color Range… Click on text, with 0 Fuzziness: Selecting Text (Click to view larger) 3.b. Add Vector Mask 3.c. Create Clipping Mask on Photo 4. Deleting Text (Click to view larger) That’s it! Download the PSD! Written by Mike

Photo Strip (Photoshop Tutorial) This is a Photoshop tutorial on how to create a beautiful photo film strip, as seen in Apple's iLife package design ('06 version) and DigitalMash website. The warp tool will be used to create the twisting effect (so, you need Photoshop CS2 or above to complete this tutorial). With the completion of this tutorial, you will be able build a photo strip with your own photos or artwork. View Final Image Download Photoshop File 1. First, create a strip with the Pen tool (either in Photoshop or Illustrator). 2. Choose 3 photos of your choice and stack them together. 3. Adjust the layer opacity to 40 or 50% so you can see the guideline underneath. Repeat this step for the rest of the strip. 4. Organize the layers into groups (ie. strip 1, 2, 3, 4). Load selection from the shapes you created in step 1 and add a layer mask for each group (so you get a perfect smooth curve). 5. In masked group 1, create a new layer above the strip. Repeat this step for the other strips. 6. 7. 8. Bonus Tips

How To Create a Realistic Money Effect in Photoshop The classic illustration style used on money is something I’ve always wanted to figure out how to replicate in Photoshop. There’s plenty of Photoshop tutorials that show how to create a basic halftone line effect, but they never quite capture that authentic engraved look with plenty of shading and tone. After lots of trial and error I finally managed to figure it out, so here’s an in depth tutorial on how to create a realistic money illustration effect in Photoshop (with some help from Illustrator!). The effect we’ll be creating in today’s tutorial is this vintage engraved or etched illustration style that builds up the tonal areas of an image with lots of tiny lines. Before we can add the effect to a photograph we first need to build a range of ‘screens’ which will then be layered up over our chosen image to produce the carved illustration effect. Enter 4mm in the Size option and apply 11 ridges in the settings. Head back to Object > Blend > Blend Options to configure the settings.

25 Adobe Photoshop actions for Photography Touch-Up and Enhancement PRO Photoshop Actions Bundle – Film & Special Effects These actions are not simple, filter-playing actions. The steps they take have been studied and thoroughly tested, making these actions true image enhancers. Bundle – 50 Top Adobe Photoshop Actions for photographers Manu color techniques were combined in order to achieve these top notch image and photo actions. HDR Legendary Image Action Unlike any “Image Effects” you may have used, this set of FANTASTIC HDR effects identifies every microscopic and even invisible detail and bring them to life. Adobe Photoshop Displacement Action Create awesome shatter and displacement effects, with just a single click of the mouse. Photo Retouching PSD Action Do professional retouching in a fraction of the time. Photograph to Sketch Art – Photoshop Action A Photoshop Action that will turn any picture into a full-blown hand-drawn sketch! Engrave Photoshop Actions Kit DGB Engrave action kit – That’s a tool to easily turn a photo into stylized engraving.

Double Exposure Style in Photoshop We've featured quite a few posts and images with the effect most call double exposure. This technique consists of 2 images superimposed. There are some really nice examples with very intricate overlaying, usually with faces of people mixed with photos of nature. I've been thinking about giving it a whirl in Photoshop for a long time and I've finally gotten around to it. So in this tutorial/case study I will show you how to create this double exposure effect using Photoshop and some stock photos. Step 1 Open Photoshop and start a new document. Step 2 Isolate the girl from the background using the select tool. Step 3 Now let's add the second image for the double exposure experiment. Step 4 Duplicate the photo of the branches to make them mor compact. Step 5 Now put both images together. Step 6 Mask the photo of the girl with the branches selection. Step 7 Time for some refinements, especially on the edges and to make them look random and not so uniform. Step 8 Conclusion Applications

How to Draw a Portrait in Photoshop Here is a new tutorial for all the drawing lovers. In this tutorial, we will make a quick sketch, scan the sketch, and convert it into Photoshop. Then the fun will begin. Drawing a portrait is not very simple, but with some knowledge you can achieve a lot. The end result may not look exactly like the person you are trying to draw, but the important thing is to do the best you can and make the eyes, mouth, or nose look similar to your subject. The end result in this tutorial looks more like me, but to tell you the truth this is just a coincidence. Final Image Preview This is the image you will create. Step 1 First of all you need to make a rough sketch, scan the image and import it into Photoshop. Step 2 Next, create a new transparent layer over the sketch (name it "sketch"). Step 3 Create a new layer and place it below the "sketch" layer and name it "color." Step 4 According to the light source angle (which is in the top-left), draw some shading using a soft Brush (B). Step 5 Step 6 Step 7

September Tutorial #1: The Dancer - Dynamic Liquid Splash Effect In this tutorial we’ll create an image of a Dancer with a dynamic liquid splash effect. Here are the few images used: Dancer: Image ID: 5826686 © Alexander Yakovlev 123RF.com Liquid Splash: Image ID: 7311559 © ifong 123RF.com Liquid Splash: Image ID: 7409551 © ifong 123RF.com Liquid Splash: Image ID: 7409560 © ifong 123RF.com Liquid Splash: Image ID: 7499024 © ifong 123RF.com Liquid Splash: Image ID: 7499033 © ifong 123RF.com Spatter: Image ID: 4797910 © Ana De Sousa 123RF.com Preparing the splashes Fire up Photoshop and open the Dancer and paint/liquid splash images that you want to use. First the splash image. The layer name will be renamed from “Background” to “Layer 0″. Use the Magic Wand Tool (W) select the background of the splash, then hit delete. Try to look for sections of the clothing that will go well with the “flow” of the splash. Lower the opacity for the splash so it’s a lot easier to see where you’re placing it. I used mainly around 30%-10%. Applying the splashes Brushes

Related: