
Crocheted Linen Grocery Tote It's always a good time to eschew the plastic bag in favor of an earth friendly one. My favorite choice is the netted grocery tote. It has all the conveniences of a plastic bag and none of the detriments. I love that it scrunches up into a tiny ball inside my purse, weighs nothing, and fits more groceries than I can even carry - magic! Our knit version of this bag has been a perennial favorite at Purl (check out Elisa's Nest Tote), so here, finally, is a crocheted option. The Materials 1 skein of Louet's Euroflax Original, 100% linen. The Pattern Gauge 5 1/2 single crochets = 1 inch Finished Size Approximately 17 inches tall x 11 inches wide and very expandable. The Bottom Chain 6 and slip stitch into the first chain to form a ring. Round 1: Make 11 single crochets (sc) into the ring. Note: Mark the first stitch of the next round with a removable stitch marker, safety pin or paper clip. Round 2: Make 2 sc into each stitch of the round. (22 stitches) The Body The Handles
Cursory Cowl by TheSexyKnitter | Knitting Pattern Hi! I'm Sarah Wilson, also known as the Sexy Knitter. I started crafting at a very young age and have tried a little bit of almost everything - sewing, quilting, cross-stitch, needlepoint, embroidery, crewel, plastic canvas, weaving, knitting, crochet, beading, jewelry making...the list goes on. Hi! Read More » fiche52 Changement de tissu Lors de la fabrication de votre tapis, vous aurez à changer de tissu dans trois occasions : si une portion de votre tissu est endommagée (ex. il y a un joint dans le tissu), si votre rouleau est vide ou que vous voulez changer de couleur. Dans un tapis rond, on peut faire un joint n’importe où dans le tapis. Si vous faites plusieurs changements de couleurs, essayez également de les faire au même endroit. Dans tous les cas, la technique est la même : (1) commencer une maille serrée en insérant le crochet dans la maille du tapis, en faisant un jeté et en le passant dans la boucle – bien serrer la boucle sur votre crochet (2) couper ensuite ce bout du tissu en laissant une queue d’environ 6 pouces (3) prendre votre nouveau tissu et le poser à plat, en exposant l’intérieur du tissu vers le haut (4) juxtaposer la queue du tapis sur le nouveau tissu et repliez chaque côté du nouveau tissu fermement pour bien emprisonner le tissu rattaché au tapis
Summer 2007 LEGS (Make 2) Using 24-inch circular needle and Crochet Cast On method, CO 110[120, 132, 144, 156, 166, 178] sts. Place marker and join to begin working in the round, being careful not to twist. Work in stockinette st until work measures 7.5[7.5, 7.5, 8, 8, 8.5, 8.5] inches, ending last round 11[12, 13, 14, 15, 16, 17] sts before marker. Place next 22[24, 26, 28, 30, 32, 34] sts on hold on waste yarn or stitch holder. Slip remaining 88[96, 106, 116, 126, 134, 144] sts to spare needle. Make second Leg in the same way as first but, after placing 22[24, 26, 28, 30, 32, 34] sts on hold, do not remove remaining 88[96, 106, 116, 126, 134, 144] sts from working needle, and do not break yarn. BODY Note: When working the next step, you may prefer to use a longer US #6/4mm circular needle. Work in stockinette st until work measures 2 inches from joining round. Decrease Round: [K2tog, k to 2 sts before marker, ssk] twice. 4 sts decreased. WAISTBAND Work 3 rounds in 2x2 Rib. BO edging sts.
Granny Bobble Spiral Hi all, My attempt at a spiral bobble pattern posted here - has been a hit with all you pinners out there, and so I have refined the pattern... Granny Bobble Spiral - And there you have it. Anywho, I hope you like it... Happy crocheting, Karen xx Pinhole Cast On Tutorial | Tin Can Knits The pinhole cast-on is an elegant way to start a piece of knitting from the centre. It is used to begin circular and square shawls, blankets, top-down hats, and other similar items. The POP!! Note: I have described and illustrated these instructions using a knitting needle, because that is how I do it, however you may find it easier to use a crochet hook instead, and then transfer the cast-on stitches onto knitting needles at the end. To begin, create a circle using the end of the yarn. Repeat steps 1-5 until you have cast on the desired number of stitches. So here’s what it looks like close-up: It must be noted that this technique is also referred to as the Emily Ocker cast-on. Did you try this tutorial and it’s not doing it for you? What have you been struggling with? Like this? Patterns that use the pinhole cast-on: Share with other knitters: Like this: Like Loading...
Logiciel gratuit de création de patrons de sacs, chapeaux... 32 Flaresbuttonbutton-type-facebook flare-iconstyle-round-bevel first" style="background-color:#0b59aa;z-index:3"> button-wrap"> button-icon">Facebook button-count">0 width=120&show_faces=false&action=like&colorscheme=light&font&height=21" scrolling="no" frameborder="0" style="border:none; overflow:hidden; width:120px; height:21px;" allowTransparency="true"></iframe>">buttonbutton-type-googleplus flare-iconstyle-round-bevel" style="background-color:#d84d2f;z-index:2"> button-wrap"> button-icon">Google+ button-count">2 buttonbutton-type-pinterest flare-iconstyle-round-bevel" style="background-color:#ce1c1e;z-index:1"> button-wrap"> button-icon">Pin It Share button-count">30 pin/create/button/? Je n’ai que peu de temps en ce moment d’où la désertion transitoire de ce blog… A tout avouer, je préfère utiliser le peu de temps que j’ai à coudre ;-). Mais tout de même voici une petite découverte toute fraîche que je voulais partager. size: large;">Wild things! Vous aimerez peut-être :
Vivid Blanket Tutorial | Tin Can Knits I just loved Emily’s Vivid blanket from the moment I saw it. So I made a pretty version for myself, and put together a tutorial to show you how! Vivid Blanket Materials ::: for my blanket I used: Yarn: Tanis Fiber Arts Yellow Label DK in her Signature Palette and Natural for the bordersNeedles: 4mm double pointed needles and 16 inch circular needle for the bordersPattern:Vivid by Emily WesselOf course you can use any yarn for this blanket, refer to the pattern for yardage requirements and recommended needle sizes. The Process ::: (refer to pattern for exact stitch counts) Note: there are many ways to knit in the round, this is the way I knit the Vivid blanket but you may prefer using one long circular needle and the magic loop technique. Using a the pinhole cast on method, cast on and distribute your stitches over 4 double pointed needles. You are now ready to follow Chart A. Option 1: Single Marker This is how I marked the round. Option 2: Marking each repeat Finishing the Vivid Blanket :::
crochet house shoes sur Etsy, la plateforme de vente internationale du fait main et du vintage. Tuto crochet : écharpe légère Fournitures : 4 pelotes de 50 g de coton Bali de Bergère de France et un crochet n°2.5 (on peut utiliser n’importe quel type de coton ou de laine et un crochet adapté) Exécution de l'écharpe : L’écharpe est réalisée avec 16 hexagones que l’on assemble les uns aux autres. Réalisation d’un hexagone : Chainette : 4ml et fermer par 1mc 1er tour : 3ml et 17bs, fermer par 1mc 2ème tour : 2ml et 2bs rabattues ensembles, 5ml, *3bs rabattues ensembles, 5ml*, répéter de * à * 5 fois (on obtient 6 groupes de 3 mailles, séparés par 5ml), fermer par 1mc 3ème tour : faire 1bs au sommet de chaque groupe de bs rabattues ensembles et sur chaque arceau de 5ml faire 3bs, 3ml et 3bs, (on obtient 42bs), fermer par 1mc 4ème tour : faire 1 tour de bs (1bs sur chaque bs du tour précédent et dans chaque angle sur les 3ml faire 2bs, 3ml et 2bs), fermer par 1mc Réaliser 16 hexagones identiques. Finitions : Assembler les hexagones entre eux en longueur. Abréviations utilisées : ml : maille en l’air mc : maille coulée
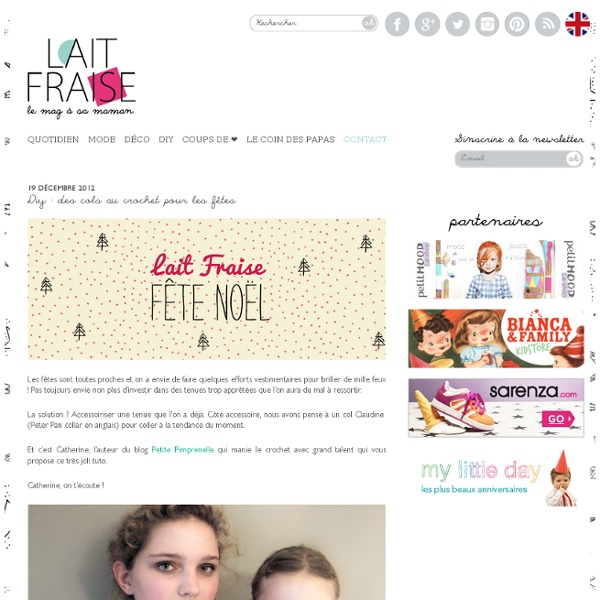
Lily Pad Hexagons... Hello from not so sunny Scotland! I haven't forgotten you all, it's just taken me longer than expected to get organised, and I also wanted to have something good to share....... but first.... Scotland in the rain is lovely; I'm really enjoying my new job and I love my new home. This is the view from my kitchen window - and these were my moving in treat to myself... I can see a loch from my bedroom window, but I'm not taking any pics until I can get out there when the sun is shining, and that has only happened so far while I've been at work. Now enough of the necessities of life and on to the good stuff! And if you look from the side I think they look rather like lily pads...... Now I'm aware that my instructions for the puffed daisy hexagon has stumped some readers who are not quite as experienced in the crochet techniques required, so I have produced a photo-heavy tutorial below that I hope can be followed by all. Lily Pad Hexagons
le crochet géant! Bon, vous aviez bien compris, malgré vous peut-être, que nous sommes dans une période crochet . C’est comme ça, ça ne s’explique pas, c’est l’air du temps… Et dans la grande tendance CROCHET il y a une niche encore plus chouette: le crochet géant . C’est beau et spectaculaire. (photos trouvées sur Pinterest) Pour le crochet géant , c’est bon, le sourcing est désormais accessible, chez brutalux (clique) : si vous avez envie de vous y mettre, voici quelques pistes pour commencer (avant le tapis, plus ardu): les cols rapides et graphiques, les corbeilles et les poufs… pour les corbeilles voir ce blog par exemple : En ce qui concerne les poufs, voici ce que j’ai réalisé récemment, en crochetant en même temps 3 grosses pelotes (pour ce pouf de 70cm de diamètre il faut 15 pelotes) au crochet n°20. et enfin le plus facile et le plus rapide, les cols, il suffit de 3 pelotes de laine n°6. Il faut monter 25 mailles puis crocheter un tube en mailles serrées.