
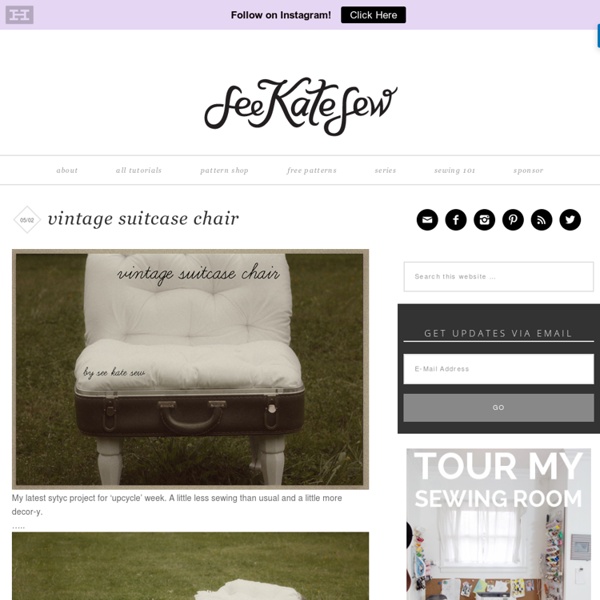
Vintage Suitcase Storage Every time I visit a flea market or antique mall, I'm always drawn to the vintage suitcases. They're not exactly practical for travel these days, but they are perfect for decor and storage. Don't you love how this one is being used? {Images via Elements of Style} Hand-Crafted Etched Glass Bottles - Home for the Holidays Some glass bottles are just too pretty and colorful to toss into the recycling bin. Instead of discarding them, I "etch" them for my own use and to give away as gifts. They're beautiful with flower stems tucked inside, and they make handy containers for bath salts and infused oils or vinegars. Materials: Contact paper—clear or light color Glass bottles or jars, washed, rinsed and completely dried Sharpie-type marker Craft knife such as X-acto Knife with new blade Wooden spoon Soft bristle brush Goggles or safety glasses An old long-sleeved shirt Rubber gloves or medical gloves "Armour Etch" Glass Etching Cream (Jo-Ann, Michaels and most other arts and crafts stores) Instructions: 1. 2. 3. perfection. 4. 5. 6. 7. 8. —By Teresa Blackburn
{Valentines day} pixel-y popup card I‘ve been scratching my head trying to come up with a card for my hubby {AKA the non-romantic type}. I finally decided to make this pixely popup heart card! They are really minimal (which I love) and take about 20 minutes to make (that includes the card, insert and envelope). You can even make some pixely confetti to put inside the card (if you are a big kid like me!). Full instructions and printable templates below! (BTW I remember seeing something similar in a popup book years ago. How to 1. (If you have a cutting machine then see note at end of post!) Cut along the black lines and score the grey lines. 3. 5. 7. Edited to add: The lovely Kayla from saynotsweetanne has send me a .dfx file of the card which you can use if you have a cutting machine. I‘ve been scratching my head trying to come up with a card for my hubby {AKA the non-romantic type}. They are really minimal (which I love) and take about 20 minutes to make (that includes the card, insert and envelope). How to 1. 3. 5. 7.
Little Lucy Lu: Ladder Laundry Rack I am SO excited about my latest "project" ... it's kinda a long one. ....But it'll be worth it. :-) Are you ready??? OK, so to preface this I need to remind you that I am a TALL gal. 5 feet 11 inces, to be exact. And my legs take up a great deal of those 71 inches. But it is also relatively hard to find ... and more importantly - KEEP! I can't tell you how many times I have "ruined" my just-barely-long-enough jeans by putting them in the dryer And therein lies my problem. Let me put this in pictures ... This is what my laundry room looks like most days: Jeans, pants, and various other dryer unfriendly articles of clothing hung on the coat hooks and any other hooks I can find (like the one inside my ironing board cabinet door). I NEED a drying rack. Enter: this old wooden ladder. Which I painted turquoise blue (the same turquoise blue I used on the trunk on the front porch!)... And then I sanded and scuffed and stained it up a little bit ... and screwed some hooks in four spots. And THEN ... P.S.
Holiday Door Mat D.I.Y. You no longer have to settle for a cheesy reindeer door mat to welcome your holiday guests! With your style in mind and a little bit of paint you can make something that feels much more like home. I chose a simple geometric design that mimicked pine trees and used gold and white to make it more festive. I found an inexpensive, bristly door mat at a local box store with an unpleasant design that I knew I could cover up. One can of spray paint should cover your mat easily but feel free to use two. After you've allowed for drying time you'll want to paint your second layer with your acrylic paint. A custom door mat will cheer up your space for the holidays but would also make a great house warming gift for any season.
DIY Party Animal Candles | The Sweetest Occasion Hi there, it’s Jenny from Hank + Hunt with a fun and super easy diy today! As soon as I thought of making these I got a huge kick out of naming them Party Animals. Hilarious, but if you hear groaning…it’s coming from my house. Regardless of how cheesy the name is, these turn out awesome. Your kid’s favorite animal holding that birthday candle minus those red eyes that are oh so typical for plastic creatures, awesome. Supplies - plastic animalsplastic candle holdersdrill with 1/8″ drill bitpliersgold spray paint For the plastic animals, you can use any kind you can find. Hold the animal with the pliers and drill a hole straight down, being careful not to pop out the other side. Spray paint the animals in a few light coats, rotating them to cover all sides. I also painted the candle holders to match. That’s it. {Photos by Hank + Hunt for The Sweetest Occasion.}
One Lucky Day: Inspired at Costco, who knew? Have you seen the latest issue of Where Women Create? I picked it up Monday night at Costco of all places (love that it's 30% off the cover price there). I knew I couldn't pass it up when I saw the FABULOUS studio of mixed media artist Gail Rieke. But it was when I opened the magazine and saw the entire wall that I was truly amazed and inspired. So, I emailed Deb and said, "have I got an idea for Wednesday's blog post...suitcases!" After that conversation, Deb went on a hunt to find ideas using suitcases in decor (this is really only half of what she found) to share with you today. Between Paula and I we have probably close to 45 vintage suitcases, so apparently we like the way they look and all the fun things we can do with them. Suitcase painted with chalkboard paint- via A Beach Cottage Paint the table and suitcase the same color - A table that uses luggage as a pedestal, genius. I have always love this idea found in a long ago issue of Country Home magazine. via Anthropologie
Mod Pillow D.I.Y. Hi there! It's time for the special Holiday edition of the Red Velvet Workshop. In our newest webisode, Rachel, will teach you to make this adorable mod pillow! We hope you enjoyed this episode! *Click to download this printable template: Download MODPILLOW DIY Macrame Bracelet - Honestly WTF Growing up by the beach in Southern California, the ability to knot a macrame bracelet was practically a right of passage. Although those days are long behind us, we’ve never forgotten the ever-so-simple square knot technique. This time, however, we’re replacing hemp and wooden beads for more updated elements like colorful nylon cord and glossy metal charms. Happy knotting! You’ll need: Start by cutting the knotting cord into two 30 inch, two 20 inch and one 10 inch lengths. Center the 30 inch cord under the two middle strands. Pull tightly and slide the knot up to the top. Finish the 2nd half of the square knot by folding the left cord over the middle strands and under the right cord. Pull tightly and repeat the steps – left, right, left, right . . . To finish the knots, thread one of the cords onto a needle and sew up the center of 3-4 knots along the backside. Repeat the same step on the other cord. After sewing up both knotting cords, trim away any excess.
adelynSTONE: Mason Jar Love There are just too many fun uses for these jars. My stash is ever growing, as I can’t seem to make it through Walmart without picking up a case. They’re just such a cheap investment. Craig thinks I’m nuts. So, I’ve scoured Pinterest, several blogs and Etsy to find some of the best uses and cutest ideas. I love the idea of mason jar candles. Look at these clever Save The Date’s. MMM. Instead of serving cans of soda, serve pint jars of lemonade and or sweet tea. I NEED these dish towels! Everyone is loving the mason jar chandeliers right now. This screen printed t-shirt is great. While everyone is raving over the chandeliers pictured above, myself included, I am obsessing over this Sconce! Mason Jars as centerpieces? HELLO! AND my favorite! #kristanlynn xoxo *As always, click on the photographs to be taken to there home on the web. * Like what you're seeing?