background preloader

How to make hard candy jewels
How to make hard candy jewels
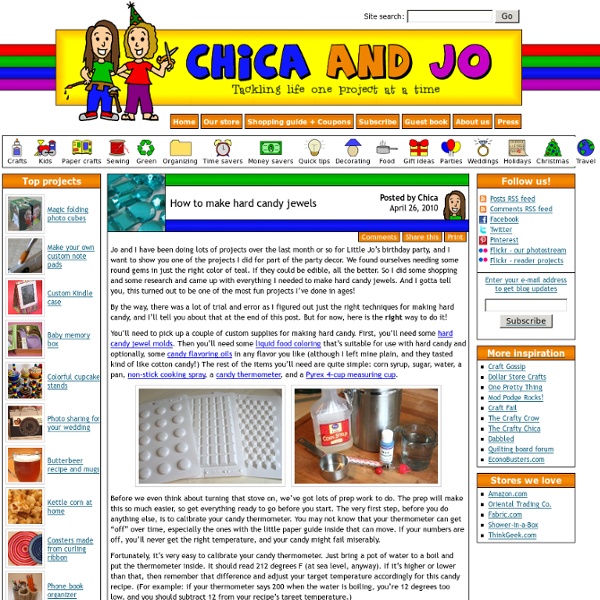
Jo and I have been doing lots of projects over the last month or so for Little Jo’s birthday party, and I want to show you one of the projects I did for part of the party decor. We found ourselves needing some round gems in just the right color of teal. If they could be edible, all the better. So I did some shopping and some research and came up with everything I needed to make hard candy jewels. By the way, there was a lot of trial and error as I figured out just the right techniques for making hard candy, and I’ll tell you about that at the end of this post. You’ll need to pick up a couple of custom supplies for making hard candy. Before we even think about turning that stove on, we’ve got lots of prep work to do. Fortunately, it’s very easy to calibrate your candy thermometer. I urge you to please not skip this calibration step, because it can save you so much frustration. Once your thermometer is set, then you need to spray the molds with the non-stick cooking spray.

How to Make a Bird out of a Plastic Straw (with pictures) Edit Article Normal Straw MethodLong Straw Method Edited by TOHGIN minako, Wyvernbait, Meta Knight, Lois Wade and 17 others This project is a fun and easy example of plastic straw art. Ad Steps Method 1 of 2: Normal Straw Method 1 Cut the straw. 19 Display the bird on a glass by putting the rim between the two legs. Method 2 of 2: Long Straw Method This method is the same basic steps as the one above, however the images show what the bird would look like with the use of a long straw. 1Cut the straw. 19Display the bird on a glass by putting the rim between the two legs. Tips Illustration. Try not to cut your fingers.Wash your hands before starting.

what goes into making chocolate bowls Leave it up to me to mess up every recipe in the world... but on the flipside, by experiencing everything that goes wrong, I end up learning the most.I had seen these bowls from Stephanie's Kitchen, and decided it was a fantastic idea for my food independent study. ingredients: chocolate, and balloons! first, a giant bar of chocolate all the way from taiwan! (i actually tried to pipe pretty lacy chocolate bowls first, but uh, that completely failed so i moved on. plus i don't like that pink fake chocolate.) balloons! tip number 2, after you have melted your chocolate in a double broiler and poured it into a bowl for dipping, let it cool before you dip your balloons. because although you are really excited to dip them and set them down like this... five seconds later you shall hear a POP and you (as well as your kitchen) will be covered in chocolate because apparently latex doesn't like heat. edit: thanks to a lovely comment, there is a reason that makes more sense!

Free Online Whiteboard and Collaboration Tool - Scribblar.com Candy Bar Chocolate Chip Cookie Sandwiches Candy Bar Cookies? Have I gone mad? Well, no but was craving some chocolate….sorry for those of you who are so good and still dieting I used the same technique I’ve been using with those giant Oreo Stuffed Cookies and am just loving it. I used 3 of my favorite snack size candy bars as pictured above. First up, Reeses Peanut Butter Cup….my absolute favorite :) Place a nice big scoop on top and… …..a nice big scoop on the bottom Use both hands to press and seal edges. Do the same with your Snickers, one giant scoop on top, one on bottom…press and seal edges! Same story for your Kit Kat Bar. Ready for the oven. Bake at 350 degrees F, 14-16 minutes! Can you just die?! The inside of the Reeses Peanut Butter Cup Cookie, mmm! …and the fabulous Kit Kat Bar Cookie. Candy Bar Chocolate Chip Cookie Sandwiches Ingredients Directions Preheat oven to 350 degrees F. Makes about 24 LARGE Cookies Other recipes you may enjoy... Bakery Style XXL Chocolate Chip CookiesYou Feeling Blue?

5 Halloween Pumpkin Whole Pumpkin Decorating Ideas A few weeks ago, I featured 5 No-Carve Halloween Pumpkin ideas in case you were looking for alternatives to the traditional jack 0′ lantern. Well, there are so many cute ideas out there that I just wanted to share a few more ideas that could help you turn a pumpkin into something else like a bat or a ghost or a cat! 5 Creative Ideas for Halloween Pumpkin Decorating 1. Turn your pumpkins into bats with a little paint, some craft foam, and miniature pumpkins! 2. Any color paint works for this no-carve alternative although black definitely makes the jewels stand out. 3. These adorable pumpkins are some of the easiest to make. 4. One of the most kid-friendly way to decorate Halloween pumpkins is to stop by your local craft store or scrapbook supply store and pick up up some of the great Halloween themed stickers they have to offer. 5. You can easily add a decorative touch to any of your Halloween pumpkins using metallic paint pens and jewels from the craft aisle!

saucy's sprinkles (bloggedy blog blog): happy thanksgiving More than a few readers suggested that Saucy try to make the infamous turkey cupcakes from What's Up, Cupcake for Thanksgiving. Remember, it's Thanksgiving in Canada this weekend. Saucy decided to give them a whirl. They are, after all, super cute. Super very cute. Seriously... tiny turkeys on top of a cupcake? Tip one: you can do lots of the prep work ahead of time. Because, super very cute takes a lot of work. Tip two: don't attempt to make more than a dozen of these unless you want to snap, or you have the patience of a Saint which Saucy does not. Tip three: decide how many cupcakes you want to make and do the turkey legs a day or so ahead of time. Tip four: the cookbook says to warm the caramel for five seconds to make it pliable, but in fact it took about twenty seconds in Saucy's microwave and the caramels were nice and fresh before she started, so again, you do the math based on the freshness of your caramels and the power of your microwave. ... like so!

Mario Piano Sheet Music - Original Quality How to Make Marshmallow Fondant This time I decided to make it with those mini fruit flavored marshmallows. I had to sort them by colour first. I figured they would add a little bit of flavor to the fondant so I wouldn't have to add much flavoring oil. I use gel colours to dye my fondant but regular food colouring will work too. You won't be able to get really dark colours without making your fondant sticky, but for lighter colours you can just even it out with more icing sugar. I also had lemon oil and coconut flavoring on hand.. oh la la the value brand (which still works fine). Step One: Take a couple of handfuls of marshmallows and put them in a microwave safe bowl. I like to make smaller batches because its easier to add the colour to the melted marshmallow than it is to work the colour into the fondant later. Step Two: Stick the marshmallows in the microwave for ten seconds at a time until the are puffed up and easily stir into a goo with a wooden spoon. Step Three: Step Four: Fondant with the icing sugar kneaded in.

How to Crochet with Pop-Tops Crochet a Flower With Pull Tabs For crafters who want to know how to crochet with pull tabs, we've come up with this free crochet pattern that will teach you how to crochet a flower. This is our first DIY project and it's a good introduction to recycled crafts. To download a printable version, click here » Step 1: Materials & Tools 6 pull tabs Crochet thread (1 or 2 colors). Step 2: Prepare Your Pull Tabs Choose tabs that are in good condition. Step 3: Start Crocheting Begin crocheting the center of the flower using a single stitch to cover the 'thin side' of the tab (top figure) (the side that's pulled when a can is opened). Step 4: Connect the Circle Pull the line of tabs into a circle and crochet them together (top figure). Step 5: Add Color to the 'Petals' Cover the outer ring of the pull-tab using a double stitch with different colored thread. Step 6: Cover and Connect Cover all tabs in this same manner, connecting each of the petals together. Step 7: Finish the Flower Acknowledgements

Rainbow Jello Recipe June 22, 2010 When I was young, rainbow Jello would always be one of the offerings on the dessert table. I used to peel the layers of Jello apart and eat them one by one, my favourite being cherry. I don’t eat Jello much, but when I do, I prefer eating rainbows. It’s funny because people are still impressed by rainbow Jello! Rainbow Jello Recipe adapted from The Food Librarian5 small packages of Jello (I used cherry, grape, blueberry, lime and lemon) 4 1/2 tablespoons of unflavoured gelatin 1 can sweetened condensed milkMix the cherry Jello with 1/2 tablespoon of gelatin.

Related: