
Learn To Sew Dresses: Free Patterns [ Close Privacy Policy ] Privacy Policy / Your California Privacy Rights Revised and posted as of March 4, 2013 Prime Publishing, LLC ("Company," "we" or "us") reserves the right to revise this Privacy Policy at any time simply by posting such revision, so we encourage you to review it periodically. In order to track any changes to this Privacy Policy, we will include a historical reference at the top of this document. This Privacy Policy will tell you, among other things: Your California privacy rights. ACKNOWLEDGEMENT/YOUR AGREEMENT Company websites are not intended for use by individuals under the age of 18 or those who are not legal residents of the United States. HOW DO WE COLLECT INFORMATION AND WHAT INFORMATION DO WE COLLECT? Distribution Partners Website operators that license our ad serving technology pass information to us so that we may serve advertisements to you. Website Registration Forms We collect information about you when you register on one of our websites.
52 Free Dress Patterns Posted on | November 7, 2013 | 19 Comments I’m a firm believer that sewers can never have too many free patterns. With that in mind, here are 52 Free Dress Patterns, divided by style. Notes about the patterns are listed for some of the dresses. Patterns from existing dresses require laying out an item of clothing onto fabric, marking it, and cutting out. No pattern needed usually means that the dress is made from a recycled shirt. Drafting instructions means that you will have to make your own pattern, but the designer included all the information needed. Free Dress Patterns - Casual Dresses Free Dress Patterns – Office Dresses Free Dress Patterns - Dress-Up Dresses Read More : Sewing or Home Comments
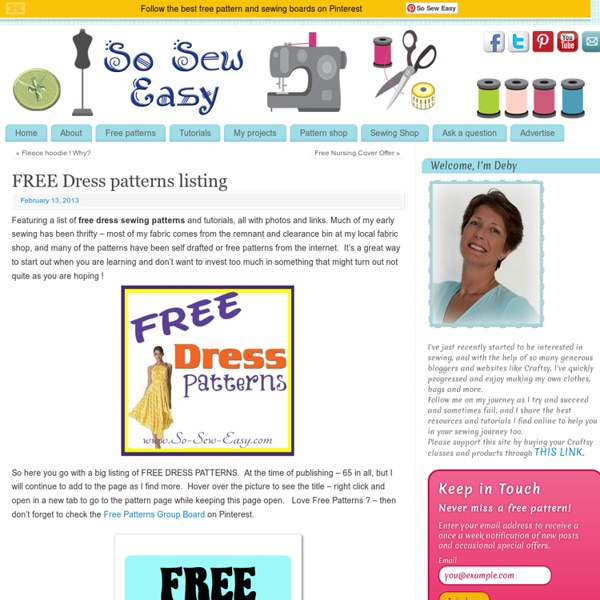
65 Free Clothes Patterns Posted on | October 9, 2008 | 7 Comments I originally became interested in patternless sewing, many years ago, because I had a hard time finding patterns in my size. Nowadays, patterns in large sizes abound. Nonetheless, I still love my pattern free sewing. These patterns generally of three types. Skirts are very easy to make without a pattern. I came across a few patterns that didn’t fit into any other category, so I gave them their own. We normally assume underwear is too complicated or to time consuming to sew ourselves. Aprons can usually be whipped up in less than an hour. Shirts and dresses are much more complicated to make than skirts. Coats can easily be the most expensive piece of clothing in your wardrobe. Click on the first link to get inspiration. Read More : Sewing or Home Comments
5 Minute Halter Top Seriously. This is so simple that it may even take you longer to pull out your sewing machine and set up than to actually make this top! How fabulous is that?! We found this idea here, and with the hot weather we've been having around here lately we thought now was the perfect time to whip one up! What You Need: 1 large square scarf (or large square of material, hemmed on all sides)something to tie around your neck (cord, ribbon, necklace...we used a chain to add some sass!) Sew across that edge to form a casing (not sure if the photo shows this very well...). Run your cord/ribbon/necklace through your casing and tie it around your neck. Then tie the corners on the left and right side around your back (if they are not long enough to tie around your back, simply sew on some fabric or ribbon to crate a longer tie). Ta-da!
Corset Tutorial Fabulous Miniature Doll Artist Anna Hardman and graciously lets us publish her corset tutorial on our Blog. Thnx Anna!You can see more of her fabulous figures on her website AnnaHardmanDolls.comThe CorsetI have created a miniature hourglass corset to share with you today. It is for a curvy full figure. My dolls do not have Victorian thin waists. I used light and glass method of transferring. Step 3.Run a tiny bead of glue on the seams, press with the iron. Step 4.Now add fine laces or trim of your choice to the top and bottom of your miniature corset. To create sophisticated lacing on the back you need to practice. Done! The pattern(click to see full size and print): Learn to Sew Class Description Increase your sewing savvy with fit and finishing techniques from Diana Rupp of Make Workshop. In Sewing Studio, she'll walk you through two classic patterns - an Envelope Pillow and Naughty Secretary Skirt - using methods you'll use again and again. Learn More about Sewing Studio Lesson Plan Lesson 1. The course begins with a brief introduction to the Sewing Studio and Diana Rupp, author of Sew Everything Workshop. Lesson 2. While working on your pillow, you will learn about fabric construction, different types of edges, cutting, hemming, seam allowances and how to construct the French seam. Lesson 3. In this session, you will assemble, sew, press and finish your pillow. Lesson 4. Diana explains the nuts and bolts of reading commercial sewing patterns and gives you the skinny on sizing conventions, pattern problems and other insider tips. Lesson 5. Diana walks you through all the steps of laying out and pinning your toile or mockup for the Naughty Secretary Skirt. Lesson 6.
Make Clothes and Accessories When you make your own clothing and accessories, your style is truly like no other. DIY fashion is often quite easy to accomplish, and the satisfaction of saying 'I made it!' is priceless. Start with some easy projects and advice. DIY style can happen in a matter of minutes. Shirts and Tops Create these cute tops and shirts with a little DIY know-how. Bags and Purses Carry something that makes a statement or simply holds all that stuff. Skirts Tailor your prom dress or just make a skirt shorter. Dresses You can create simple dresses or alter your dress to the perfect fit. Pants and Shorts DIY Pants. Hair Accessories From headbands to hair sticks, you can make all sorts of hair accessories at home. Belts Make your belt do more than hold up your pants. Hats Cap your lid with a toasty winter hat or a breezy sun-blocker. Gloves, Wristbands and Warmers Warm your chilly hands with these gloves, wristbands and arm warmers. Wraps and Scarves Add a wrap or a scarf, be it for warmth or style. No-Sew Clothing
DIY Bleach Tie Dye Last summer, we were obsessed with shibori indigo tie dying. No, really . . . we just about dyed anything white in sight. So when Free People asked us to include a DIY in their guest blogger series, we knew a new tie dye project was absolutely in order. And as the weather is beginning to warm up, what better time than now to start experimenting with reverse tie dye using bleach! Black tees and tops: watch out! To make a grid-like pattern, fold the shirt like an accordion and bind it between two pieces of wood or other flat shaped objects. Before you start bleaching, make sure you are wearing gloves and working outdoors or in a well ventilated area. The rusty brown color will slowly fade into a beautiful lighter shade as it begins to set. Your reverse bleach tie dye shirt is ready to wear! (top image from here, rest of images by HonestlyWTF)
Make A Journal Make a hand bound journal with elaborate side stitching for yourself or as a gift. The stitching is a lot easier than it looks and is so much nicer to hold than a spiral bound edge. Supplies and Equipment – sharp utility knife and cutting surface BE VERY CAREFUL WITH THE SHARP BLADE – rulers – drill with 1/16th inch bit OR a small paper punch BE VERY CAREFUL WITH POWER TOOLS – fancy cover paper – I used Cavallini Vintage Tickets Wrapping Paper – 20″ x 28″ – 1 sheet of 8.5×11 for endpapers (this can be fancy or the same paper as your pages) – 10 sheets of 8.5×11 paper for pages – 3 yards of embroidery floss – mat board – I used Crescent No. 33 White & Cream Smooth Mat Board – Yes Stikflat Glue or other archival glue that leaves paper flat – heavy object to use as a weight – waxed paper – cutting/hole punch template – click here to download – thin cotton or linen fabric (optional) – needle with an eye large enough to fit embroidery floss – brush for glue Stitch down through the next hole.
Creating Colorful Bookcovers bySusan MyersonAugust 2, 2012 With school time just around the corner, I came up with a school craft project that incorporates brightly colored paper. After all, a long school day could certainly use some sunshine! I created fun book covers using the technique called Iris Folding! The plan was to revamp the old version of the book cover. You know, the one that is made from a grocery bag? For this project I used: Several sheets of different colors of bright colored cardstock A paper grocery bagGlue StickTacky GlueScissors Begin by cutting your paper bag open as shown, and then cut off the bottom flap, so that you have one large sheet of paper. With printed side of the grocery bag up, place the book on top and fold down the top and bottom edges of the paper to match the top and bottom of the book. Fold one end of the paper and slide the front cover of the book into the open end until the edge of the cover meets your fold. Now lets create some beautiful Iris Paper Folds! Pages: 1 2 3
Patchwork Book Projeto elaborado para a revista Mãos que Criam. Cereal Box Books Photos and Post By Emelie Sanders. When Momma takes us to the bookstore we each get a book; sometimes two–it depends on her mood, really. Usually, I take the longest time. I quickly scan the fiction area, then turn to the small nook of craft books. I have already made just about every book except the “Cake Box Book”. I highly recommend reading all the way through before starting. First, we need supplies. » a box of some kind (take into consideration the size) » paper (I used 100% recycled, lined paper I tore from an old notebook) » a ruler (a foot long ruler is long enough, I assure you) » a pen » needle » thread (waxed linen is the best, but I used floss due to a shortage of waxed linen) » an envelope (this is optional, I like using it as a pocket inside) » a hammer » a thin nail » some kind of banging platform (piece of 4×4 or just a piece of wood) » graph paper The first step is the only step I messed up on. Open the bottom and cut a slit on the side you do NOT want as your spine.