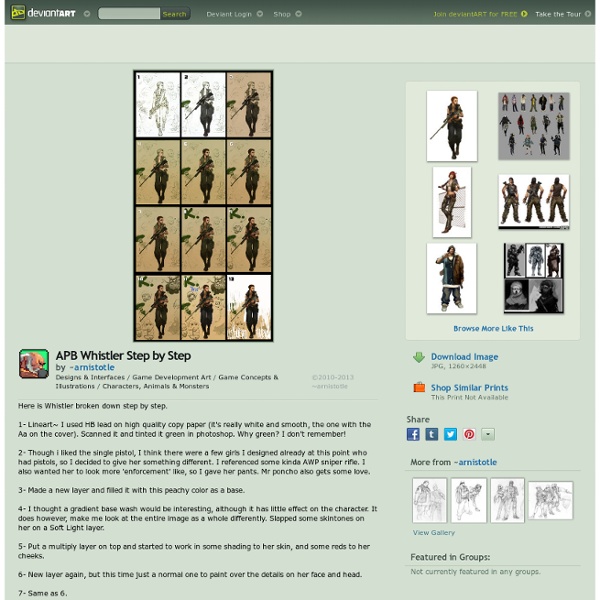
APB Whistler Step by Step by ~arnistotle
Targete's NEWS
Making of Yuka
Introduction After receiving some positive feedback to my last work “yuka” I decided to write a detailed tutorial about creating process. My main goal was to create a painting which was really detailed. Tools For this work I used Adobe Photoshop CS2 and Wacom Intuos 3 tablet. Preparation I had to decide with what resolution I want to work. Sketch I start with creating a sketch in order to define the shapes, which will be later filled in with colours . I like keeping everything simple so I will use these brush settings through the whole creating process.
Related:
Related: