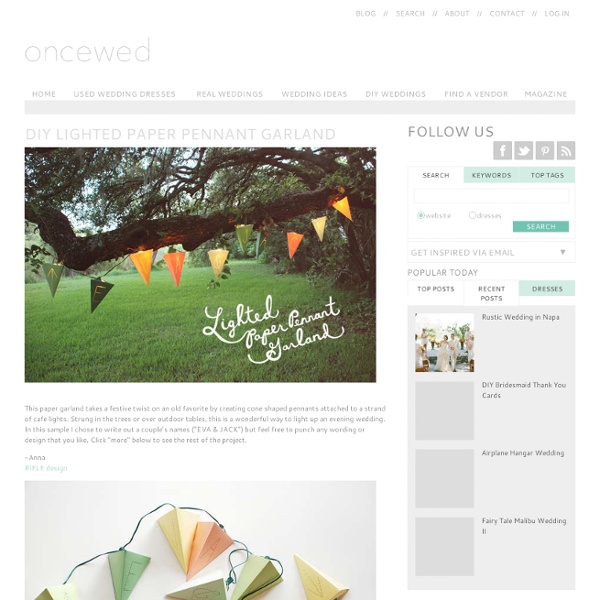
DIY Lighted Paper Pennant Garland
Cupcake Flower Lights
May 24 By Steph Hung May flowers have arrived! These lights were inspired by all the beautiful blooms I’ve been seeing around town. I wanted to bring the summer indoors, but they could make for some colourful outdoor lighting too: Making these floral garlands couldn’t be faster – all you need are cupcake papers and string lights, and you’re on your way to some simple summer lighting. Materials you will need: cupcake papers (large and small), string lights, scissors, and an exacto knife. Step 1: To make leaves – fold a small cupcake paper in half 2 times, and with the folded point at the bottom cut a leaf shape. Step 2: To make an 8-petal flower – fold a small cupcake paper in half 3 times, and with the folded point at the bottom cut around the top. Step 3: To make a 16-petal flower – fold a large cupcake paper in half 4 times, and with the folded point at the bottom cut around the top. Step 4: Cut a small X in the center of each paper. Sorry, the comment form is closed at this time.
DIY Project: How to craft a twine-ball light garland
Time for another DIY craft project and today I’ll be showing you exactly how you can make this twine-ball light garland yourself. It’s one of those projects that’s a little bit messy and does take quite a bit of time, but it is so much fun. Plus you have a really cool piece of decor at the end of it. How-to make a Twine Ball Light Garland I’ve seen twine balls used for all sorts of purposes, from chandeliers to dining table decor, so I thought I’d have a go at making a light garland using this idea. I chose to use coloured twine, alternating between pink and purple twine balls. {You will need} Twine ~ Either plain or in colours of your choosingPVA Glue ~ About 1/2 litreCornflourWarm waterBalloonsMarker penVaselineOld tray for the glue mixtureA broom or long piece of wood to hand the balloons fromTwinkly light garland to attach the twine-balls toFishing wireSpraypaint in the colours of your choice ~ I used Rustoleum painters touch multi-purpose paint {Four} This is the really messy part.
Related:
Related:
