
DIY: Gift Card Snow Globe | the creative mama I know that people like receiving gift cards for the holidays, but I feel that they can be a little impersonal. There is absolutely nothing wrong with putting a gift card in an envelope for someone, but if I have the time, I like to make them a little extra special. This DIY Snow Globe takes about 10 minutes to put together, the longest part is waiting for the glue to dry. You only need a few things to make this project and I would bet that you already have them around your home. Here is what you need: a jar of some sort a gift card hot glue gun glitter embellishments water ribbon Glue a strip on the bottom of your jar. Add some glitter to the bottom of your jar. Fill the jar with water. See how pretty and shimmery the glitter is? Put the top on your snow globe and add a ribbon around the bottom. Idea source: One Charming Party For more creative Christmas ideas check out Holiday Sparkle – Make Your Own Ornaments, Counting Down to Christmas, and A Modern Tree & a Math Lesson.
Celebration Cakes | TreatBox TreatBox Welcome to the Treat Box! Sydney pickup points: Ready to order? Order Celebration Cakes Order now! Celebration cakes are chiffon cakes covered with your choice of icing (buttercream, royal icing, chocolate ganache or fondant) decorated to take centre stage in your party. Flavours currently available: VanillaChocolateMochaUbe (taro or purple yam) Celebration cakes can be personalised to your party theme. Unique shapes, square and round cakes available upon request.Children’s character cakesEdible cake toppers and figurines (i.e. fondant or royal icing) can be made for an additional fee. We can sit with you to design the cake - Your imagination’s the limit. Cake sizes available: Regular (8 in × 12 in) - (about 32 pcs of 1" x 2" cake slice)Medium (10 in × 14 in) - (about 35 pcs of 2" x 2" cake slice )Large (12 in x 16 in) - (about 64 pcs of 1" x 2" cake slice) Prices depend on the design of the cake. Click on the photos below for a closer look. Wedding, Engagement and Bridal Shower Cakes
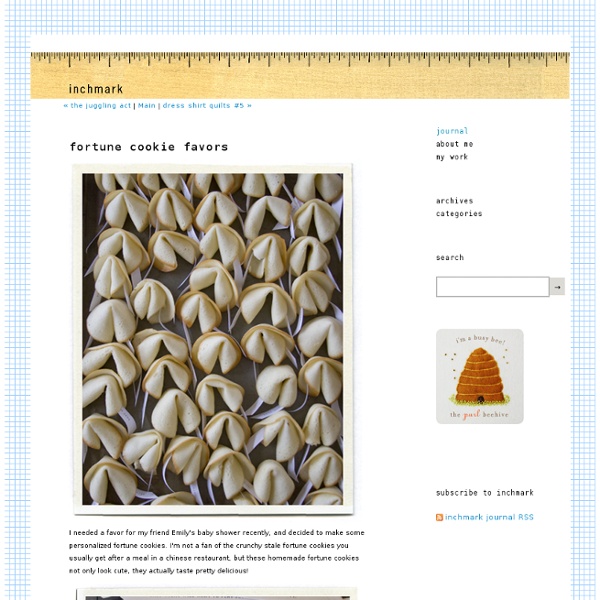
Eat Drink Chic Pat and Stick's Homemade Ice Cream Co. Makers of the 'World-Famous' Ice Cream Sandwich. We have a range of ice cream sandwiches and 500ml tubs. Be on the look-out for one-off flavours which occasionally pop into our branded freezers. Classic Ice Cream Sandwich Flavours Vanilla LaceReal bean vanilla ice cream, all dressed up in almond lace cookies. Ice cream sandwich 4-Packs All of our ice cream sandwiches are available in packs of 4. 500ml Tubs Traditional Vanilla BeanCreamy smooth ice cream infused with aromatic vanilla beans.
Watercolor Stencil Portrait + TUTORIAL - MORE ART, LESS CRAFT Okay kids, for leaving me all those wonderful and inspiring comments, I give you: Watercolor Stencil Portraiting - The Tutorial! Bear with me, it's almost midnight and I am exhausted, and I leave for vacation tomorrow. Okay. 1. 2. 2a. You should end up with something like this; 3. 4. 5. 6. 7. 8. I didn't do a very good job. 9. 10. 11. 12. Alright, I hope that was helpful to everyone! Also, IF YOU USE THIS TUTE, POST WHAT YOU MAKE! Tartelette Project January 25th, 2014 I should title this post “Mr. Project is the most amazing person, I’ve ever met. Lets see all the beautiful things he’s created for this house” But it got kind of wordy there at the end . But seriously, Mr. When we designed the house, I wanted an entry way that had door portals so you felt you were actually inside of a room instead of a wide hallway. I thought about having columns built out to separate the spaces, but decided that columns were more formal than the look I was going for. Mr. Our front door is one of my favorite features of the house. I wanted an perfect paneled wall (no doors etc.) in the entry as a backdrop for my entry table vignette. Moving onto the formal living/music room – We had more time than we expected to finish up trim projects (due to Christmas and new years keeping subs away), and Mr. Moving to the great room… We had our builder do most of the ceiling work in the house. Here’s another detail view of the ceiling. Mr. Mr. Mr. Mr. When Mr.
Welcome to Zensation Tea house 一禪堂 茗茶店 Welcome to our Zensation website. While it is our objectives to provide a unique sanctuary in this changing busy world by promoting our Tea House. Tea is something that has been my inspiration that my 1st tea house experience was at my tender age of 6 years old when my father took me to the traditional Yum Cha tea house where they served all the tea in the Gaiwan (Tea Cup with lid, bowl and under plate). Years of promoting Chinese cultural events from Dragon Boating to Chinese New Year celebrations, I have set my new goals in promotion my passion that has been with me for many many years. As much as coffee culture in Australia has in grained into every corner, yet I am sure the benefit of tea drinking will eventually wake everyone up that you will start searching the fountain of youth in our tea house.
Water Balloon Luminaries : Candle & Soap Making Techniques - StumbleUpon A fun and easy project with a beautiful payoff. Learn how to make these Balloon Luminaries. You will need: High-Melt Paraffin Wax (IGI 1260)Party BalloonsDouble BoilerCookie Sheet Instructions: 1. 2. 3. 4. 5. 6. 7. 8. 9. 10. Here is an example of these luminaries when using dye. The Idea Room: Jell-O "Blood" Worms Halloween Food These edible Jell0 Worms are a BIG hit for our Halloween Dinner. The first time I served these up the kids really freaked out. My daughter couldn’t even look at them at first, but after some coaxing and a little good natured teasing, she ate one. Then much too her surprise, she liked them. They take a little effort to make, but I think they are worth it. Jell-O Blood Worms Ingredients: 100 flexible plastic straws (The straws with a bendable neck make the most realistic worms by adding ridges to the worm. an empty, cleaned 1-quart milk or orange juice carton to hold straws. (The straws will fill up to the height of the container, the taller the better.) 1 package (6 ounces) raspberry or grape flavor gelatin 3 envelopes unflavored gelatin 3 cups boiling water 3/4 cup whipping cream 12 to 15 drops green food coloring waxed paper Instructions: 1. 2. 3. 4. 5. 6. 19.2Kstumbleupon
The ultimate DIY wedding photobooth tutorial A few people have asked about our DIY photo booth so I thought I'd share. It went over really well with everyone at our turquoise & red wedding ! Stuff you need Computer Webcam or laptop with a built-in webcam Spark Booth photo booth software Printer that prints 4×6 photos 4×6 photo paper Table or something to put said computer, printer, and webcam on Stuff you might want Lamp Fabric, room divider, or something as a back-drop External monitor External keyboard Table cloth Signage The set-up Computer: My HP Laptop with an external monitor and external keyboard Webcam: Microsoft LifeCam VX-5000 . Back-drop: Van Gogh Room Divider . How we did it: The credit really goes to my amazing cousin! She hooked up the printer, monitor and keyboard and put them on the table. I choose to use an external monitor and keyboard (but no mouse!) I didn't want people actually touching my laptop I wanted to give them as little opportunity as possible to mess something up hence not having a mouse. That's it!
Dashboard My craft “room” Well, it’s not really a room. There’s no real flooring, and zero drywall…but it works and I lurve it! I created this “space” a couple years ago, but recently have been making changes to make it function better and look cuter– as cute as cement walls and floors can get. ;) The space started out like this a few years ago: That would be a dumping zone. Last year, I added a folding table and shelving to hold wrapping and craft supplies and tools: A few weeks ago, when I started the massive decrapification of the basement (AGAIN), I made a few adjustments – I have learned the way I had things placed down here contributes to the crapifying of the space every year. The first change was to move a shelf that had most of my decor items from the back of the basement to this area – I found having in the back corner of the basement made it rare that I would actually walk back there and put the stuff away. So I moved it to this area. Once I had everything in the right spot, this is what I was left with:
How to draw graffiti This is a cool way to learn how to draw graffiti in legal areas. Step 1: Familiarize yourself with different styles of graffiti. No matter where you live, you can probably find graffiti nearby. If you can't find any in your neighborhood, visit a city if possible and look there--graffiti is predominately an urban art form. If a trip isn't possible, look on the internet. Step 2: Write down a name on a sheet of paper. Step 3: Choose a style you'd like to use for the name.