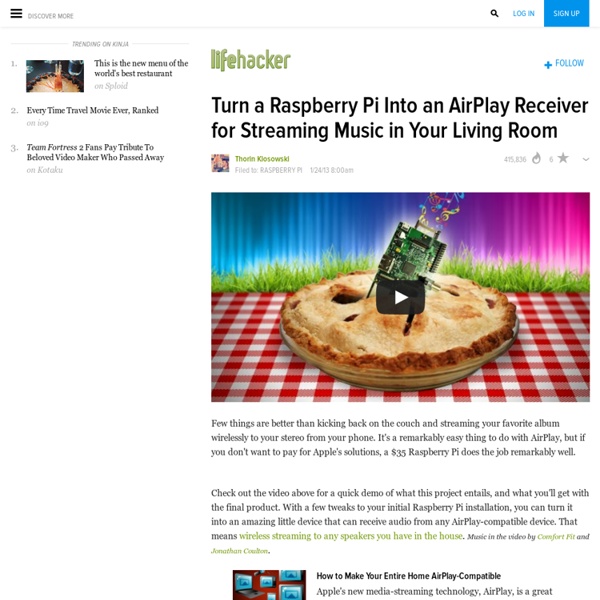
Turn a Raspberry Pi Into an AirPlay Receiver for Streaming Music in Your Living Room
I'm in the process of building a portable boombox using the Raspberry PI, while I have not assembled the case the individual pieces work as intended. The RaspPi will do one of three things on boot: connect to my home network, connect to a USB powered portable access point, or create an ad hoc network (ad hoc has had mixed results with iOS and Android devices). It will then start Shairport. Credit to Lasse Christiansen for the boot up with ad hoc network write up: Flagged Nice, I'm totally picturing an '80s-style boombox with Tron-lights on it for some reason :)
Plus de 50 idées pour votre Raspberry Pi
Nous sommes nombreux à nous être procuré un petit ordinateur Raspberry Pi pour nous lancer dans des projets de ouf malade... C'est très cool, mais à part le classique Media Center XBMC, qu'avez-vous fait avec votre Raspberry Pi ? Si vous séchez niveau idées, voici une petite sélection que j'ai rassemblée au cours des derniers mois. J'imagine qu'il y a encore beaucoup d'autres idées et de tutos, donc n'hésitez pas à partager les liens dans les commentaires, je les rajouterai à ma liste. Merci ! En attendant, j'espère que ceux-ci vous donneront de l'inspiration... On peut donc en faire : Et si vous cherchez un moyen rapide et pas cher de faire un boitier de protection pour vos Raspberry Pi, pensez aux LEGO. Bon, je pourrai continuer comme ça toute la journée, mais va bien falloir que je m'arrête. Amusez-vous bien ! Rejoignez les 60492 korbenautes et réveillez le bidouilleur qui est en vous Suivez KorbenUn jour ça vous sauvera la vie..
BerryBoot – Du multiboot facile sur le Raspberry Pi
J'aime beaucoup mon Raspberry Pi même si pour le moment, je n'en fais pas grand-chose (mais je vous prépare un article là dessus). L'une des limites de ce petit ordinateur, c'est qu'on stocke l'OS dans une carte SD. C'est cool, un poil artisanal (c'est ça qui est rigolo) mais si vous avez une petite carte SD, vous pouvez vite vous retrouver assez limité niveau distribs. Autre chose aussi, c'est le multiboot... Pas simple en terme de paramétrage et de stockage, de caler, disons 3, 4 ou 5 OS sur le même RaspBerry Pi . Et pourtant, c'est possible grâce à Berryboot, un soft/bootloader qui vous permettra de mettre plusieurs OS sur la même carte SD ou de les installer sur un disque externe ou une clé USB, histoire de continuer à utiliser votre petite carte SD. Pour installer Berryboot, téléchargez la dernière version ici, dézippez-le, puis placez son contenu sur une carte SD (formatée en FAT). De quoi largement vous simplifier la vie Vous avez aimé cet article ?
How to Turn a Raspberry Pi into a Low-Power Network Storage Device
Mix together one Raspberry Pi and a sprinkle of cheap external hard drives and you have the recipe for an ultra-low-power and always-on network storage device. Read on as we show you how to set up your own Pi-based NAS. Why Do I Want to Do This? The benefit of having an always-on network storage device is that it’s extremely convenient to have your data (or backup destination) always accessible to the computers both inside and outside your network. Our office server, for example, runs 24/7 and consumes almost $200 worth of power a year. We’ll be the first to grant you that a full fledged server is going to have more storage space and the capability to do more work (such as transcoding a multi-terabyte video collection in a reasonable span of time). What Do I Need? In addition to the gear you’ll need from the Getting Started with Raspberry Pi tutorial, you’ll only the following hardware: One (at minimum) USB external hard drive for simple network backups and file serving or That’s it!
Pas à pas : Installer XBMC sur un Raspberry Pi
Le Raspberry Pi est un mini ordinateur (85,6 x 53,98 x 17 mm) "low-cost" vendu moins de 50 euros. Nous vous proposons de vous expliquer comment créer un PC Home-Cinema, sans être un "crack" de l'informatique. Suivez le guide... Rapide présentation Le prix de revient pour le faire fonctionner (hors écran, stockage externe et clavier/souris) est en moyenne de 40 €. Il dispose d'une puce SoC (System-on-Chip) alliant un processeur ARM 11 cadencé à 700 MHz et une partie graphique dédiée (Videocore 4) prenant en charge les vidéos HD 1080p, ainsi qu'à peu près tous les formats audios et vidéos existants. Vue Du dessus. À côté d'une CB. Côté 1 : lecteur de cartes SD et alimentation. Côté 2 : RJ45 et 2 USB 2.0. Côté 3 : sorties audio et vidéo. Côté 4 : sortie HDMI. Le logiciel XBMC que l'on utilisera est pour sa part un "mediacenter" ; c'est-à-dire un programme qui permet d'organiser, visionner ou écouter une bibliothèque multimédia (films, séries, musiques, images...). Installation et branchements
Related:
Related: