
Everyday Mom Ideas: Make Your Own Family Board Game (Memory Lane) This is such a fun way to celebrate your unique family. Have fun remembering your family's past up's and downs with this do-it-yourself board game made from a bit of fabric and some iron on computer paper. You can make your board game as unique as your family is. Need: 1 yard of a light colored fabric 3 sheets of iron on computer paper 4 sheets of card stock paper Card board- A paper size cut out Hot glue stick w/glue gun Fabric Paint (optional) Felt (optional) 1.COMPUTER IRON ON'S- With your computer your going to design your board squares. Your going to need about 36 little iron on square images. You need to come up with some fun memories when creating these squares.( For example: You wrecked your dodge intrepid without insurance lose a token.) 3. 4. "?" 4. 5. 6. You can make these cards out of any card stock. 7. 8. 9. (You can buy dice for cheap at any grocery store or just borrow some from another game) How To Play: 1.Set up: Place cards and tokens on their squares. 3.
Baixe (GRÁTIS) Patchwork Moldes para patch aplique Patchwork Moldes Grátis em alta resolução Se você está chegou aqui é por que precisa de moldes para artesanato. Acertei? Espero que encontre tudo o que precisa. Neste post deixaremos todos os nossos patchwork moldes que adaptamos ou críamos para nossos trabalhos artesanais. Você pode utilizar estes moldes para diversos tipos de artesanato, tais como, em EVA, feltro, tecido, patch aplique e etc. Não se apegue apenas ao desenho, crie, invente e verá que há muito mais do que um simples risco ou molde. Quer um exemplo? Molde de Galinha de Angola: vários trabalhos Viu que com um simples molde fizemos 3 trabalhos diferentes: porta pano de prato, peso de porta e um pano de prato! Agora é como você, baixe todos os moldes e comece a trabalhar agora mesmo, caso você queira aprender artesanato passo a passo é só clicar aqui. Assista ao vídeo e aprenda a baixar nossos moldes para patch aplique da forma correta! Clique na imagem do molde que você quer baixar e visite o post de cada risco.
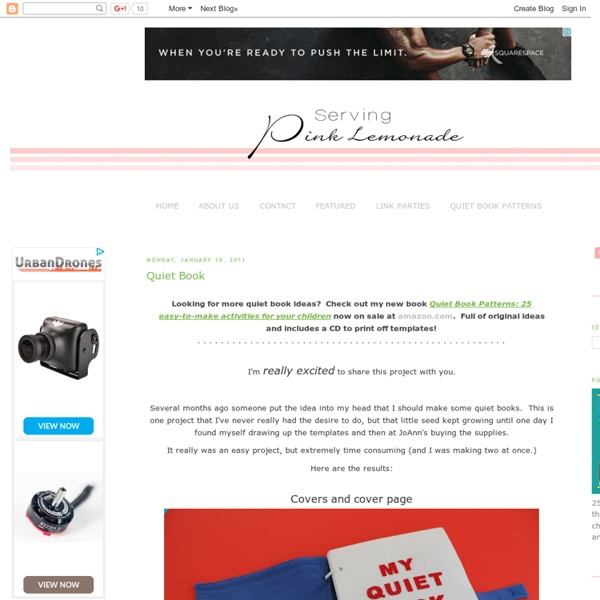
Quiet Book Templates Looking for more quiet book ideas? Check out my new book Quiet Book Patterns: 25 easy-to-make activities for your children now on sale at amazon.com. Full of original ideas and includes a CD to print off templates! First lets talk about supplies. For all the pictures on my pages I decided to use felt. Each of my books has eleven pages plus the cover page. For velcro I used the clear sticky dots. This book requires a lot of fusible webbing and ironing. Each template should print out on a full horizontal 8 1/2 x 11" paper. And the moment you've all been waiting for . . . The templates! You can view the supply list HERE. (To print templates: Click on picture and then copy and save to your computer. Circus monkey can be found HERE. I've received comments from people surprised that I was giving away all this information for free. If you make a quiet book I'd love to see it.
Sew. Craft. Create. — DIY all the time! Don't Call Me Betsy: Munchkin Soft Book Tutorial I couldn't believe how many people actually liked the soft book I made for my nephew last week! Thank you all! I really didn't think it was terribly special, but it was a ton of fun to put together. The sketching and planning part alone was a blast. If you've got a little one in your life, this is a great little project you can whip up for them to enjoy in nearly no time. Supplies: Notebook paper Pen Steam-a-Seam (or other fusible webbing product like Wonder Under, just make sure it's double-sided) Solid fabric for "paper" of book - 6 pieces 12" x 6" Batting - 3 pieces 12" x 6" Embroidery floss (if you plan to embroider any of the book) Various scraps of fabric How To Make Your Own Soft Book 1. Once you've chosen your concepts, cut out six pieces of paper to represent your six pieces of fabric and fold each in half. 2. 3. 4. Next, grab your batting. 5. 6. 7. Flip each page right side out, and make sure to point your corners well. 8. 9.
MamaVonTeacher: DIY Interactive Books... Here's a little project that I've been working on lately: DIY interactive books out of cheap discount store sticker books. I love sticker books, but the problem with sticker books is that they can only be 'restuck' so many times with a classroom full of preschool students; they about destroyed one of these 're-usable' sticker books in one a day! They did, however, have a great time with the book before annihilating it. I set out to solve this problem with a few cheap books in hand, some cardstock, sharp scissors and my school's industrial size laminator. Here's a farm themed sticker book that I purchased a while ago at the dollar store: First, I took out the sticker pages and placed the stickers on a piece of white cardstock. Then I did a little surgery and took the book apart - this one just had a couple of staples in the middle that I needed to pull out. My kids practically beg to read it and love putting the 'sticker 'pieces in the book kind of like a puzzle.
Blanket Tutorial From I am Momma Hear me Roar! I'm sure you all have been over to I am Momma Hear Me Roar! Cheri is so sweet and I'm so glad she let me share this tutorial with you! Just about everything she makes comes out fabulous ... and this is no exception! Here it is! When I started brainstorming about the theme "baby gifts" I wanted to think of something I would truly want to receive for a baby. This mat is guranteed to keep a baby happy and entertained. Want to add your own toys? But, the best part is....it's machine washable. Want a brief run down of how it was made? 1) I cut both the green and blue fleece to be 4' by 4'. 2) I sewed on all the goods....flowers, rocks, the sun, a branch. 3) I used two layers of batting and "quilted" it in a few different ways. 4) I trimmed the edges to be even and sewed on the satin baby blanket edging. That's basically the run-down. I told you! Oh, and P.S. {Click to enlarge!}
Ice Cream Color Match File Folder Game This sweet Ice Cream stall game was our very first free printable file folder games (with only the best Italian Ice Creams!). Learn colors with the colorful cut out scoops and ice lollies that need to be matched with the correct cone or stick, both through word recognition and color matching. There is even a sweet ice cream pocket accessory where the cut out scoops and lollies can be stored. You can also play the game in reverse by putting all of the ice lollies in the correct positions and then guessing the colors, then revealing the correct answer below. In fact we hope that you invent your own ways to play with our games, by customizing and decorating them however you like. Think of this one as your very own ice cream stall! Download! How to play Match the colors of the Ice cream scoops with the colors inside the cone. Learn colors & color names! You will need papers, file folder, scissors, glue Optional: removable labels such as Post-it (see our tip below) 1. Tips
Dress-Up Crown Tutorial I made birthday crowns for my girls last year. I had intended for them to be a special birthday thing, that we got out only once a year, so they would be extra special. But, as these things go, the girls loved them, and they found a permanent home in our dress up basket. I had no idea how much the kids would love them. They are a regular feature around here. I decided to make a bunch for an art fair coming up, and put together this tutorial while I was at it. I digress. Update: Be sure to check out the Nicholas Crown Project that this tutorial inspired! Instructions: 1. 2. Playing House: Momma made....I Spy Book I saw this awesome idea for an I Spy Book over at No Time For Flashcards and I knew I had to make one for Sweet Girl!!! I had so much fun gathering her toys, making the different page layouts and then photographing the pages. Sweet Girl really loves looking through the book and was really surprised to see HER TOYS in there. Here are some pages from our I Spy Book.... This is the cover of our book. This is probably Sweet Girl's favorite page because it has her dolphin, duckie and turtle! Gosh...do we have enough farm animals??? I spy with my little eye.....Little People! I love this page!! Here are some other great I Spy things to make for your little one!! Do you have any more I Spy ideas????
How To Make A Stick Horse When I first made stick horses here, I adapted a no-sew tutorial from Family Fun magazine so I could use my sewing machine. People wrote to ask how I made my stick horses, and I always referred them to that original tutorial. As I made more horses, and eventually unicorns, I drew up a pattern because I wanted uniform-sized horse heads, and the freedom to sew everything on, including the eyes, before gluing the heads to the sticks. This pattern has been sitting in my to-finish tubs for a long time, as has the stack of torn jeans that I wanted to turn into more horses. Note that my torn jeans, split open, look like this - just to encourage you that yes, even that hole in the knee is OK for turning out a pretty decent horse: Here is the pattern. Some notes: There are NO seam allowances. You can use the pattern on actual old jeans, or just cut up brand new fabric. Righto- let's begin. Step 1 Press the seam allowances of the inside ear piece inwards. Step 2 Top-stitch them to the ear pieces.
DIY Eye-Spy Book When I saw this post by Jenae over at I Can Teach My Child ( who will be a guest poster tomorrow so don’t miss it! ) my head was running with ideas on how to make something similar. I would be lying if I told you it was easy, maybe it would have been with no kids but I had an infant in my arms while taking every picture and a 4 year old helper wanting to “help”. However the results were pretty cool and it’s a great book to take to church or somewhere else where talking is frowned upon. Gather your materials. More I-Spy Crafts I-Spy Bottle I-Spy Bag Gather your materials.
Car Mat...Part 3 Mark it Up and Play! I choose to mark the roads, railroad, signs, and airport landing strip with permanent marker, you could sew them all or applique black fabric. In a few years I will need to freshen it up, but for now I like the look of this. After the railroad is complete you can start to draw in the rest of the city. You can draw a sidewalk if you want to, I just marked a line where each driveway or store entrance is. Add crosswalks, stop signs and other traffic signs. I should have made these railroad crossing signs the same size--but I didn't notice it until I was coloring the yellow. Add parking spots where ever there is room. The finished carmat Oh yeah! The car mat is in full use now. The zoo if getting full. Cars are everywhere, imaginations are running wild. Hope you can make one for your children too.