
DIY Fishtail Hat Band We were instantly inspired by this gorgeous rainbow fishtail braid in Free People‘s September catalog and decided to recreate it, adding our own little twist: making the braid into a wearable hat accessory. Who said braids were limited to summer and hair? Cut about 40 strands of yarn about 3 feet long, knot at one end leaving a several inches of slack, and divide into two sections. Transform your hat with your new fishtail braid by securing it with a piece of yarn, safety pin or elastic band! (all images by Honestly…WTF)
12 Days Of Wrapping: Pixel Weave Speaking of nerding out, today’s DIY wrapping project combines two of our favorite things: pixels and crafts. If you haven’t done a basic weave, trying it out around a gift box is the easiest way to start! We started out with a simple yarn wrapping weave, then used ribbon, rubber bands and embroidery floss, and finally construction paper for some pixelated goodness. Materials: - string for weaving (yarn, ribbon, embroidery floss and rubber bands) - construction paper - scissors - wrapped presents or gift boxes For the yarn wrap, start with a piece of yarn or string and wrap it in stripes around your package. Secure it temporarily on both ends using tape (you’ll tie off these ends later). We did the same thing using construction paper, ribbon and a combo of rubber bands and embroidery floss with awesome results. Then, our crown jewel: the Pixelated Letter Weave! For a paper weave, cut out long strips and tape the first layer (the base layer) to the bottom of the package.
Make Your Own Tree Swing Our first house in Springfield had a huge Oak tree in our wild, rambling backyard so I made Sebastian a tree swing once he was big enough to enjoy it. We were so sad to leave it behind when we moved, especially since our second house had absolutely no trees large enough to support even a family of squirrels much less a toddler. Our new place came with a good-sized apple tree right in the middle so as soon as the weather warmed up I decided it was time for another swing. 1. Supplies needed: 1 - 2x4x8 piece of wood for the seat, 1 - 1x2x8 piece of wood for the top, rope long enough to hang from your branch and strong enough to support adult weight (just in case). I suggest at least 40 ft. The kids and I love having a swing again and it adds a lot of charm to our backyard.
MAGAZINE ENVELOPES 18K+ Well I got this idea from our friend Nina. She was making these super cute envelopes out of scrapbook paper and I really wanted to make some! So I came home and made some! They are so so SO simple and add a personal touch to your envelopes. You will need: An old magazine, scissors, an envelope, a glue stick and a Sharpie. Tear out some magazine pages that you like. Carefully pull the envelope apart. Trace the envelope on a magazine page. Cut the envelope shape out. Turn the envelope over as well as the magazine cut-out. Unfold everything and separate the magazine cut-out from the envelope. Glue the bottom flap down to the two side flaps. And you've made your own envelope! The great thing about making these envelopes our of magazine pages is that the envelopes have a character all of their own.
love notes {easy note cards} This weekend I taught a lesson at church that focused on how our attitude can affect the overall feeling in our home. I encouraged the girls to leave little love notes for their parents and siblings to show love and appreciation and make their home a happy place. I wanted to give them each three cards to use, so I had to come up with about 24 cards. Little Love Notes {Tutorial} Supplies:*Patterned paper*Plain card stock for card base*Paper punches (I used a couple of different hearts, a butterfly, and a star)*Sewing machine and thread*Scissors 1. 2. 3. Whew! 4. But wait, here are a few more--they were so cute I hated to give them away!
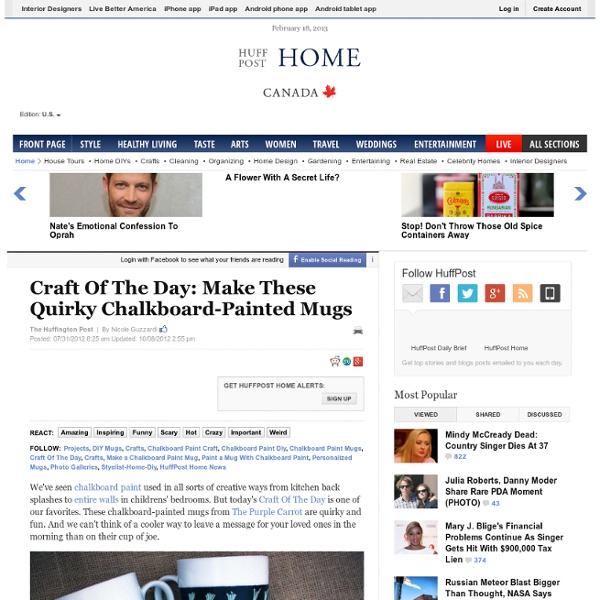
Easy Painted Tumblers Thank you all so much for such amazing feedback and for helping this project circulate all over the internet! My cups have held up pretty well due to not being used too often (they are currently just holding bobby pins in my bathroom) but several readers said after a little wear and tear, the paint comes off. Other readers have found that using paint specifically for glass leads to a much longer life! In the comments, readers have specifically stated that Martha Stewart Paints and DecoArt paints have lasted the best. I have used both, and love them both! Here's the thing about Anthropologie; everything is gorgeous. Let the knockoff begin! The internet taught me that I can use acrylic paint on glass as long as I seal it afterwards, so thats what we are going to do here. In true knockoff fashion, I did one rainbow confetti, and one each of red and blue. So there you have it. xo,
DIY Découpage Floral Bag When H&M asked us to DIY a boho-inspired item for their summer issue, découpage was the first thing that came to mind. Honestly, does it get any better than customizing a simple handbag with a brilliant floral print? However you create it, it’ll be satisfying to know that you’ve designed yourself a one of a kind bag! You’ll need:a handbagcotton fabric with a large floral patternpainter’s tapeMod Podgecraft paint2 small plastic dishes2 brushesscissors Start by taping off the edges and hardware of the handbag. Squeeze a dollop of colored craft paint into a small disposable container. Allow the first layer to dry completely. While the paint dries, carefully cut out a handful of flowers from the fabric. Arrange them onto the painted section of the bag. Remove the painter’s tape when the Mod Podge has dried clear and your floral handbag is complete! (all images by HonestlyWTF)
DIY: Homemade Berry Lip Balm | Feminiya Lips have an important role to play in the facial beauty of an individual. Like rest of your face, your lips also need extra care. A touch of lip gloss or a cursory swipe of lipstick is not just enough. To enhance beauty of your lips, you should use natural ingredients, available in your kitchen. Here is the recipe of homemade berry lip balm. Ingredients Required 1 Raspberry (for feminine pink colour)3 Blackberries (for bright berry colour)½ tsp Extra Virgin Olive Oil3 Pomegranate Seeds (for vibrant red colour)SpoonSmall Jar Method of Preparation Step 1: With the help of back of spoon, mash raspberry and blackberries. Step 2: Squeeze the juice of individual pomegranate seed with the help of your index fingers and thumb over the bowl of raspberry and blackberry mixture. Step 3: Add olive oil to it. Step 4: Strain the mixture in a small jar. How to Apply? Apply it on your lips with the help of a lip brush or your fingers. Comments comments