Traduction des exemples du livre "Getting started with arduino" avec ArduBlock - le Blog du Clergeot !
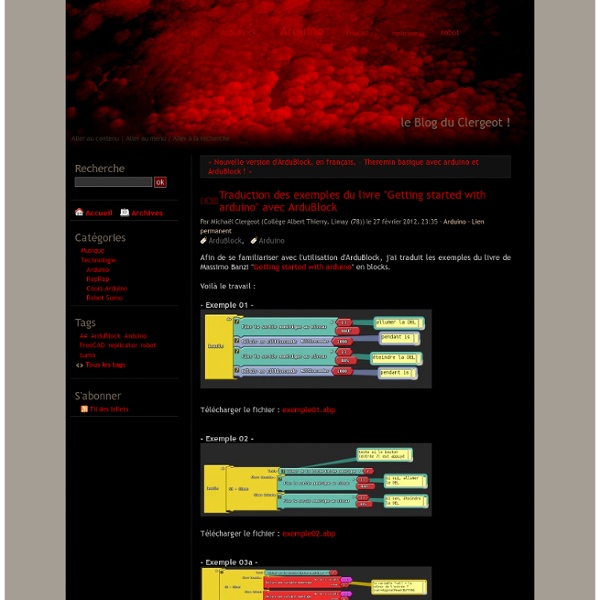
Par Michaël Clergeot (Collège Albert Thierry, Limay (78)) le 27 février 2012, 23:35 - Arduino - Lien permanent Afin de se familiariser avec l'utilisation d'ArduBlock, j'ai traduit les exemples du livre de Massimo Banzi "Getting started with arduino" en blocks. Voilà le travail : - Exemple 01 - Télécharger le fichier : exemple01.abp - Exemple 02 - Télécharger le fichier : exemple02.abp - Exemple 03a - Télécharger le fichier : exemple03a.abp - Exemple 03b - Télécharger le fichier : exemple03b.abp - Exemple 03c - Télécharger le fichier : exemple03c.abp - Exemple 04 - Télécharger le fichier : exemple04.abp - Exemple 05 - Télécharger le fichier : exemple05.abp - Exemple 06a - Télécharger le fichier : exemple06a.abp - Exemple 06b - Télécharger le fichier : exemple06b.abp - Exemple 07 - Télécharger le fichier : exemple07.abp
Arduino With L298N Based Dual Motor Controller
The ControllerA motor controller is a device that serves to govern in some predetermined manner the performance of an electric motor. A motor controller might include a manual or automatic means for starting and stopping the motor, selecting forward or reverse rotation, regulating the speed and torque, and protecting against overloads and faults. This Dual Motor Controller is easy to use, thank's to the L298N motor driver chip. This chip allows for direct drive of two bi-directional DC motors, and incorporates high-speed short diodes for protection. Drive current up to 2A per motor output. The driver uses a broad-brush design to reduce wire resistance.Below, an illustration of the DRI0002, an inexpensive board avalaible by DFRobot. Click the image to enlarge Each motor is controlled by two pins on the motor controller: A pin M, (zoom the above picture, look at the motor logic) that affects the polarity on the output terminal of the corresponding motor. Click the image to enlarge.
rMP3 - Playback Module | Rogue Robotics
Description | Pricing | Downloads | Documentation | Buy Online Easy to use memory card interface Supports MMC/SD/SDHC Plays MP3, PCM WAV, and IMA ADPCM WAV files MP3 playback control via serial or parallel interface Pitch control Play tones (no files needed) Simple TTL serial control interface (non-inverted) SPI control option 2400 bps to 460800 bps 5 volt operating voltage RoHS Compliant Low power operation - less than 60mA @ 5V during playback - less than 30mA @ 5V idle Small module footprint (2.7" x 2.1"/68.58 mm x 53.34 mm) with mounting holes FAT12, FAT16 and FAT32 compatible - 8MB to 32GB and beyond Read and write data files as well as audio playback Easily interfaced with any microcontroller (PIC, AVR, 8051, etc.) Chipset available (TQFP44/QFN44 + LQFP48) RoHS compliant. The rMP3 module allows designers to integrate high quality MP3 playback into designs with an easy to use TTL serial protocol. SD/MMC card not included. Buy Online
Arduino Shield List
NetIO Controller
Here are some examples of hardware which has been used with this app. If you want to test your hardware and write a small tutorial about it, please ask for a promotion code to get the app for free. Also, many users have submitted their projects including instructions and configurations. Server / PC This tutorial sets up a simple Java socket server and connects the NetIO App to this server. 1. Make sure you have the latest Java JDK installed on your and download the VerySimpleServer.java 2. Go to the folder you saved the file and run javac VerySimpleServer.java in your terminal. 3. Type "java VerySimpleServer 54321" into your terminal. 4. Open the helloworld.json in the UI-Designer and edit the host name (ip address) in the connection. The host attribute should be the name or the ip of your computer you started the server. 5. Start the app and hit the "Hello World"-Button. Arduino I found a nice project on (german) which uses the NetIO app with an arduino board.
NetIO UI-Designer
The designer is a tool to create configurations for the NetIO applications. It helps adding and layouting items, as well as adding functionality to these items. The overall process of creating a new configuration can be seen in the video tutorial. Once you created a new configuration you can click the button to add the configuration to your user profile.Important: Changes made in the designer are not automatically saved. On the app side, enter your UI-Designer credentials and hit the 'sync' button to download all your user configurations. The designer can be used with or without being logged in to a user account. The button opens a pop-up menu which shows all available configuration presets and if logged in, all user configurations. Help to specific attributes can be retrieved through clicking the sign in the according form. The buttons can be used to upload existing configuration files (JSON) or download the edited configuration back to your computer.
NetIO Controller
This section describes the JSON structure used to store configurations. In most cases, using the UI Designer should do anything you want. In the UI-Designer, there is also a small help icon ( ) beside every attribute showing a small explanation on mouse-over. Don't wanna read? Check out the short introduction on youtube! Short API-like auto-generated docs See the auto-generated docs for getting a quick overview over available attributes. General Remarks The App is called NetIO, but the name displayed on your device is just 'Controller'. Handling multiple configuration files and sync with online UI Designer When seeing the first page, a swipe to the right opens the configuration menu on the left. Testing If you want to test the iPhone/iPad/Android application, simply start a socket server on your computer like descriped in the Tutorial section. How does the app work? The app renderes different items on the screen. Configuration This is the overall JSON structure. Connections Items Buttons Icons ...
Related:
Related: