
Full Page/ Full width Background Slider A great plugin that allows you to add full page background slider to your website with a lots of custom features. - Adds full page slider to use to your website. - You can add up to 6 images to the slider. - You can add single full page background image to your site. - You can add different slider to different pages of the website. - Easily manageable back-end. - Comes with 6 Great Backgrounds ready to use - Last but not the least its FREE Read more instructions about how to use here Features Adds full page slider to use to your website.You can add up to 6 images to the slider.You can add single full page background image to your site.You can add different slider to different pages of the website.Easily manageable back-end.Comes with 6 Great Backgrounds ready to useLast but not the least its FREE
10+ Amazing WordPress Bootstrap Plugins Twitter Bootstrap is one of the most popular front end framework developed by Twitter using HTML, CSS and JavaScript languages for building websites and apps. Owing to the increased adventures that one experiences with new plugins, let me introduce you to some of the best WordPress Bootstrap Plugins which you can use on your WordPress site. Also Read: Bootstrap Lightbox Bootstrap Lightbox is a simple Lightbox plugin created with Bootstrap, it is a really easy to use plugin, just add the required HTML to the page, and you get a pretty and responsive lightbox with an optional caption. WP Bootstrap Gallery If you are looking for best WordPress Gallery Plugins, here you have a great option WP Bootstrap Gallery a responsive image gallery plugin which is based on Twitter Bootstrap. WP Bootstrap Gallery plugin comes with easy to use, friendly user interface. Download Theme WP Bootstrap Carousel A simple, straightforward implementation of the Twitter Bootstrap Carousel in WordPress. Download Theme
Un site Web de 1000 ans Le grenier d'une grand-mère, la boîte à chaussures pleine de photos dans un placard ou tout simplement les étagères de nos bibliothèques : nous collectionnons de très nombreux objets physiques. Ces porteurs d'informations sont des éléments de notre mémoire personnelle et collective. Ils nous aident à créer du lien affectif, à transmettre des émotions mais aussi de la connaissance. La gestion de la mémoire (ou l'archivage) prend lieu à tous les niveaux structurels, du souvenir d'enfance à l'information d'une multinationale. Organisation de l'information dans le monde physique Nous avons appris dans le monde physique à gérer cette information par la création de stratégies adaptées à notre environnement. La refonte du site Web, cette catastrophe périodique Au cours de la vie d'un site Web, il est régulier d'entendre le mot « refonte » dans les équipes ou l'agence Web qui doivent gérer le site. L'information nouvelle sera de nouveau obsolète d'ici quelques mois, quelques années.
Site Creator Ultimate This is an all around plugin that allows you lots of control on how your front page, posts, pages and website looks. It can enhance the look of your front page or make a website look like a professional magazine or news website. Usage By posting a short code on a page you can display a layout. Example front page Example blog page Example uses Create a great news, magazine or business looking front pageEnhance the look of your website or blogCreate widgets such as top posts or latest posts etcCreate complex sub pages Features Effects Image changes to another image when hover over with mouseImage changes to another image automatically (simple slideshow)Image fades when hoverBackground color effect marks the post you are hovering overPut text over imagePut text in a pop up Introduction This plugin works by using layouts. [sitecreator show="1"] Up to 20 layouts that can be used but sometimes you only need one. Example: How do I create a widget?
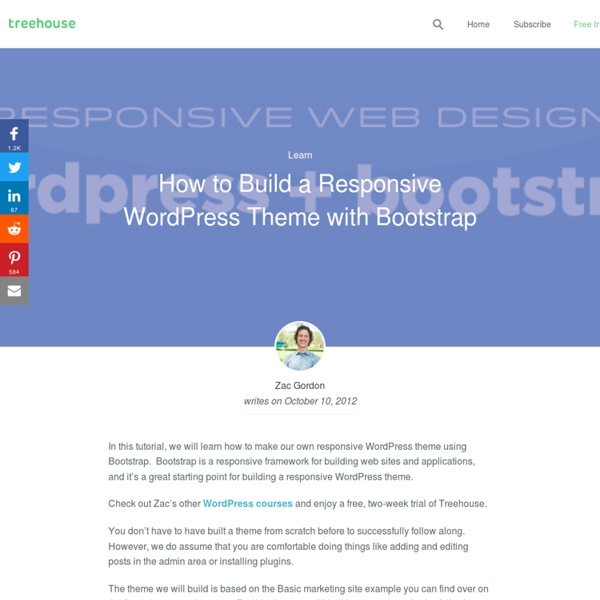
How to Build a WordPress Responsive Theme On Bootstrap | ArtDriver Considered as the world's most popular HTML, CSS and JavaScript framework for developing mobile first, responsive projects, Bootstrap has been heavily used and recommended by web developers across the globe. Bootstrap has served as a great starting point for building fully responsive and eye-catchy WordPress themes. In this post I'll be walking you through all the steps associated with creating a WordPress theme from scratch using Bootstrap. Install WordPress First you'll need to install WordPress and download and unzip Bootstrap files. You may also opt for installing the Theme Test Drive plugin in case you are building a responsive WordPress theme using a live website and hence don't want people to view the site while it's being developed. Step 1 Once you're done with putting all the above mentioned things in place, simply open the directory which contains all your WordPress files. Our Recommended Hosting for WordPress Sites Step 2 Step 3 Step 4 Step 5 Step 6 Step 7 Step 8 Step 9 Step 10 Step 11 <?
Comment tester la compatibilité de votre site sous Internet Explorer même si vous n'êtes pas sous Windows ? Si vous êtes développeur web et que vous avez besoin de faire des tests de compatibilité sur la dernière version d'Internet Explorer disponible sur la dernière version de Windows, à savoir la Technical Preview de Windows 10, voici un service proposé par Microsoft qui va bien vous rendre service. RemoteIE utilise le client RemoteApp qui donne accès aux machines virtuelles Azure, sauf que là, pas besoin de configurer votre propre machine... Non, non, Microsoft met à votre disposition un Internet Explorer distant sur lequel vous pouvez vous connecter gratuitement, que vous soyez sous Windows, sous Mac, sous iOS ou Android... Pour y accéder, rendez-vous sur ce site, puis loggez-vous avec votre compte Live. Ensuite, téléchargez l'un des clients suivants : Lancez-le et cliquez sur le bouton "Microsoft RemoteApp" (sous OSX) ou sur "App Invitations" (sous Windows). Une fois identifié, vous devriez voir apparaitre une invitation à utiliser Internet Explorer 10. Amusez-vous bien ! Source En Savoir +
Duplicator With over 25 million downloads Duplicator successfully gives WordPress users the ability to migrate, copy, move or clone a site from one location to another and also serves as a simple backup utility. Duplicator handles serialized and base64 serialized replacements. Standard WordPress migration and WordPress backups are easily handled by this plugin as are zero downtime migrations. For complete details visit snapcreek.com. Quick Video Demo Overview Duplicator is the most powerful migrator available. Move, migrate or clone a WordPress site between domains or hosts with zero downtimePull down a live site to localhost for developmentTransfer a WordPress site from one host to anotherManually backup a WordPress site or parts of a siteDuplicate a live site to a staging area or vice versaBundle up an entire WordPress site for easy reuse or distributionPerform a full WordPress migration without struggling with messy import/export sql scripts Migrate WordPress and Run WordPress Backups Duplicator Pro
Function Reference/wp nav menu Languages: English • 日本語 • Português do Brasil • (Add your language) Description Displays a navigation menu created in the Appearance → Menus panel. Given a theme_location parameter, the function displays the menu assigned to that location. If no such location exists or no menu is assigned to it, the parameter fallback_cb will determine what is displayed. If not given a theme_location parameter, the function displays the menu matching the ID, slug, or name given by the menu parameter; otherwise, the first non-empty menu; otherwise (or if the menu given by menu is empty), output of the function given by the fallback_cb parameter (wp_page_menu(), by default); otherwise nothing. Note: As of 3.5, if there are no menu items, no HTML markup will be output. Usage Usage (Showing Default Values) <? Parameters $theme_location (string) (optional) The location in the theme to be used--must be registered with register_nav_menu() in order to be selectable by the user Default: None $menu $container Default: div <?
Liste des bonnes pratiques Webperf Sites Opquast Connexion Vous avez oublié votre mot de passe ? ou Créer un compte Webperf 41 critères pour afficher vos sites encore plus rapidement Testez et faites reconnaître vos compétences Opquast Certified est un test sur 1000 points permettant de vérifier le degré de maîtrise des meilleures pratiques du Web Découvrir L’ouvrage de référence pour les professionnels du Web En savoir + Version numérique offerte pour l’achat de la version papier WordPress Themes » Montezuma Note: This is a completely different theme than the old “Montezuma” theme from 2007/2008. Montezuma is my second theme for the wordpress.org theme directory. Montezuma is a responsive, totally customizable, search engine optimized HTML5/CSS3 theme with various CSS3/jQuery animations. A little bit of HTML/CSS knowledge is recommended, or at least the desire/willingness to read & learn. (If the theme is running a bit slow it is probably due to various theme check plugins running in the background. Responsive Choose from 10 responsive, 5 flexible and 5 static layouts. Edit & create templates online Montezuma has a virtual file system that lets you edit and create new page templates online in the Montezuma admin area, without the need for uploading files with FTP. Edit PHP code online You can use a limited set of about 60 WordPress and Montezuma PHP functions while editing or creating page templates. Auto post thumbnails Cached auto post thumbnails. Advanced post excerpts Numbered page navigation
Top 10 des meilleurs plugins WordPress Une liste de 10 plugins WordPress indispensables pour bien débuter la conception de votre nouveau site / blog WordPress. Une sélection entièrement subjective pour laquelle j’attends vos réactions d’utilisateurs passionnés, débutants ou professionnels. #1 – WordPress SEO by Yoast Sans doute le meilleur plugin de gestion de votre référencement sous WordPress… à condition toutefois de paramétrer finement ce dernier pour éviter une mauvaise indexation de votre site. Alternative : Platinum SEO Pack WordPress SEO by Yoast Améliorer votre référencement (SEO) avec le plugin WordPress SEO de Yoast. Taille : 650,4 KiB • Date : 7 janvier 2013 • Hits : 3 656 #2 – Wysija Simple d’utilisation, puissant et efficace : Wysija n’est autre que le plugin ultime de gestion de newsletters. 90% des besoins standards sont couverts par cette extension si bien que je l’utilise pour le projet WordPress Channel depuis quelques semaines. Alternative : WordPress Newsletter par Tribulant Software Wysija Newsletters Akismet
Browseo Moving WordPress WordPress.org Codex Codex tools: Log in Interested in functions, hooks, classes, or methods? Check out the new WordPress Code Reference! Moving WordPress Languages: English • WordPress 日本語 Français • Nederlands • Português do Brasil • Русский • Slovenčina • 中文(简体) • (Add your language) This page was moved to except above language locator. Retrieved from " Codex Resources Code is Poetry.