background preloader

Stenciling with Bleach

Stenciling with Bleach
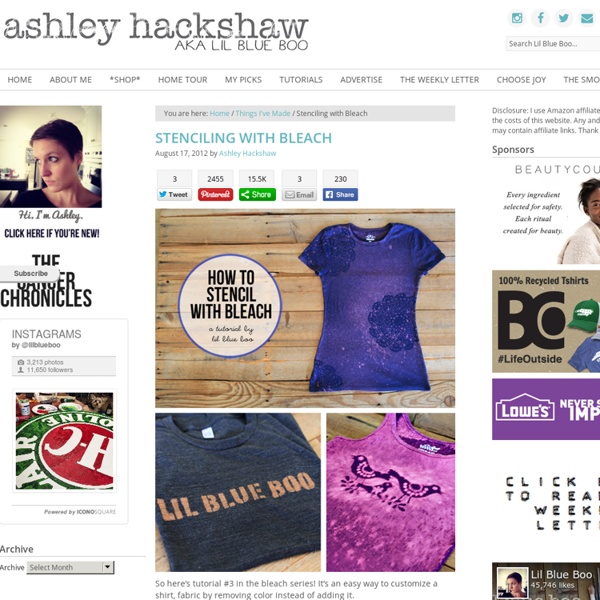
So here’s tutorial #3 in the bleach series! It’s an easy way to customize a shirt, fabric by removing color instead of adding it. For my first project I used a $1 doily as my stencil. I placed it on a navy t-shirt and sprayed a mist of bleach over top: I moved the stencil to another location and sprayed again. Navy….turning to a dark pink/purple: Finished: You can also use vinyl or freezer paper stencils. I used a sponge to dab the bleach around the stencil and I used a spray bottle to mist around it: Once the shirt began to change colors, I sprayed the back of the shirt with bleach. Bleach stenciling is an easy way to add lettering to a shirt too. Finished! Visit the other two projects from this week by clicking the images below:

6 Fun Science Experiments for Kids | TheMomsJournal My kids love to work on science experiments so I’m always on the look out for simple kids science projects that we can do at home, using items we have around the house. These science experiments I found look like fun. Remember to provide supervision as needed and keep your kids away from harmful chemicals! Crystal Geodes Here’s one from Martha Stewart that is actually a great way to decorate eggs for Easter too. Learning about Absorption My twins came home from school once with a white carnation that had turned blue as a result of absorbing blue water. Mad Scientist Potion Not only is this great fun for kids, but it’s edible and a great addition to your Halloween recipes collection. Cell biology Here’s a fun one that the kids will enjoy eating too! Tye-Die Milk This one uses milk, food coloring and dishwashing soap to show the effect of how the chemistry of milk and soap react together. Baking Soda Explosion Baking soda experiments are usually hit around here.

DIY Bleach Tie Dye Last summer, we were obsessed with shibori indigo tie dying. No, really . . . we just about dyed anything white in sight. So when Free People asked us to include a DIY in their guest blogger series, we knew a new tie dye project was absolutely in order. And as the weather is beginning to warm up, what better time than now to start experimenting with reverse tie dye using bleach! To make a grid-like pattern, fold the shirt like an accordion and bind it between two pieces of wood or other flat shaped objects. Before you start bleaching, make sure you are wearing gloves and working outdoors or in a well ventilated area. The rusty brown color will slowly fade into a beautiful lighter shade as it begins to set. Your reverse bleach tie dye shirt is ready to wear! (top image from here, rest of images by HonestlyWTF)

Fallen Princesses by Dina Goldstein Great photo series titled “Fallen Princesses” by Dina Goldstein… Dina Goldstein Superbe série de photos intitulée “Fallen Princesses” par Dina Goldstein… Dina Goldstein How to Make a Rose Apple Tart I love pie. Love it. LOVE it. For flavor, it can't be beat, in my opinion. No finer dessert around. I was inspired by classic French apple tarts. This was more of a technique than a recipe, really, but I'll list out the ingredients I used, too. Rose Apple Tart Recipe single pie crust recipe Four or five large apples, sliced thinly 1/3 cup sugar 1 t cinnamon 2 t lemon juice 2 T butter, melted First thing's first: make your dough. Press the dough into your tart pan and brush with melted butter. Pin It Next up, core and slice your apples. Use this technique for coring your apples. Pin It Slice your apples thinly. Pin It Now it's time to start forming the roses. To create the center of the rose, roll one apple slice in a tight coil. Pin It Do you see what I mean about using the coring technique I linked to above? Pin It Fill in any gaps between the large roses with little rosebuds--just one or two apple slices coiled exactly like the centers of the large roses. Pin It

DIY Macrame Bracelet Growing up by the beach in Southern California, the ability to knot a macrame bracelet was practically a right of passage. Although those days are long behind us, we’ve never forgotten the ever-so-simple square knot technique. This time, however, we’re replacing hemp and wooden beads for more updated elements like colorful nylon cord and glossy metal charms. Happy knotting! You’ll need: Start by cutting the knotting cord into two 30 inch, two 20 inch and one 10 inch lengths. Center the 30 inch cord under the two middle strands. Pull tightly and slide the knot up to the top. Finish the 2nd half of the square knot by folding the left cord over the middle strands and under the right cord. Pull tightly and repeat the steps – left, right, left, right . . . To finish the knots, thread one of the cords onto a needle and sew up the center of 3-4 knots along the backside. Repeat the same step on the other cord. After sewing up both knotting cords, trim away any excess.

DIY String Art Hi guys! Dina here from Honey & Fitz back with another tutorial. This time I’m showing you how to make some string art for your little one’s room! Rather than deal with hammers and cutting wood, I decided to do this project using cork tiles. Not only are they easy to find and inexpensive, they’re also very light weight so you don’t have to worry about them falling off the wall and hurting anyone. Here are the supplies you’ll need: Cork tiles // Linoleum Nails // 3M Hanging Strips // Contact Cement Stack the cork tiles on top of each other and use your contact cement to glue them together. I really wanted the look of a white background for my string art so I decided to paint the cork. Once the paint has dried, flip your cork tile over and apply your hanging strips. Create your template using whatever font you like. When you’ve traced the entire template, carefully remove the paper. Tie your string in a double knot onto your first nail now, and start weaving in a back and forth fashion.

paint chip calendar | Maple and Magnolia A few weeks ago, I saw this paint chip calendar on my friend David’s blog Cheltenham Road and knew I had to make one! It combines two things that I love…stylishness and organization. And the fact that it utilizes paint chips? Even better. I mostly followed David’s tutorial with just a few modifications. That’s the beauty of this project…it’s totally customizable. Since I planned for this calendar to hang in my office, I chose paint chips that would coordinate with the room and with the pin board that hangs on the adjacent wall. Here’s my version. materials needed: poster frame, fabric, hot glue gun, 35 paint chips, paper trimmer, corner rounder, fabric glue, foam brush 1) Purchase a poster frame (mine came from Target…$9.99). 2) Remove the edges from the frame. 3) Cover the cardboard insert with fabric using hot glue to secure it on the back, pulling tightly to keep the fabric smooth. 4) Trim the paint chips with a paper trimmer (I chose to leave the paint color names but cut off the brand).

Drab to fab! 5 DIY ideas for t-shirt remakes Posted by ScrapHacker.com on tisdag, juni 5, 2012 · 5 Comments With temperatures rising so is the annual epidemic of fashion fever, making many of us feverishly hit the high street (although our wardrobes are already stuffed full…). This post celebrates the power of re-invention of a wardrobe staple – old t-shirts. Infusing and old tee with some contemporary style means that fashion quick fix is waiting in the dusty corners of your wardrobe…When you’ve found yourself a remake candidate, get crafty asap! Here are 5 easy peasy drab-to-fab projects from the D.I.Y blogosphere to get your own ideas flowing – enjoy! D.I.Y from ‘Free People’, check out the full DIY TUTORIAL HERE Lauren of ‘Calico Skies’ has made a great screenprint tee, to make your own, check out the DIY TUTORIAL HERE Rebekah of blog ”A little Sunshine when skies are grey” made an awesome DIY ombre inifinity scarf from an XL white t-shirt, to make your own, check out her DIY TUTORIAL HERE

Fun with Foam Printing - Easy Tutorial I loved this idea because not only can you recycle these horrid polystyrene containers, but the process is really simple. You could even use tracing paper and trace your design so you don't even need to be able to draw. You could make a whole series of cards like this or just a colorful print to hang on your wall and cheer up the place. Materials needed: Foam or polystyrene container pencil paint or ink small roller 1. 2. 3. 4. 5. Happy printing! Original image courtesy of themetapicture Cake postcard tutorial Supplies Materials needed to make two cake postcards: 1 large sponge (yellow paints the best)Serrated knifeX-Acto or utility knifeSpray paint (brown, yellow, pink or white)1 tube acrylic latex caulk (brown, cream or white)Spray adhesive (3M Super 77 works great!) Instructions Cut sponge into wedge shape With a serrated knife, using a sawing motion, cut a sponge into two, cake wedge shapes. Cut a center groove into sponge Using an X-Acto or utility knife, cut a section of foam from the center of the sponge. Paint the sponge wedges in desired color. Trace the slice of cake When the sponge wedges are dry, trace around them on a piece of cardboard, kraft paper or colorful scrapbook paper. Spray glue the postcards to the solid, flat sides of the sponge wedges. Using a caulking gun and your desired caulk, fill a plastic disposable piping bag with half of the caulk. Pipe the center of the cake Pipe the icing on the top Allow your cake postcards to dry for three to five days. Note from the editor

5 Ways to Turn Zippers into Awesome Arm Candy UPDATE: By popular demand, Zipper Bracelet Kits ($15) and readymade Zipper Bracelets ($20) are now available in the Brit + Co. shop! You know we love turning unconventional materials into wearable accessories. Today, we’re tackling zippers! We figured out 5 simple, beautiful ways to create bracelets, cuffs, and bangles out of metal, plastic, and repurposed zippers. Materials: - zippers - E-6000 quick hold contact adhesive - velcro or snap buttons - leather crimps + clasps - Tools: needle nose pliers, sharp scissors First thing to do is get your zippers! 1. These bangles are sweet, and have a definite friendship bracelet vibe. Use colored zippers for these, in whatever colors you like. Attach cord ends so that you can add a clasp and loop. 2. For this one, you’ll want a zipper with some contrast. We chose a black zipper with gold teeth. 3. This one is silly simple! Get a zipper with a more interesting material like denim. 4. 5. Last, the wrap bracelet! And that’s a wrap (hehe!).

Related: